dev-ops-challenges
Install Jenkins Plugins
Technical Overview
Jenkins is a highly extensible automation server that relies on a modular plugin architecture to support diverse version control systems, build frameworks, and deployment environments.
Managing plugins inside Jenkins involves:
- Plugin Repository Sync: Jenkins queries the configured update center (by default, the official update site) to fetch the index of all available plugins.
- Dependency Resolution: When a plugin is selected for installation (e.g., GitLab), Jenkins analyzes its manifest file to discover and schedule the download of all required transient dependencies.
- Installation and Lifecycle Management: Plugins are downloaded as
.hpi(or.jpi) files into theplugins/directory of the Jenkins home directory (/var/lib/jenkins/plugins). - Graceful Restart: To safely load and register the new classes into the JVM’s classloader, the Jenkins server is restarted. Checking the safe-restart option ensures that Jenkins waits for active build jobs to finish executing before initiating the reboot.
graph TD
    subgraph Client ["Admin Browser"]
        Admin["CI/CD Administrator"]
    end

    subgraph JenkinsServer ["Jenkins Controller"]
        UI["Web UI Interface"]
        PluginManager["Plugin Manager Core"]
        AptUpdateCenter["Jenkins Update Center"]
        PluginsDir["Plugins Directory"]
        JVM["JVM Classloader"]
    end

    UI -->|Search and Select| PluginManager
    PluginManager -->|Query Availability| AptUpdateCenter
    PluginManager -->|Download hpi Files| PluginsDir
    PluginsDir -.->|Load Classes on Restart| JVM

    Admin -->|Login with admin Credentials| UI
    Admin -->|Trigger Safe Restart Check| UI
Plugin Dependency and JVM Classloader Deep Dive
1. Dynamic Plugin Loading & Dependencies
Each Jenkins plugin runs inside its own isolated classloader to prevent library conflicts (e.g., two different plugins requiring different versions of the same library).
- Transient Resolution: If you select the
GitLabplugin, Jenkins reads the plugin’s metadata and automatically installs dependency libraries such ascredentials,git,bootstrap5-api, etc. - HPI/JPI Packages: When download completes, a
.hpifile is extracted. Jenkins expands this archive to expose the plugin’s classes and frontend resources.
2. The Necessity of Safe Restarts
While some plugins can be dynamically loaded at runtime (dynamic loading), core plugins or those altering index structures require restarting the underlying Java servlet container.
- Safe Restart Flow: Selecting “Restart Jenkins when installation is complete…” triggers a transition state. Jenkins stops accepting new build executor requests and waits until active pipelines reach a stable checkpoint. Once executors are idle, the servlet context reboots, loading the new bytecode into the classloader hierarchy.
Infrastructure & Configuration Requirements
- Target Instance: Stratos DC Jenkins Server
- Access Protocol: Web Browser (HTTP) on port
8080 - Target Plugins to Install:
- Git (ID:
git) - GitLab (ID:
gitlab-plugin)
- Git (ID:
Login Credentials
- Username:
admin - Password:
Adm!n321
Step-by-Step Walkthrough
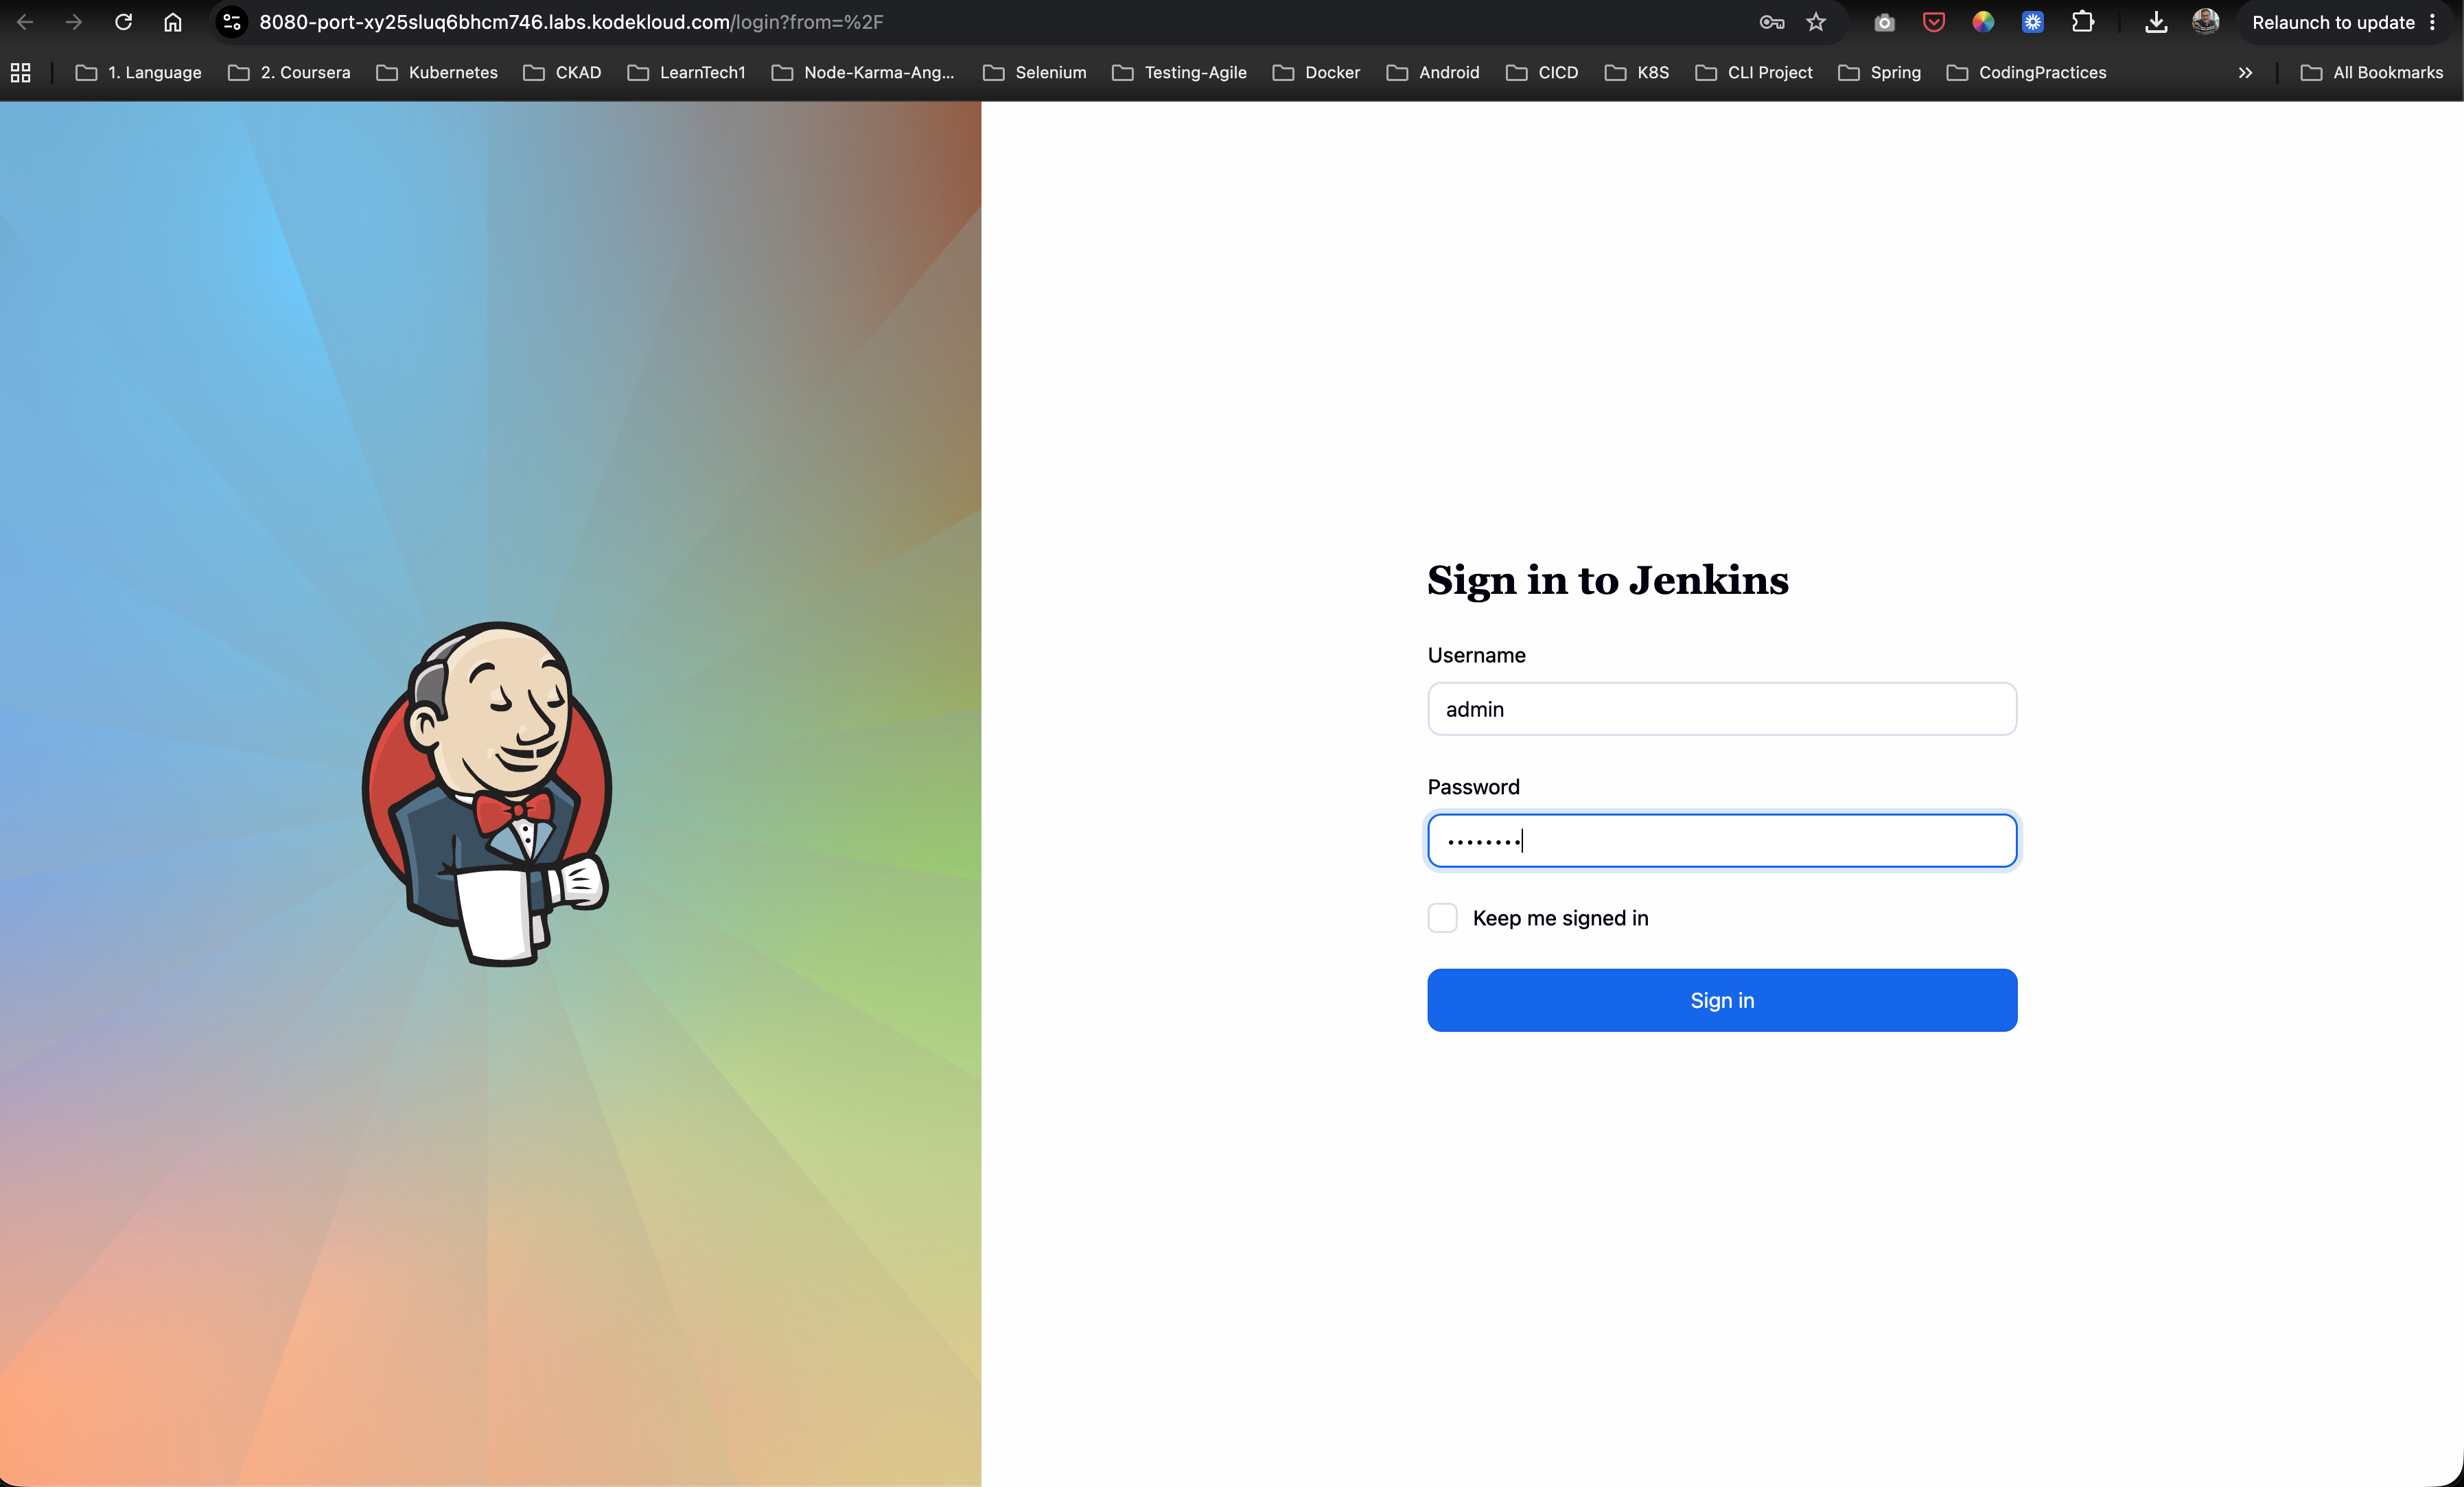
Step 1: Log in to the Jenkins Console
Access the Jenkins dashboard landing page via your browser. Submit the administrative credentials:
- Username:
admin - Password:
Adm!n321
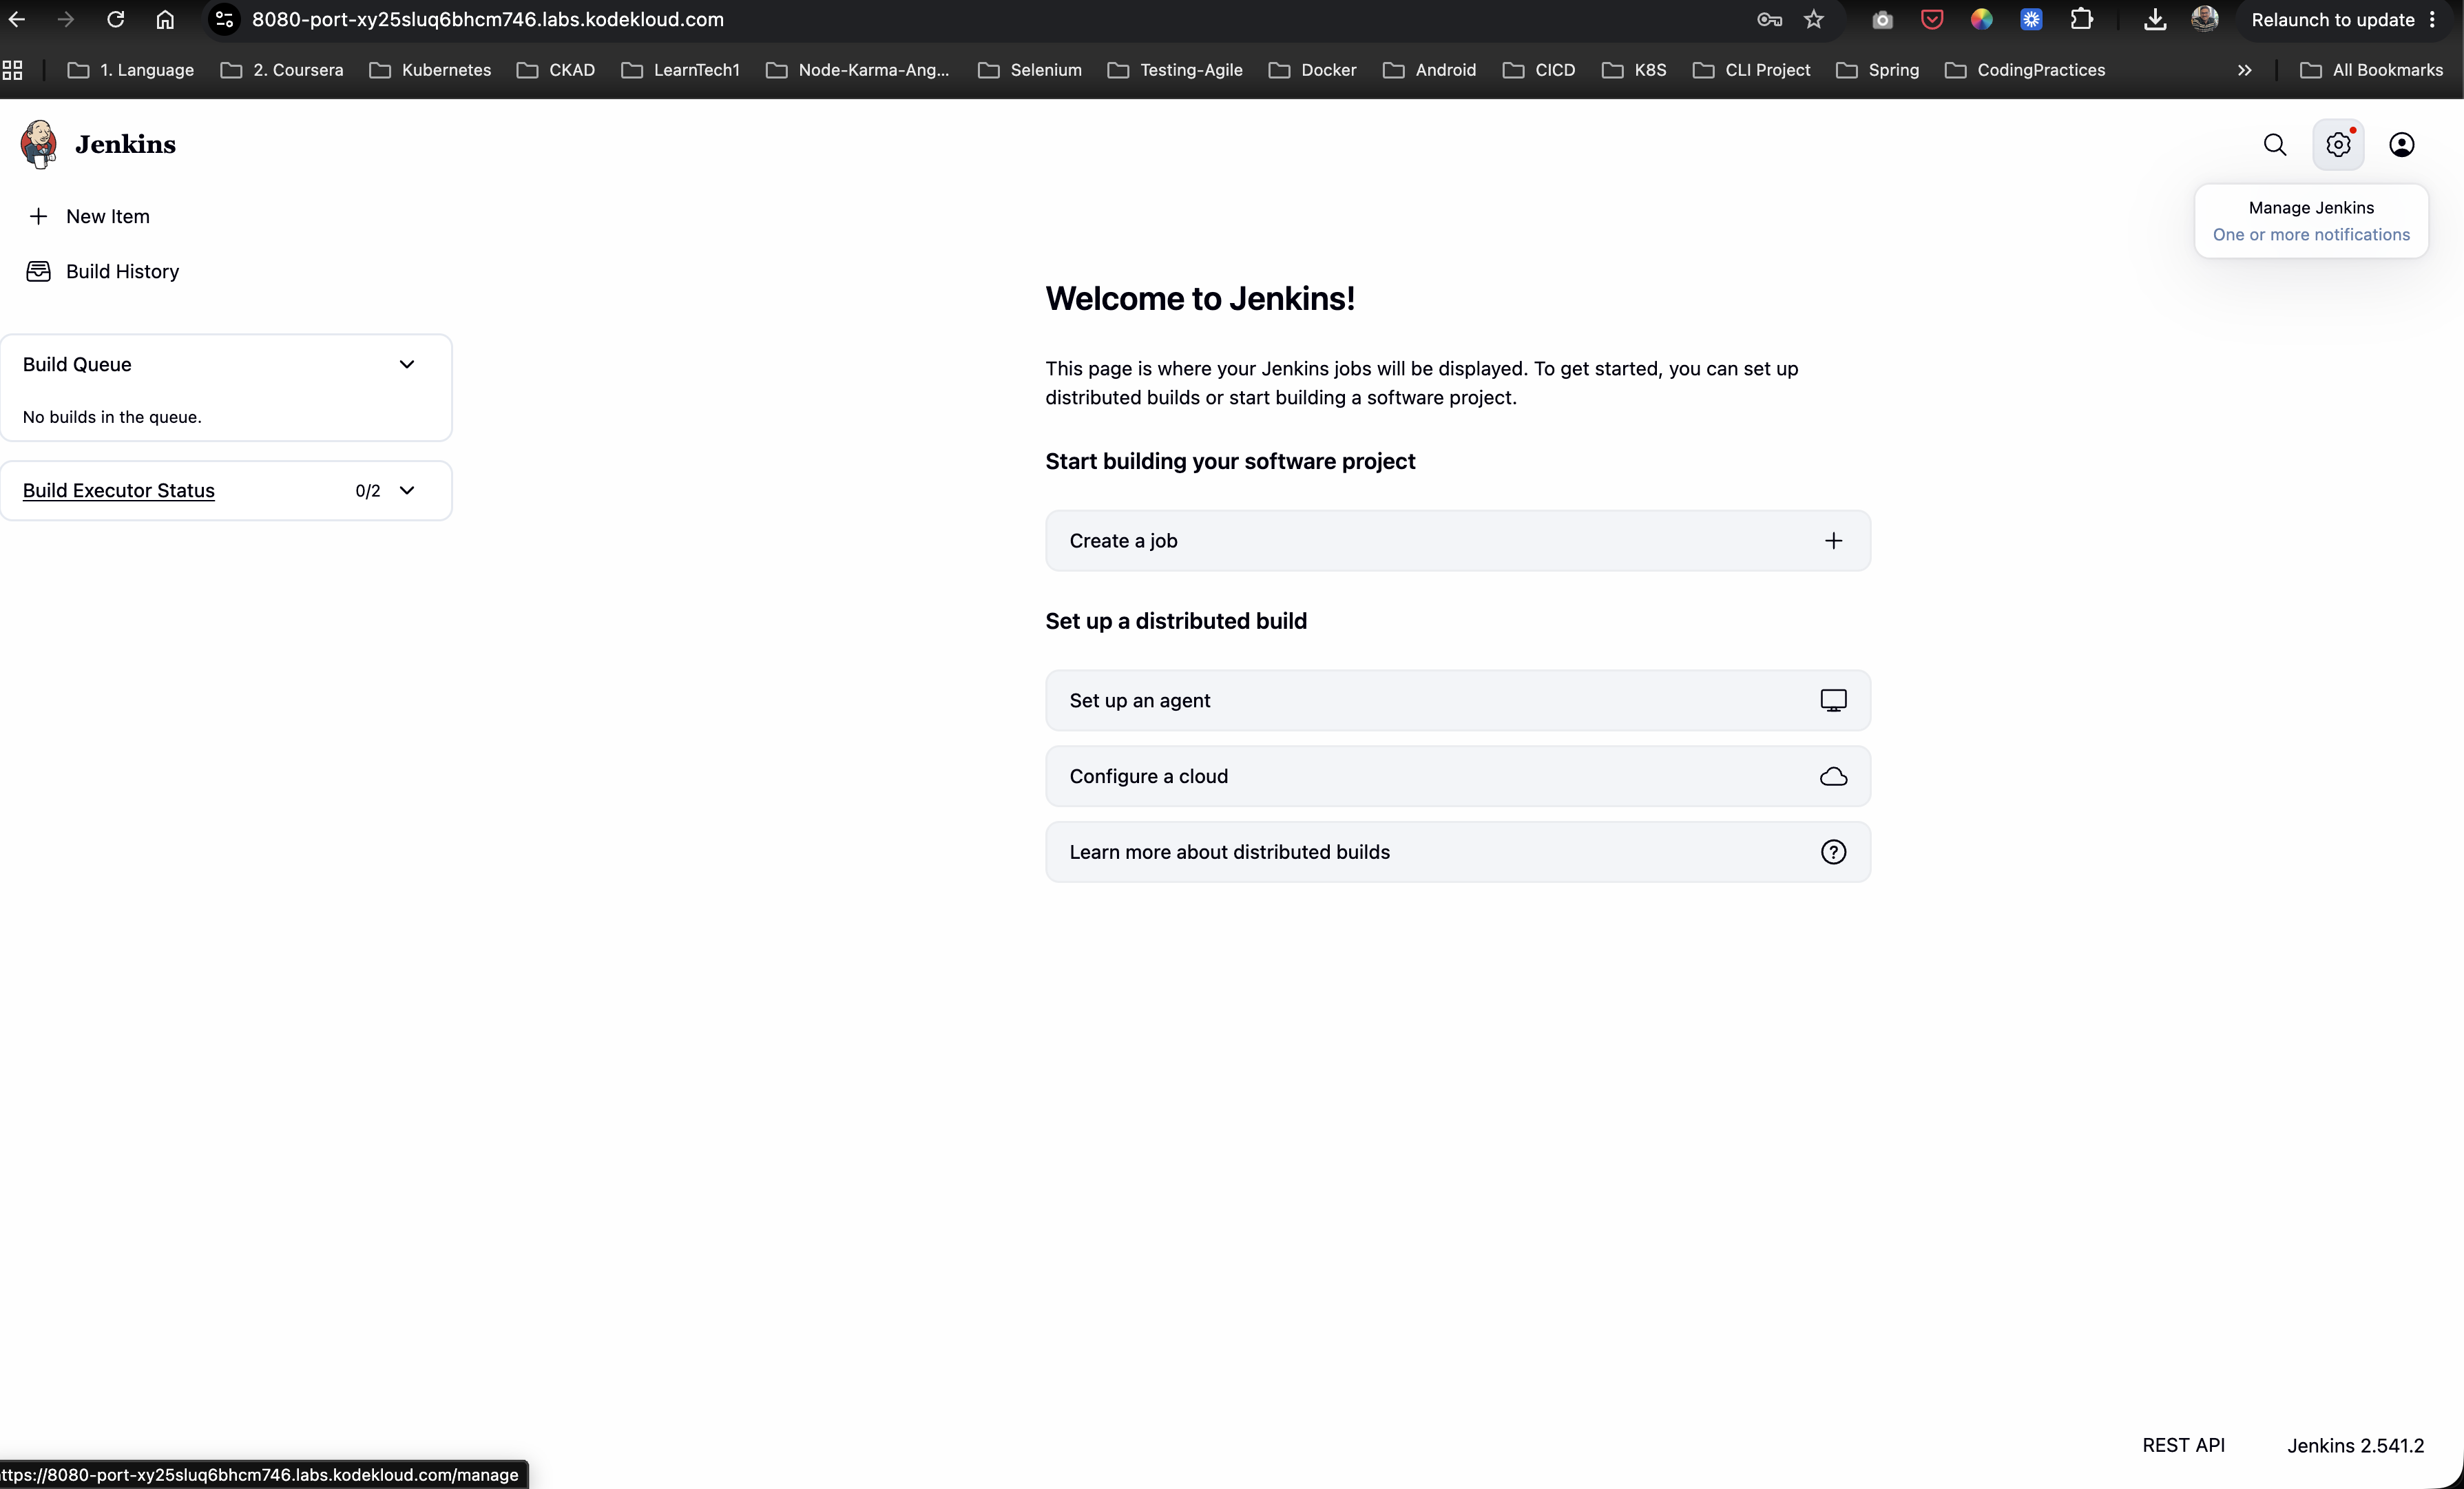
Step 2: Open “Manage Jenkins”
Once successfully logged in, navigate to the side panel and click on Manage Jenkins (represented by the gear icon):
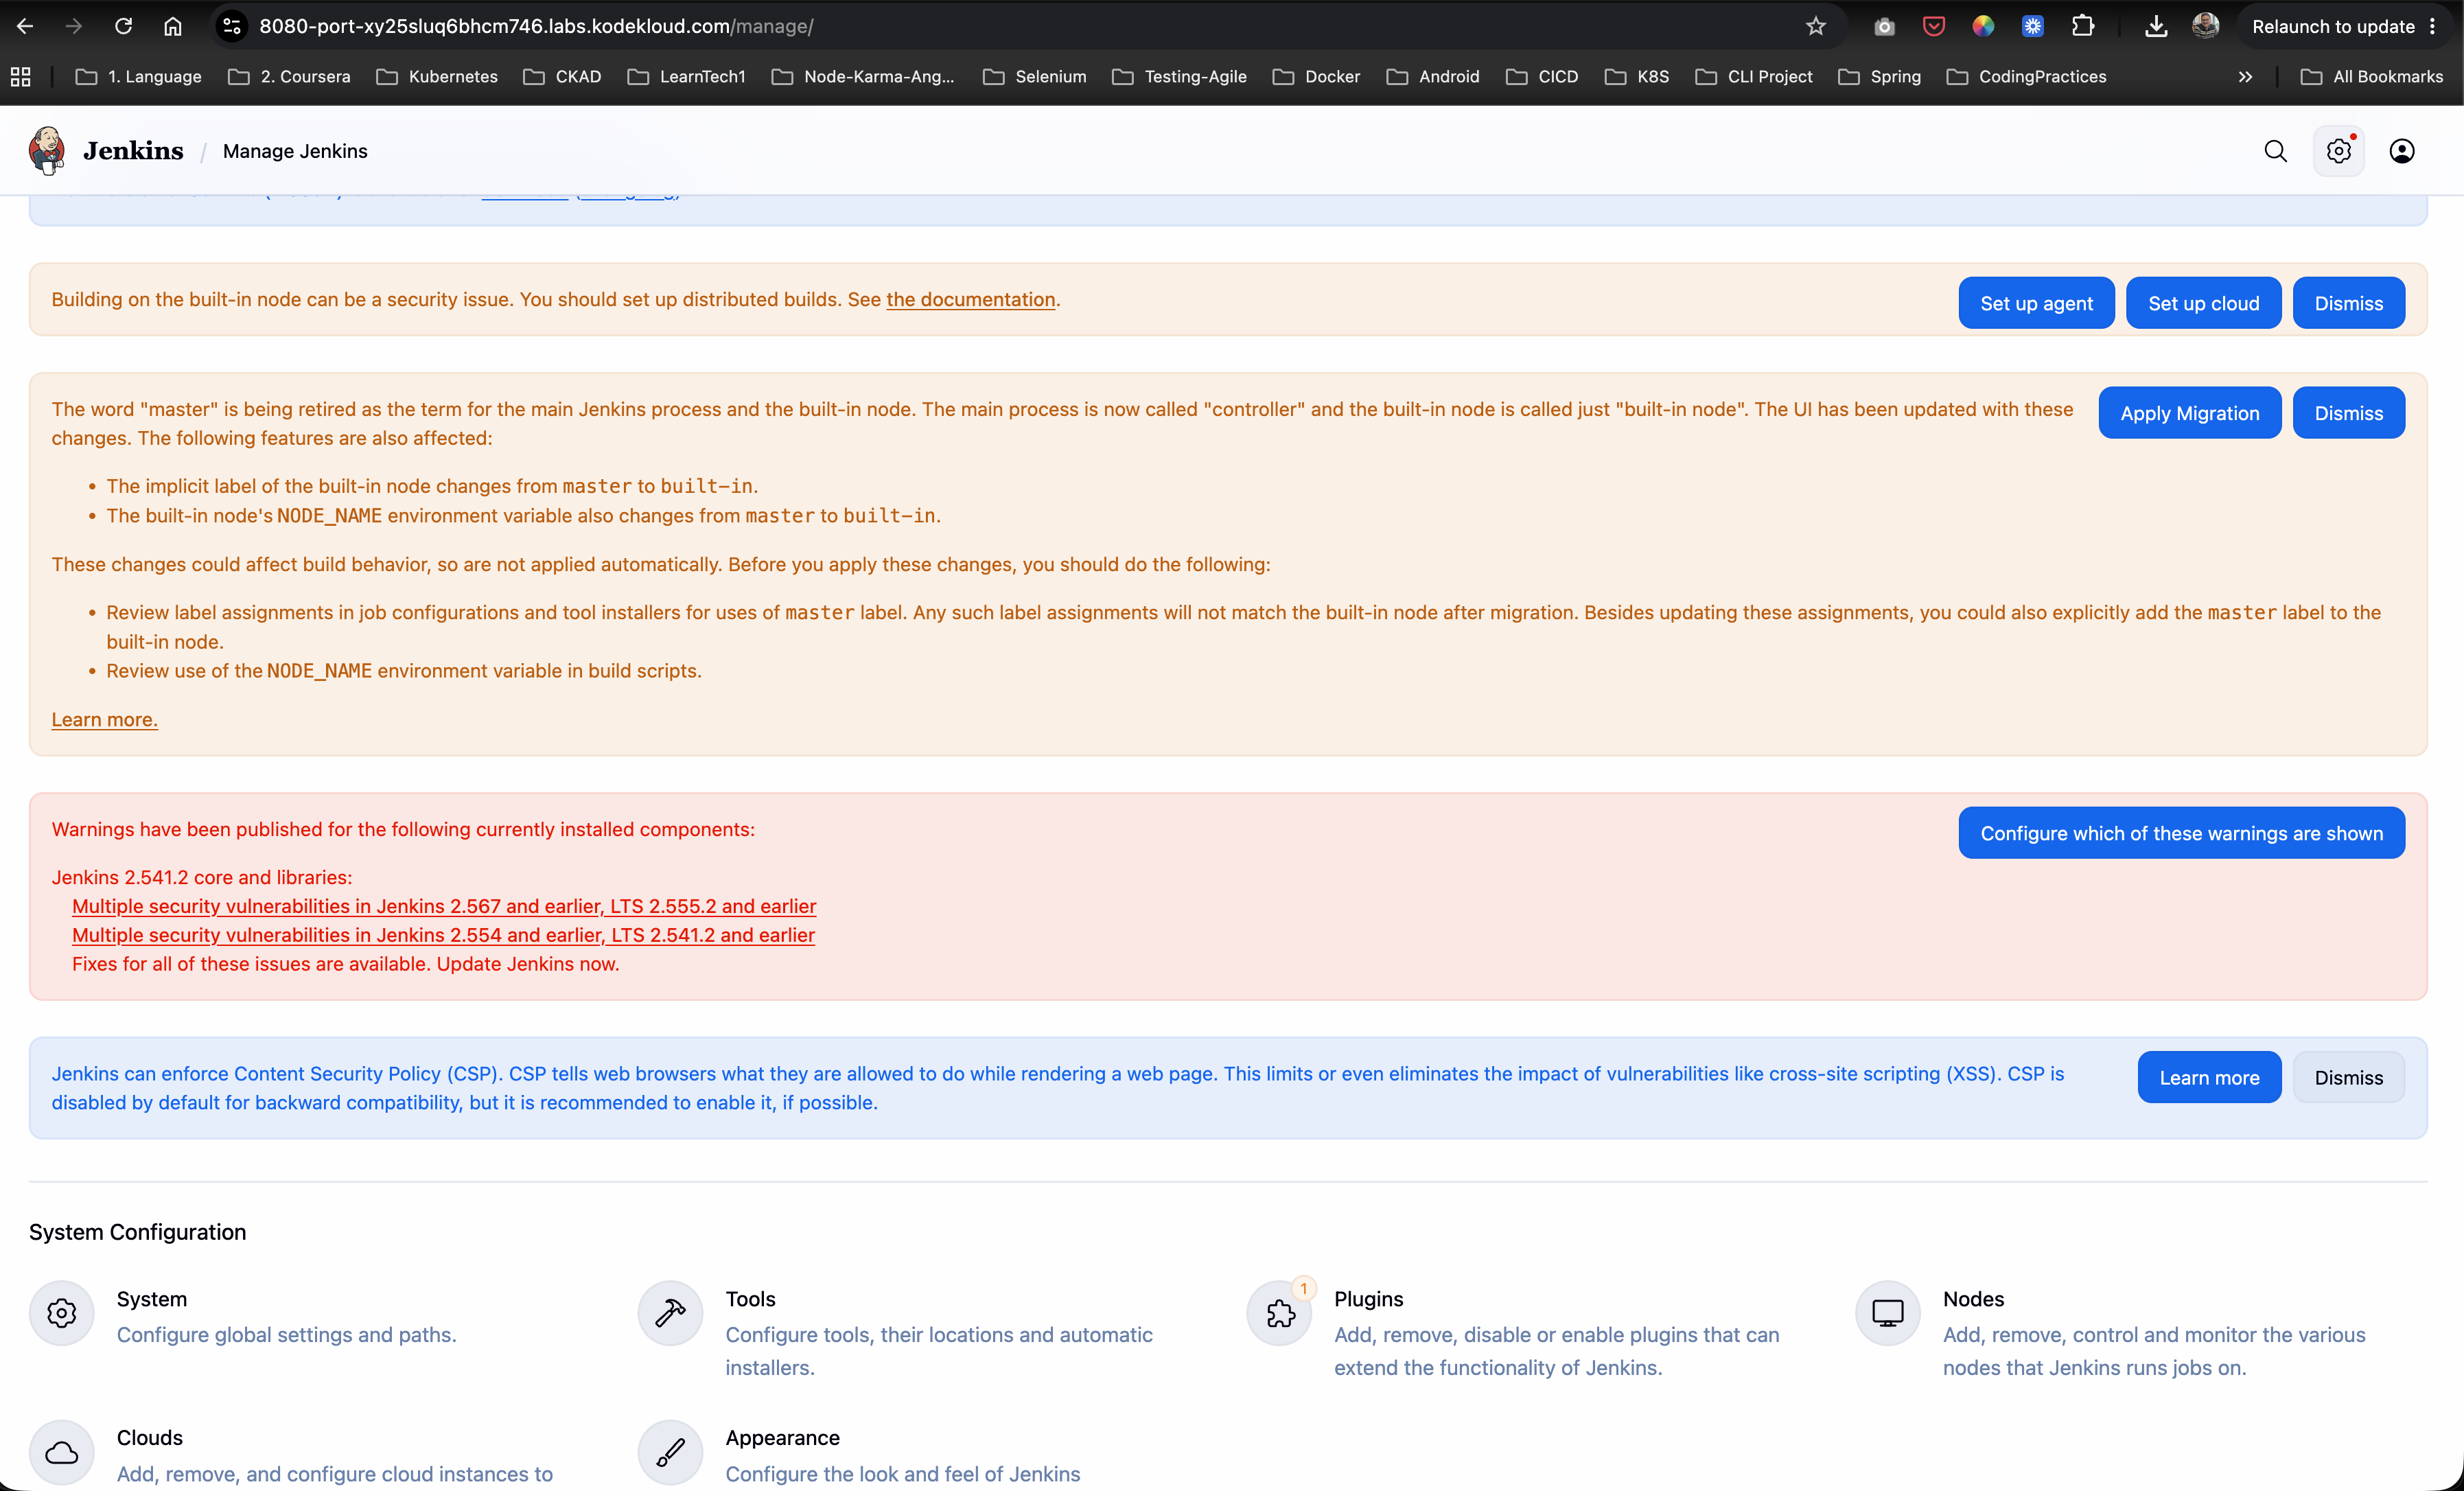
Step 3: Open the Plugin Manager
On the Manage Jenkins landing page, scroll down to the System Configuration section and click on Plugins:
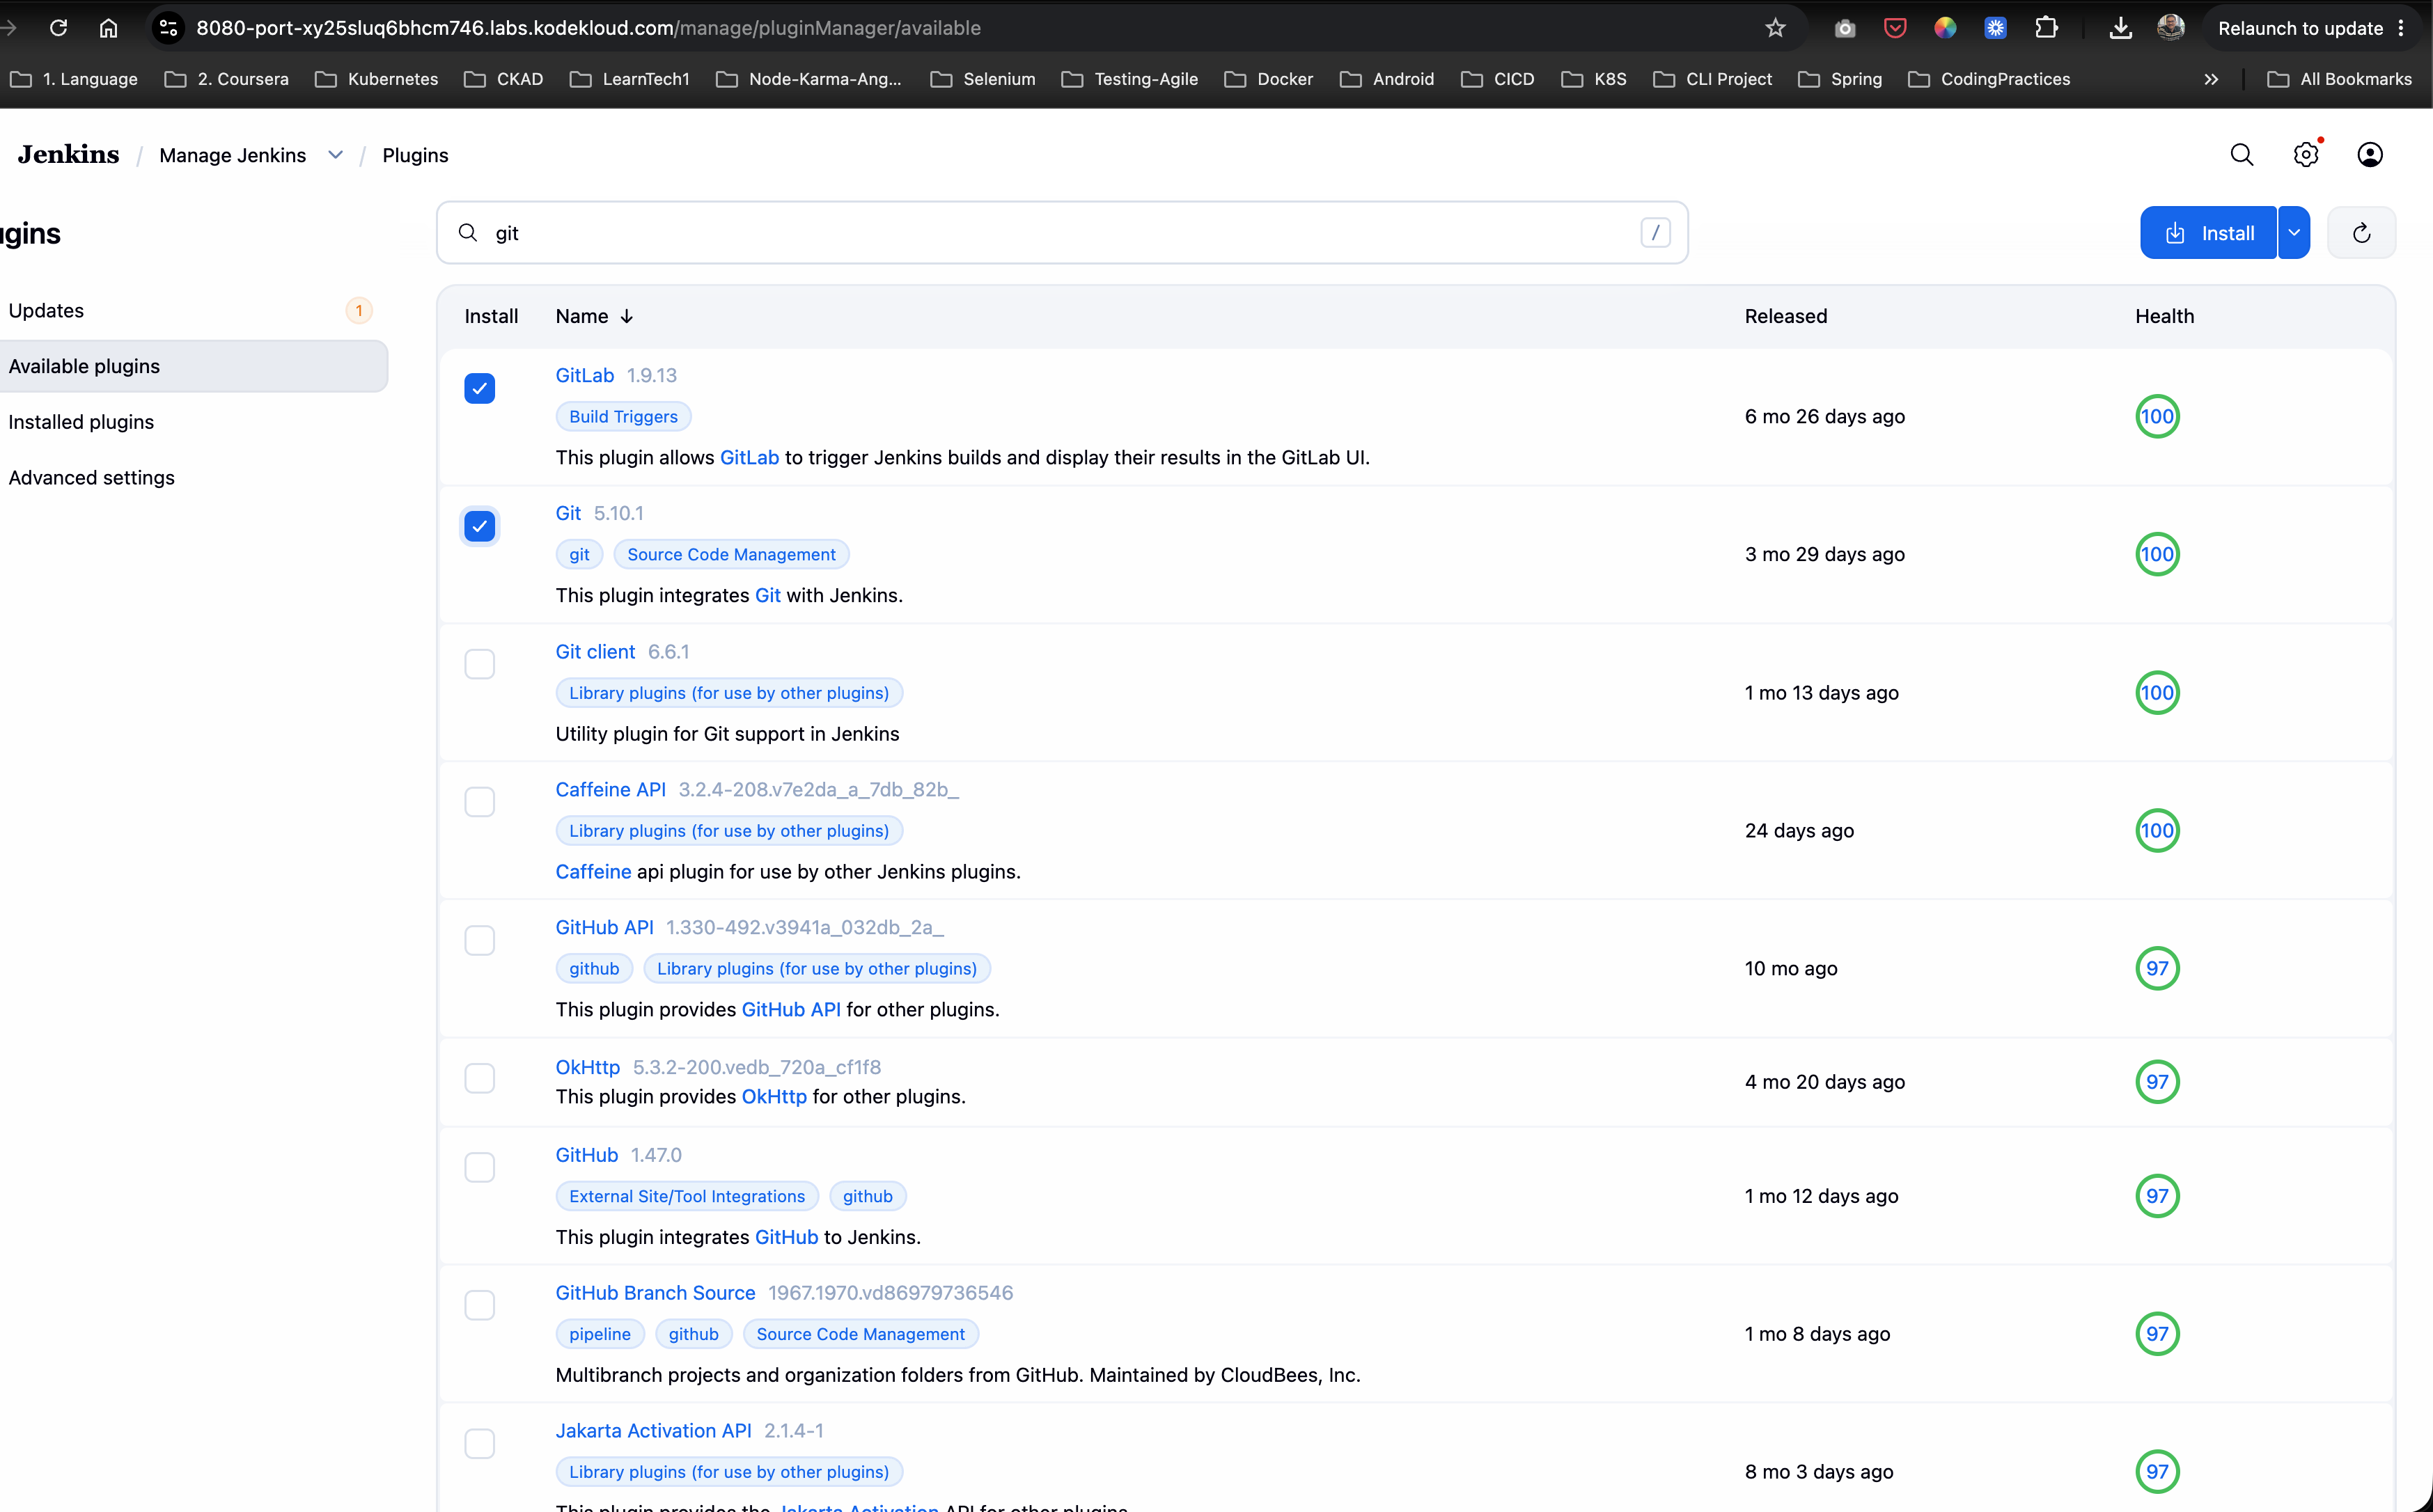
Step 4: Search and Select Git and GitLab
- In the Plugins interface, click on the Available plugins tab in the left-hand navigation pane.
- In the search bar, type
git. - From the search results, select the checkboxes for:
- Git
- GitLab
- Click the Install button at the top right of the plugin list.
Step 5: Install Plugins with Restart
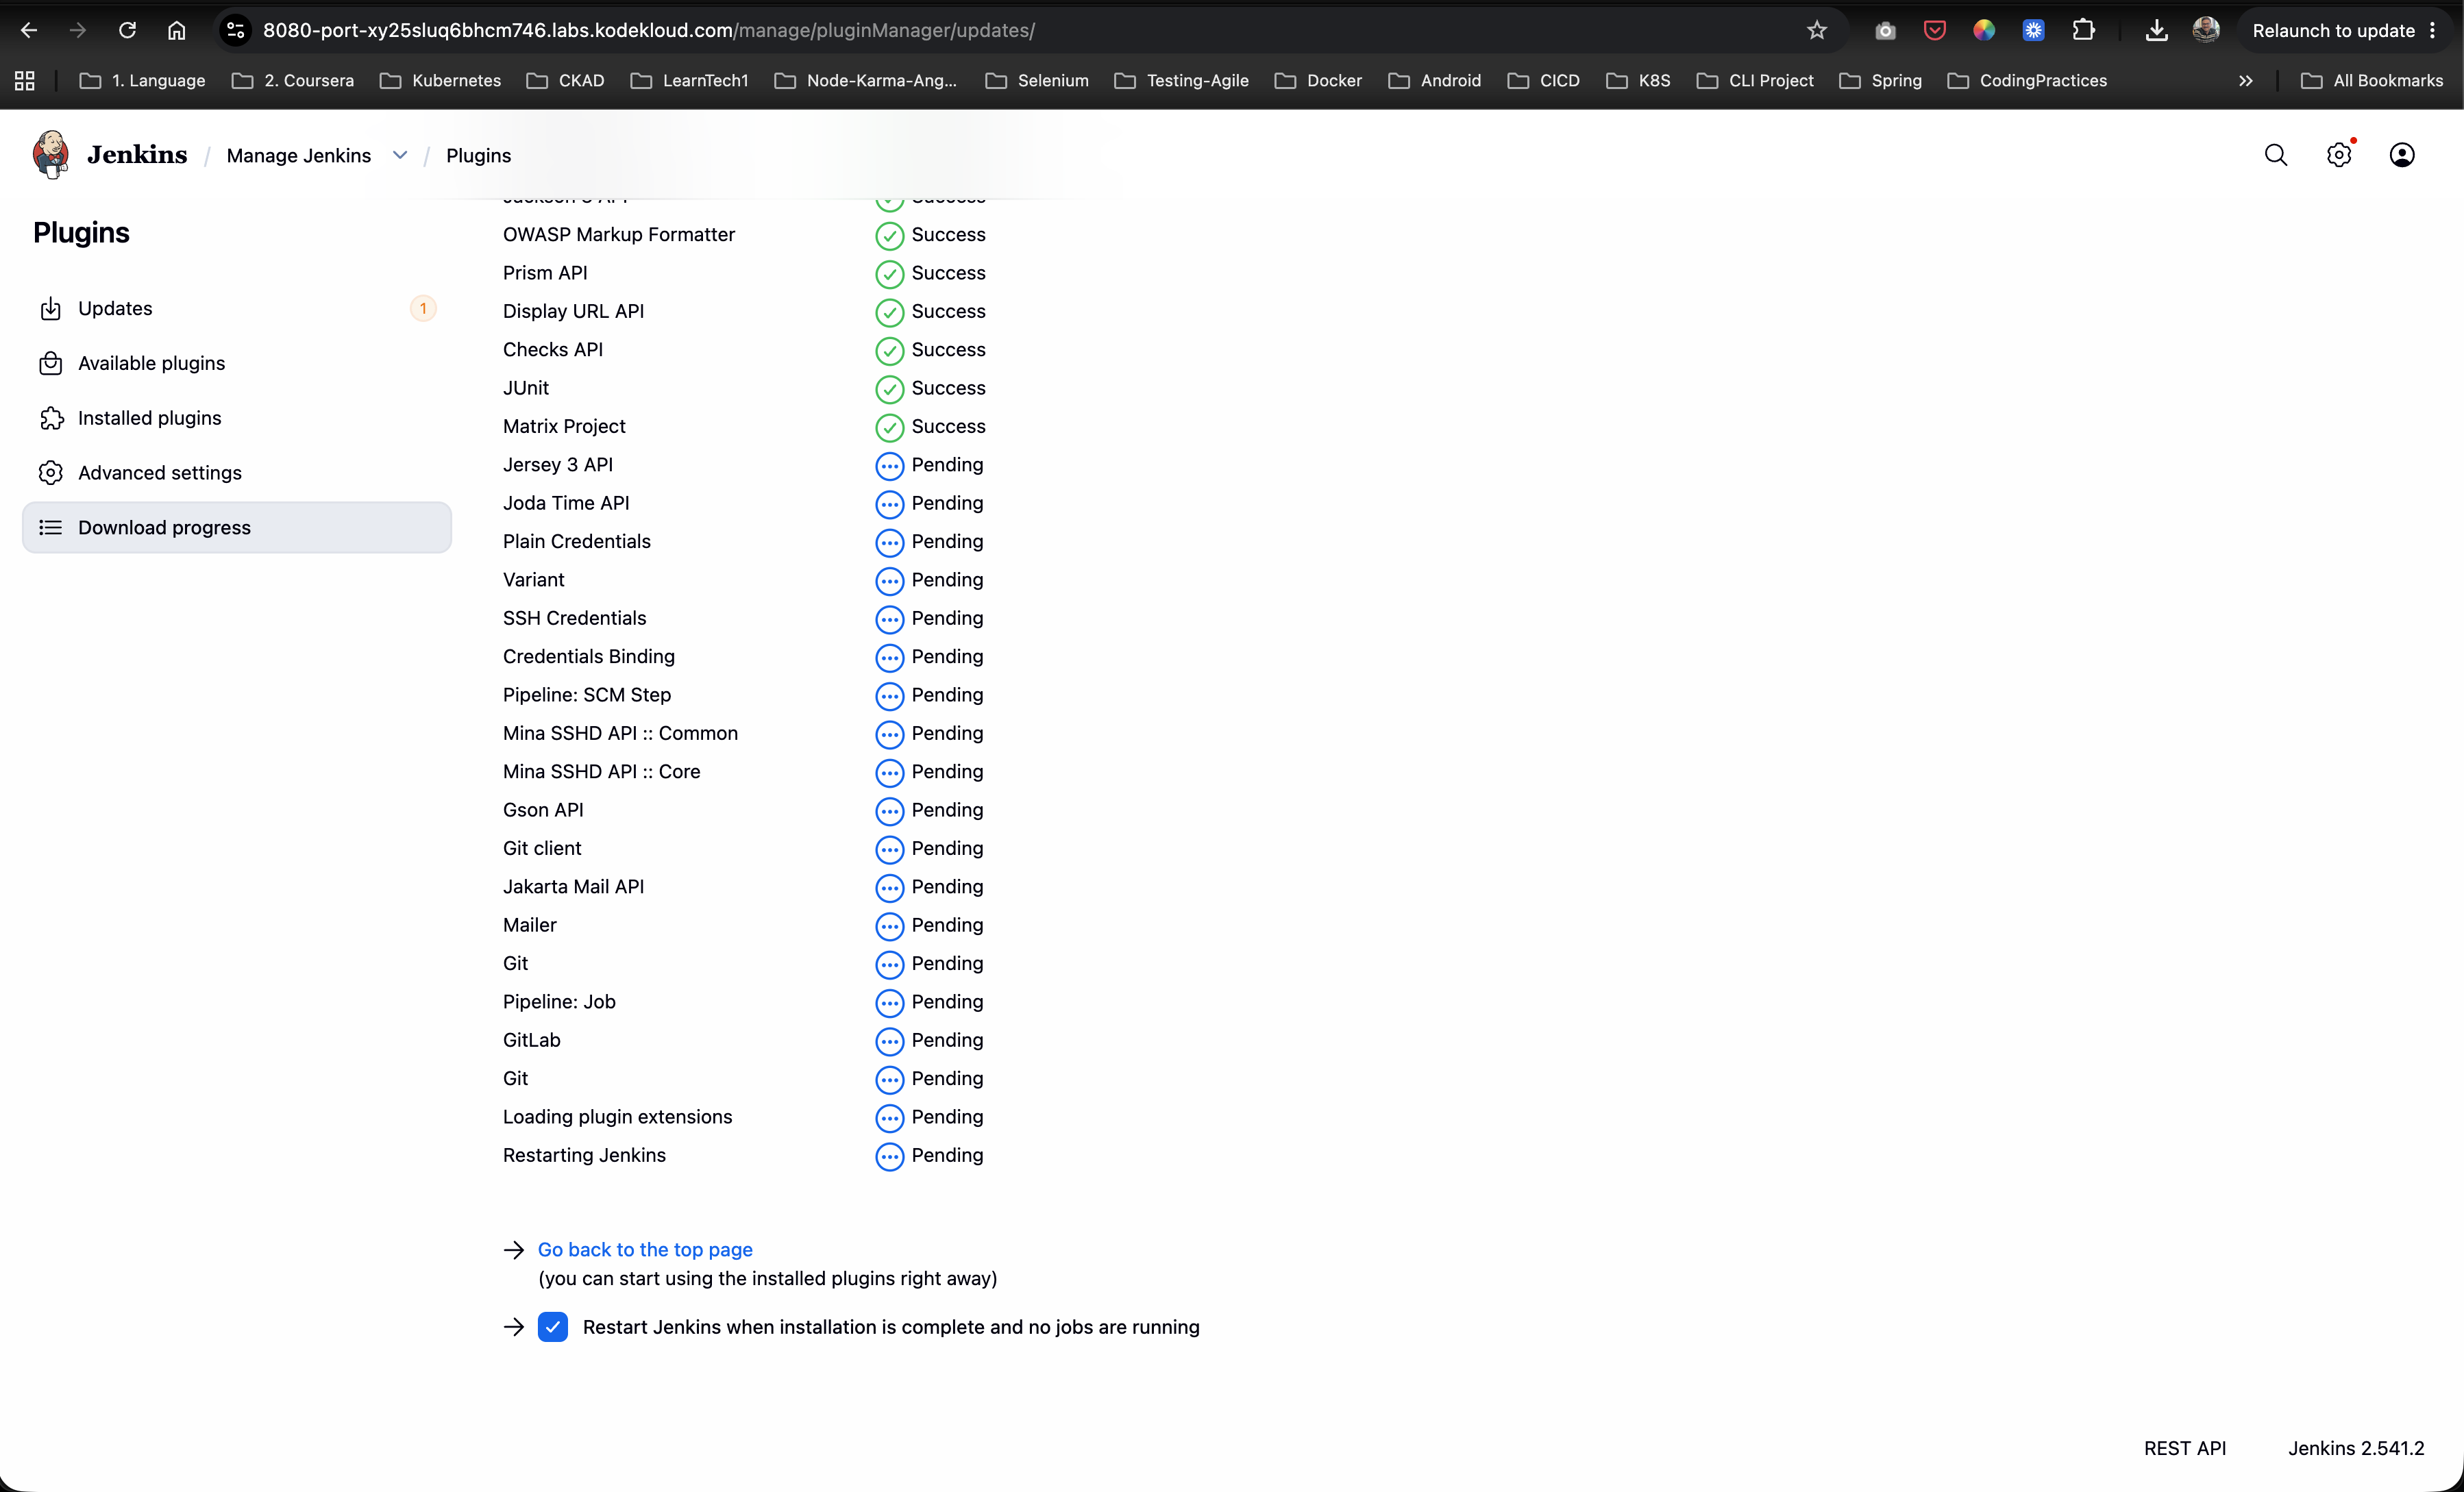
Jenkins will direct you to the Download progress page where it begins downloading the plugins and their dependencies.
- Check the box at the bottom: “Restart Jenkins when installation is complete and no jobs are running”.
- Wait for the download stages to complete. Jenkins will automatically initiate a safe reboot.
Step 6: Verify Plugin Installation
After Jenkins completes its restart cycle, log back into the interface:
- Navigate back to Manage Jenkins -> Plugins.
- Click on the Installed plugins tab.
- Type
gitin the search bar. - Confirm that Git plugin, Git client plugin, and GitLab Plugin are listed and enabled with a blue toggled switch.
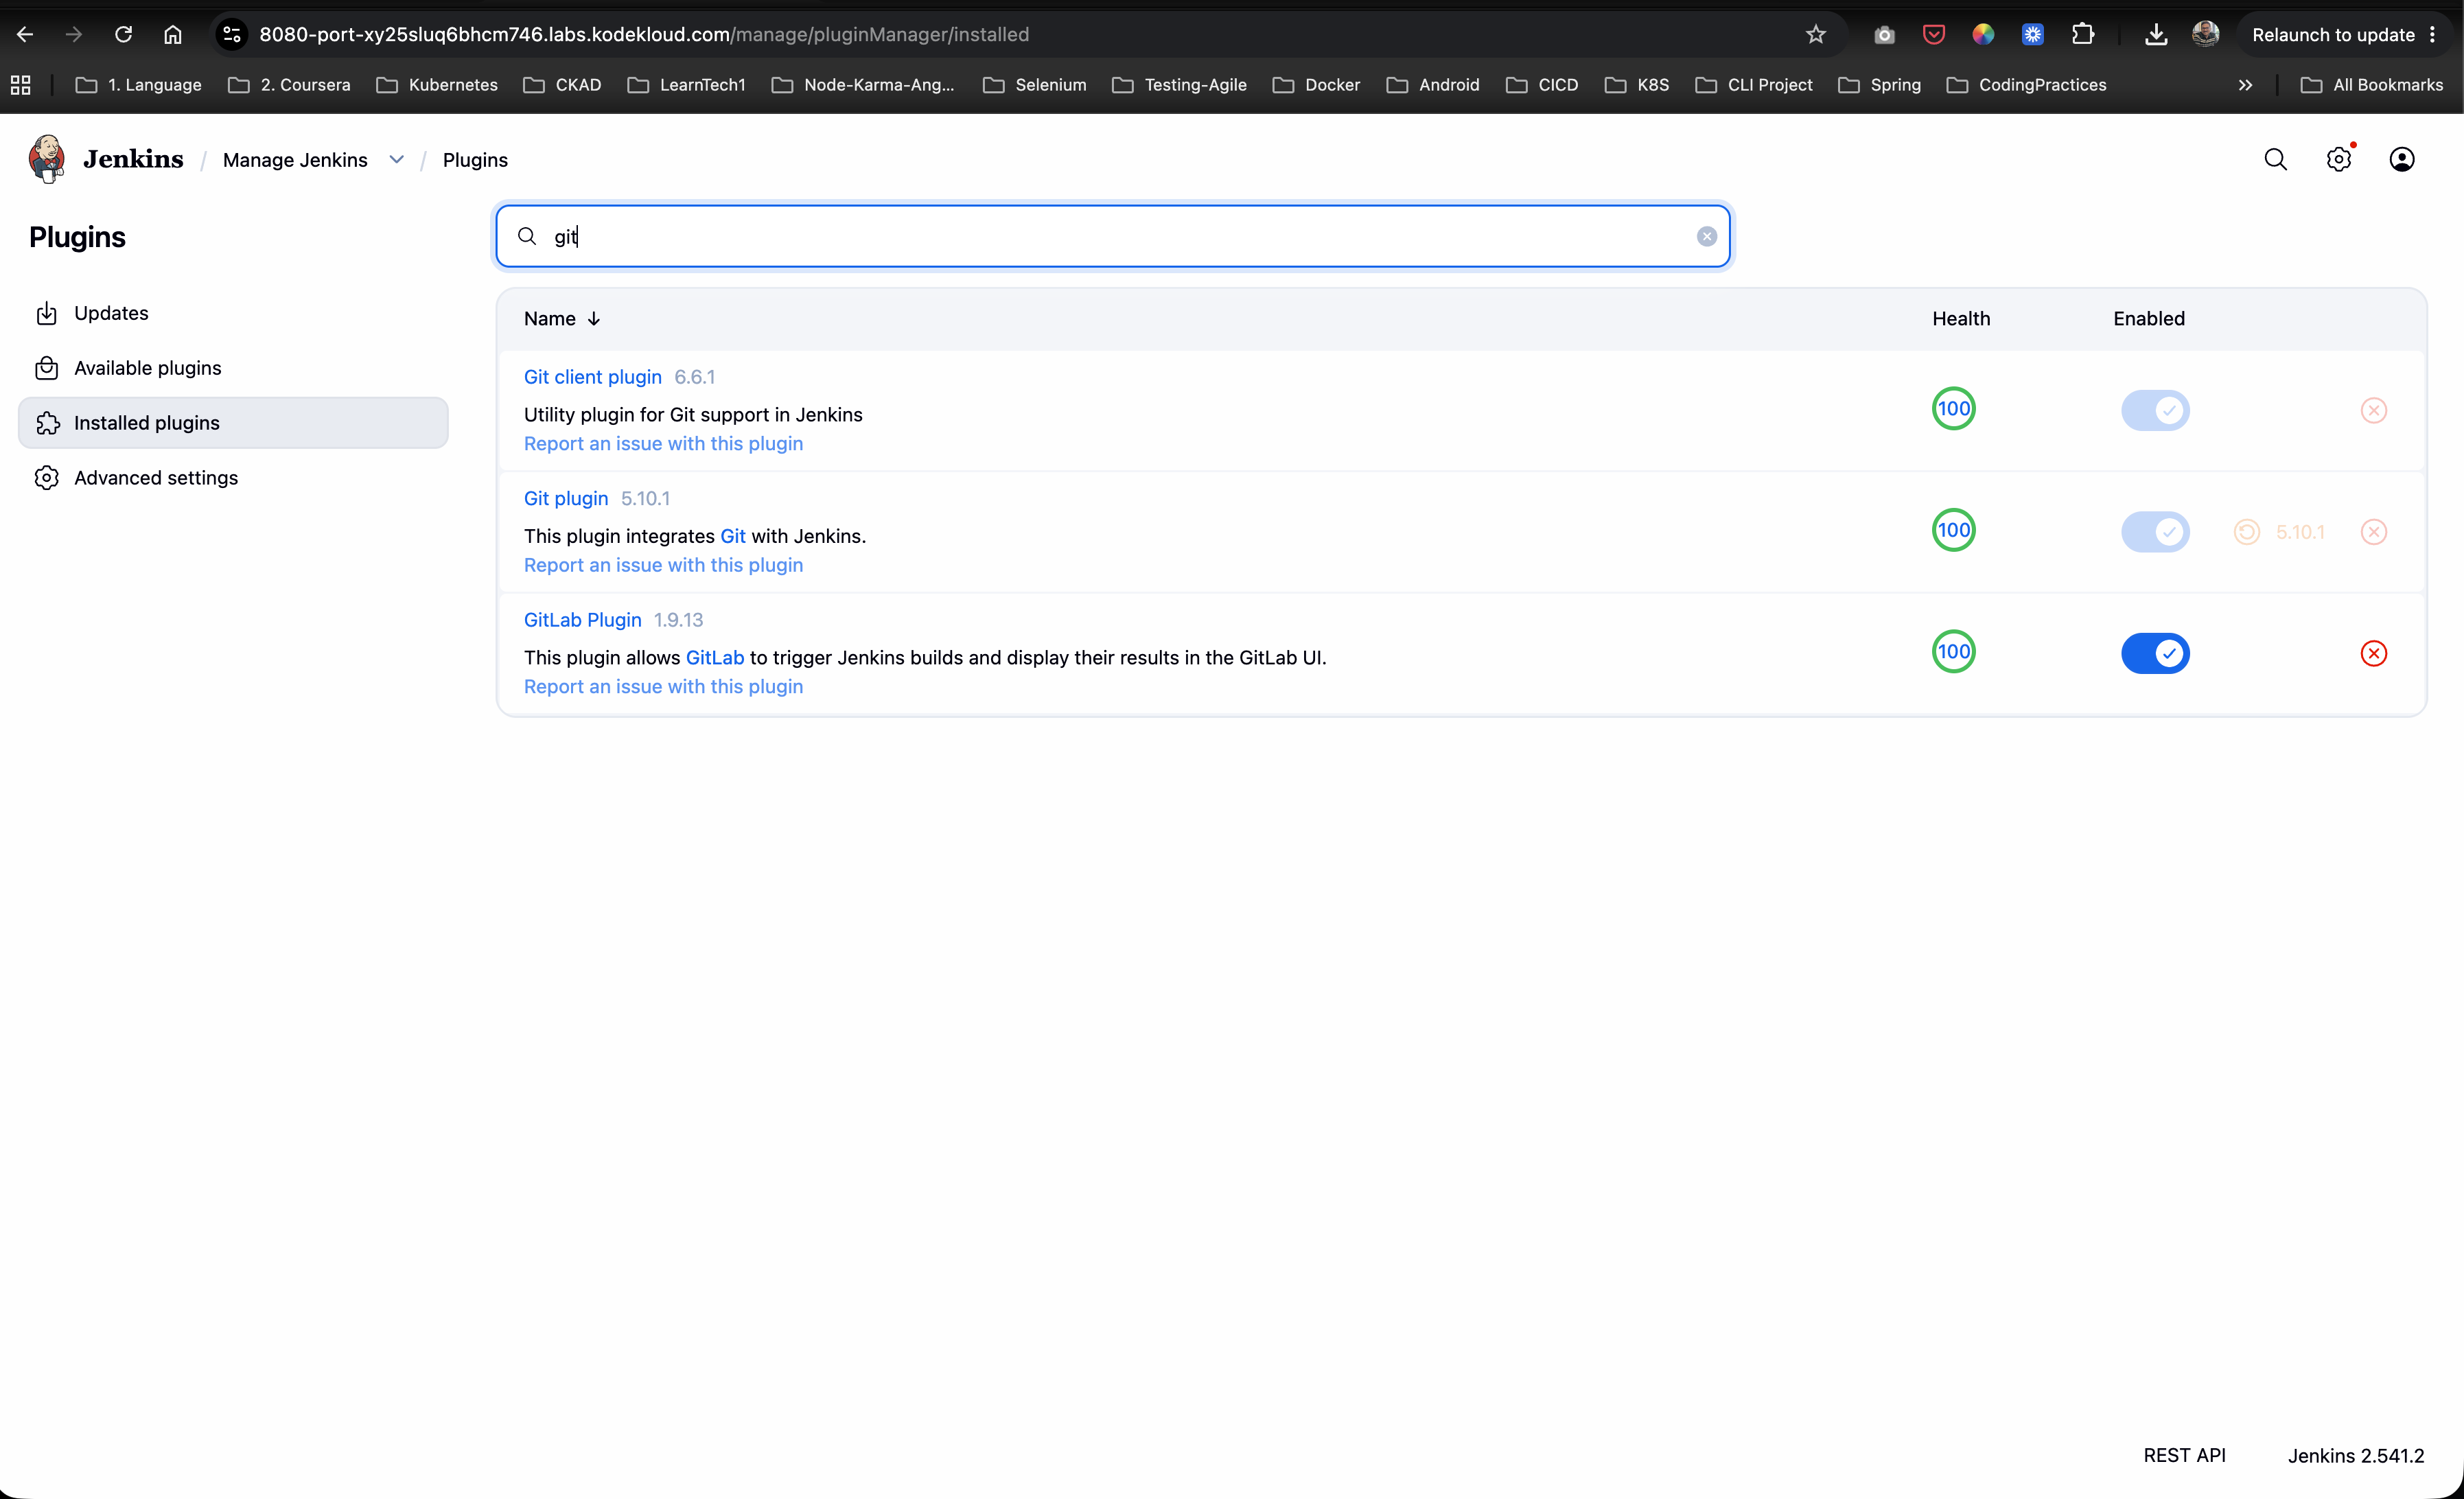
The requested Git and GitLab integration plugins have been successfully installed and verified on the Jenkins server!