dev-ops-challenges
Configure Jenkins User Access
Technical Overview
Securing a Jenkins automation server requires setting up structured user credentials and granular authorization permissions. This prevents unauthorized access to pipelines, system configurations, and build nodes.
Jenkins manages user security using two primary components:
- Security Realm (Authentication): Controls who can access Jenkins. Typically uses Jenkins’ own user database or LDAP/Active Directory.
- Authorization Strategy (Permissions): Controls what authenticated users can do.
By default, Jenkins provides broad, all-or-nothing authorization strategies. Installing the Matrix Authorization Strategy plugin introduces fine-grained, table-based permission mapping:
- Matrix-based security: Allows assigning global permissions (e.g., Read, Administer, Build) to specific users and groups.
- Project-based Matrix Authorization Strategy: Inherits global permissions but adds the ability to define distinct, project-specific (per-job) permission matrices. This is essential for isolating project workspaces between different teams.
graph TD
    subgraph Client ["User Browser"]
        Admin["admin (Administrator)"]
        RoseUser["rose (Developer)"]
    end

    subgraph JenkinsController ["Jenkins Controller"]
        AuthStrategy["Project-based Matrix Authorization Strategy"]
        UserDB["Jenkins' own user database"]
        JobHelloworld["Helloworld Job"]
    end

    Admin -->|1. Create rose User| UserDB
    Admin -->|2. Configure Global Security| AuthStrategy
    Admin -->|3. Enable Project Security| JobHelloworld

    RoseUser -->|4. Authenticate| UserDB
    RoseUser -->|5. Check Overall:Read| AuthStrategy
    RoseUser -->|6. Verify Job:Read| JobHelloworld
Authorization Strategies & User Directories Deep Dive
1. Jenkins Internal User Database
When Jenkins is configured to use its own user database, it creates a directory structure under the Jenkins home folder:
- Location:
/var/lib/jenkins/users/ - User Folders: Every user has a folder (e.g.,
/var/lib/jenkins/users/rose_123456789/). - Config XML: Each user folder contains a
config.xmlfile which houses the user’s encrypted password (using bcrypt hashing), email addresses, and personal settings.
2. Global vs. Project-Based Matrix Authorization
The Matrix Authorization Strategy plugin exposes two distinct models:
- Matrix-based security (Global): A user granted
Job -> Readhere can see and read all jobs in the Jenkins instance. - Project-based Matrix Authorization Strategy: Global permissions are treated as baseline defaults. For individual jobs, checking the “Enable project-based security” box lets you explicitly define which users have access to that specific project, bypassing or extending global policies.
Infrastructure & Configuration Requirements
- Target Instance: Stratos DC Jenkins Server
- Access Protocol: Web Browser (HTTP) on port
8080
Admin Login Credentials
- Username:
admin - Password:
Adm!n321
New User Specifications
- Username:
rose - Password:
TmPcZjtRQx - Full Name:
Rose
Security Policy
- Authorization Strategy: Project-based Matrix Authorization Strategy
- Global Permissions (rose):
Overall -> Read(Only) - Global Permissions (Anonymous): None (No access)
- Job Permissions (rose - Helloworld job):
Job -> Read(Only)
Step-by-Step Walkthrough
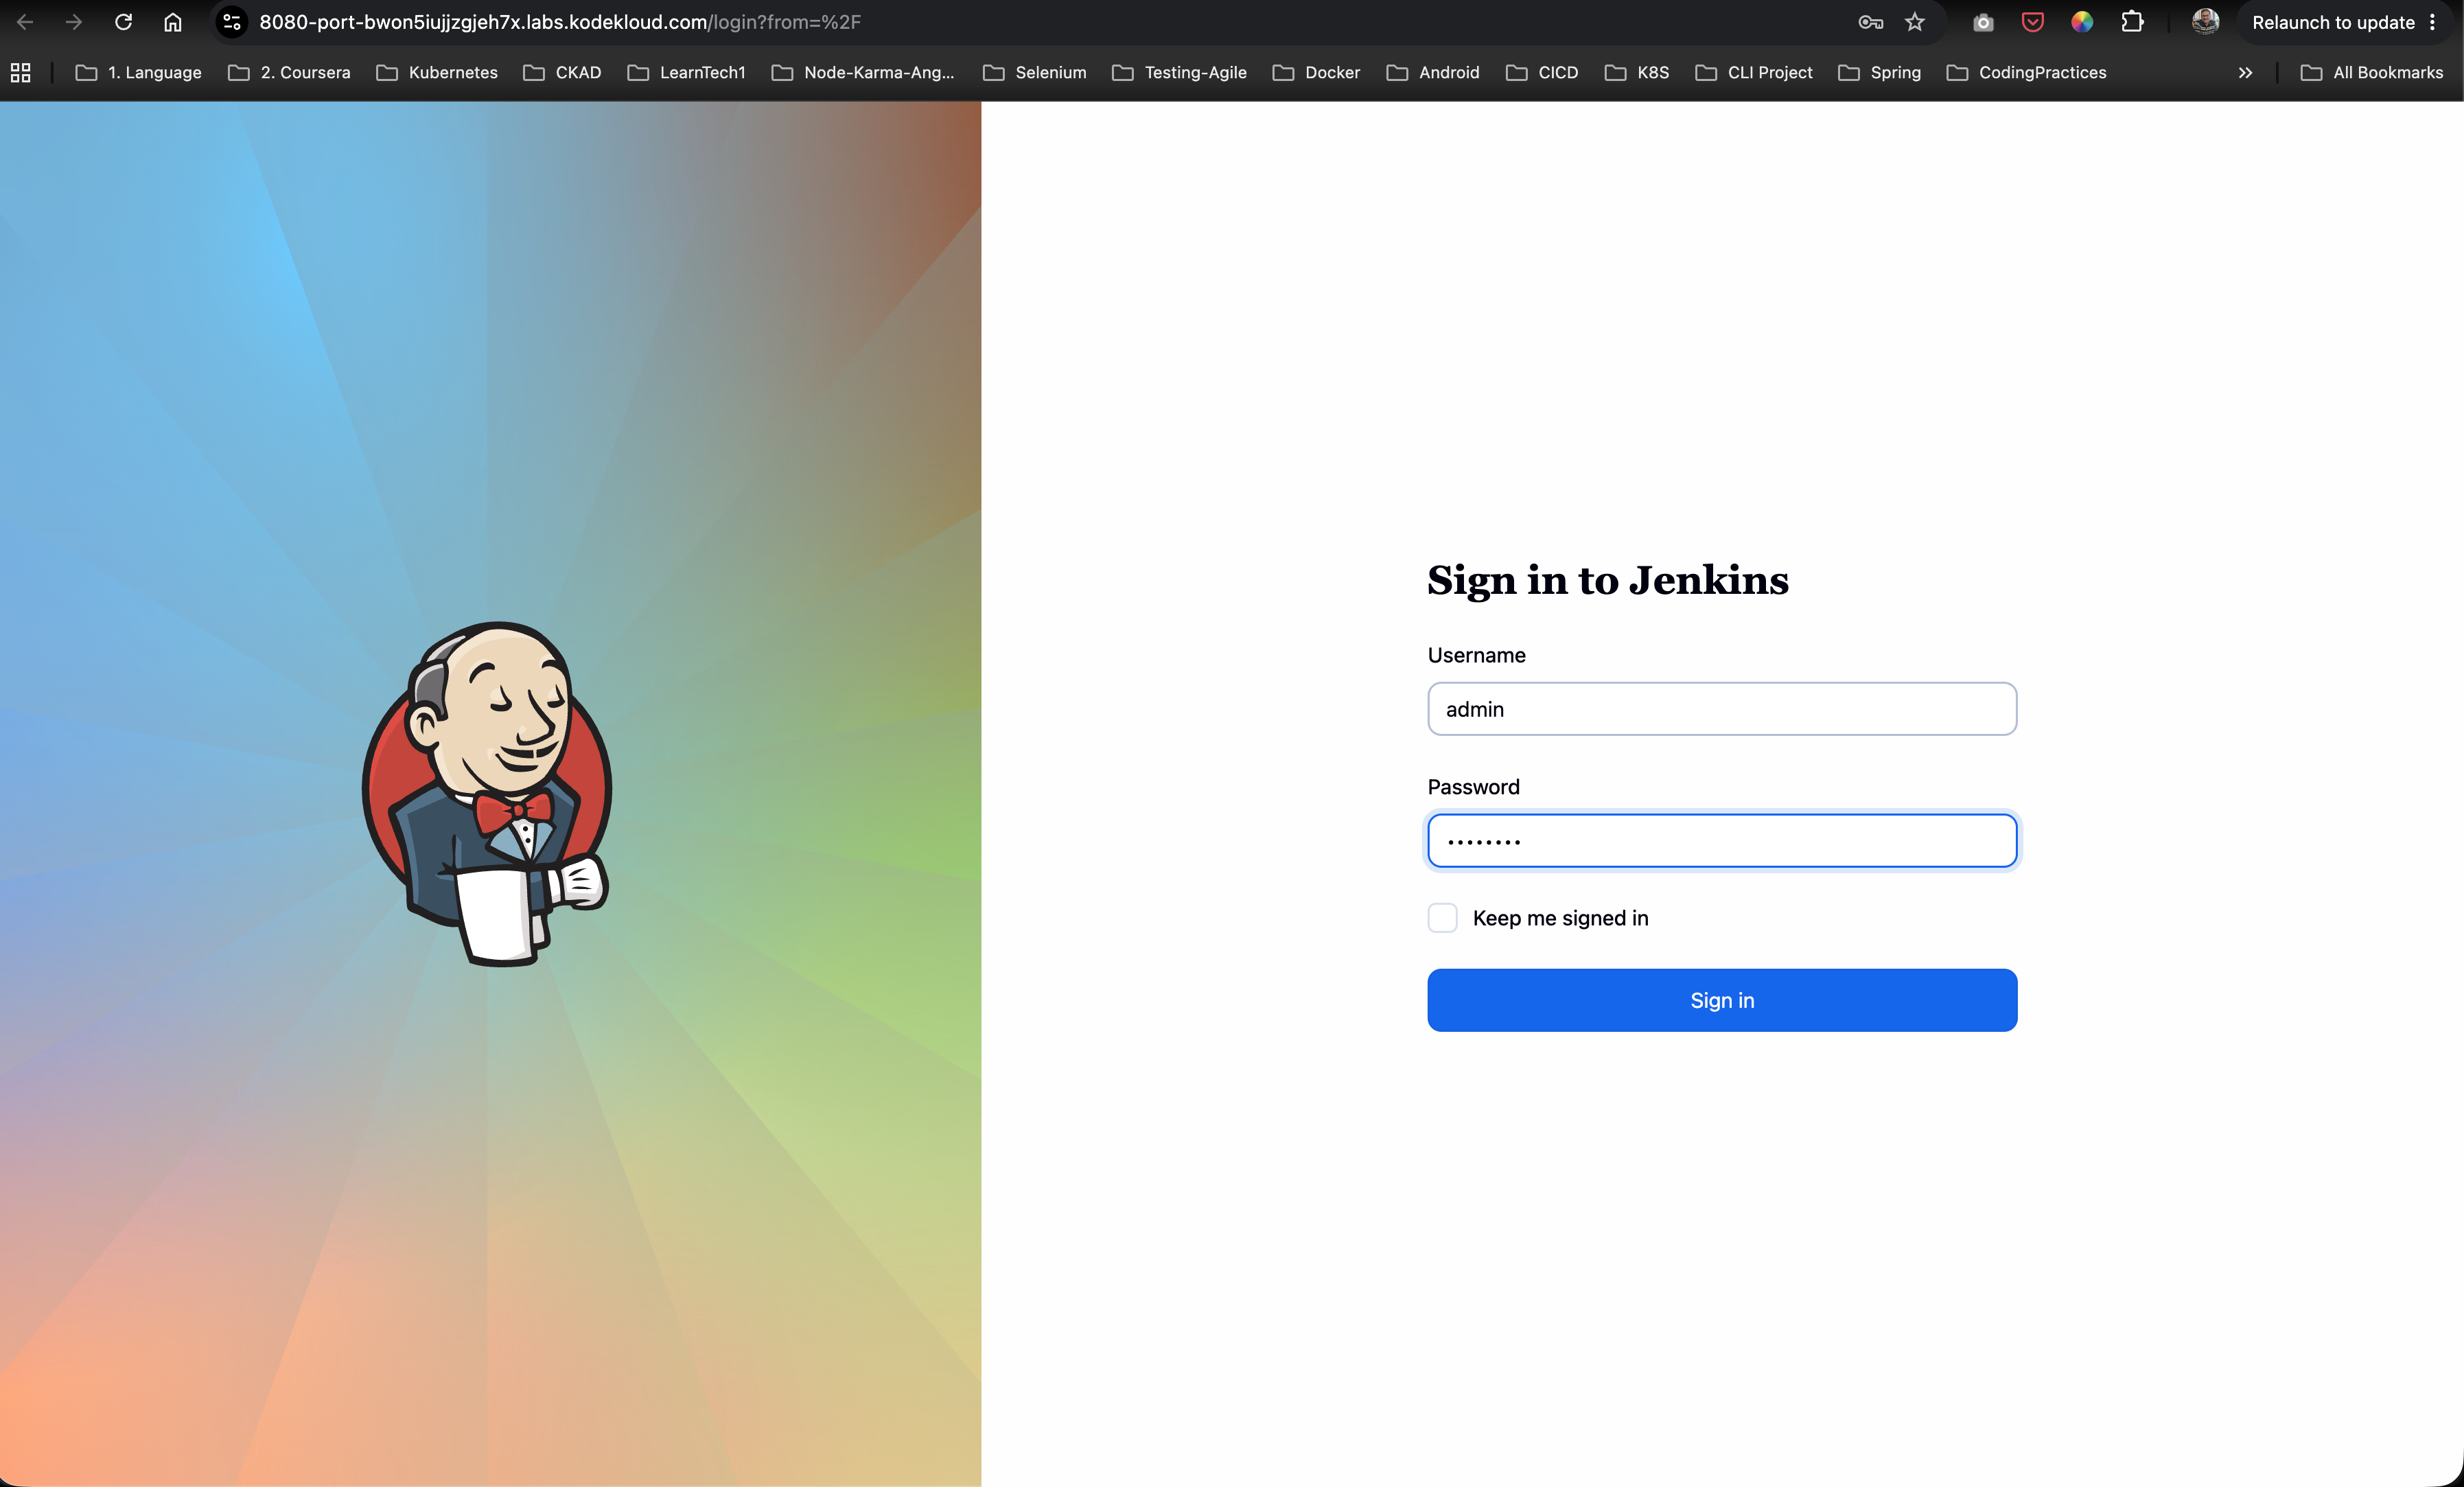
Step 1: Log in to the Jenkins Console
Navigate to the Jenkins UI in your browser and log in with the administrative credentials:
- Username:
admin - Password:
Adm!n321
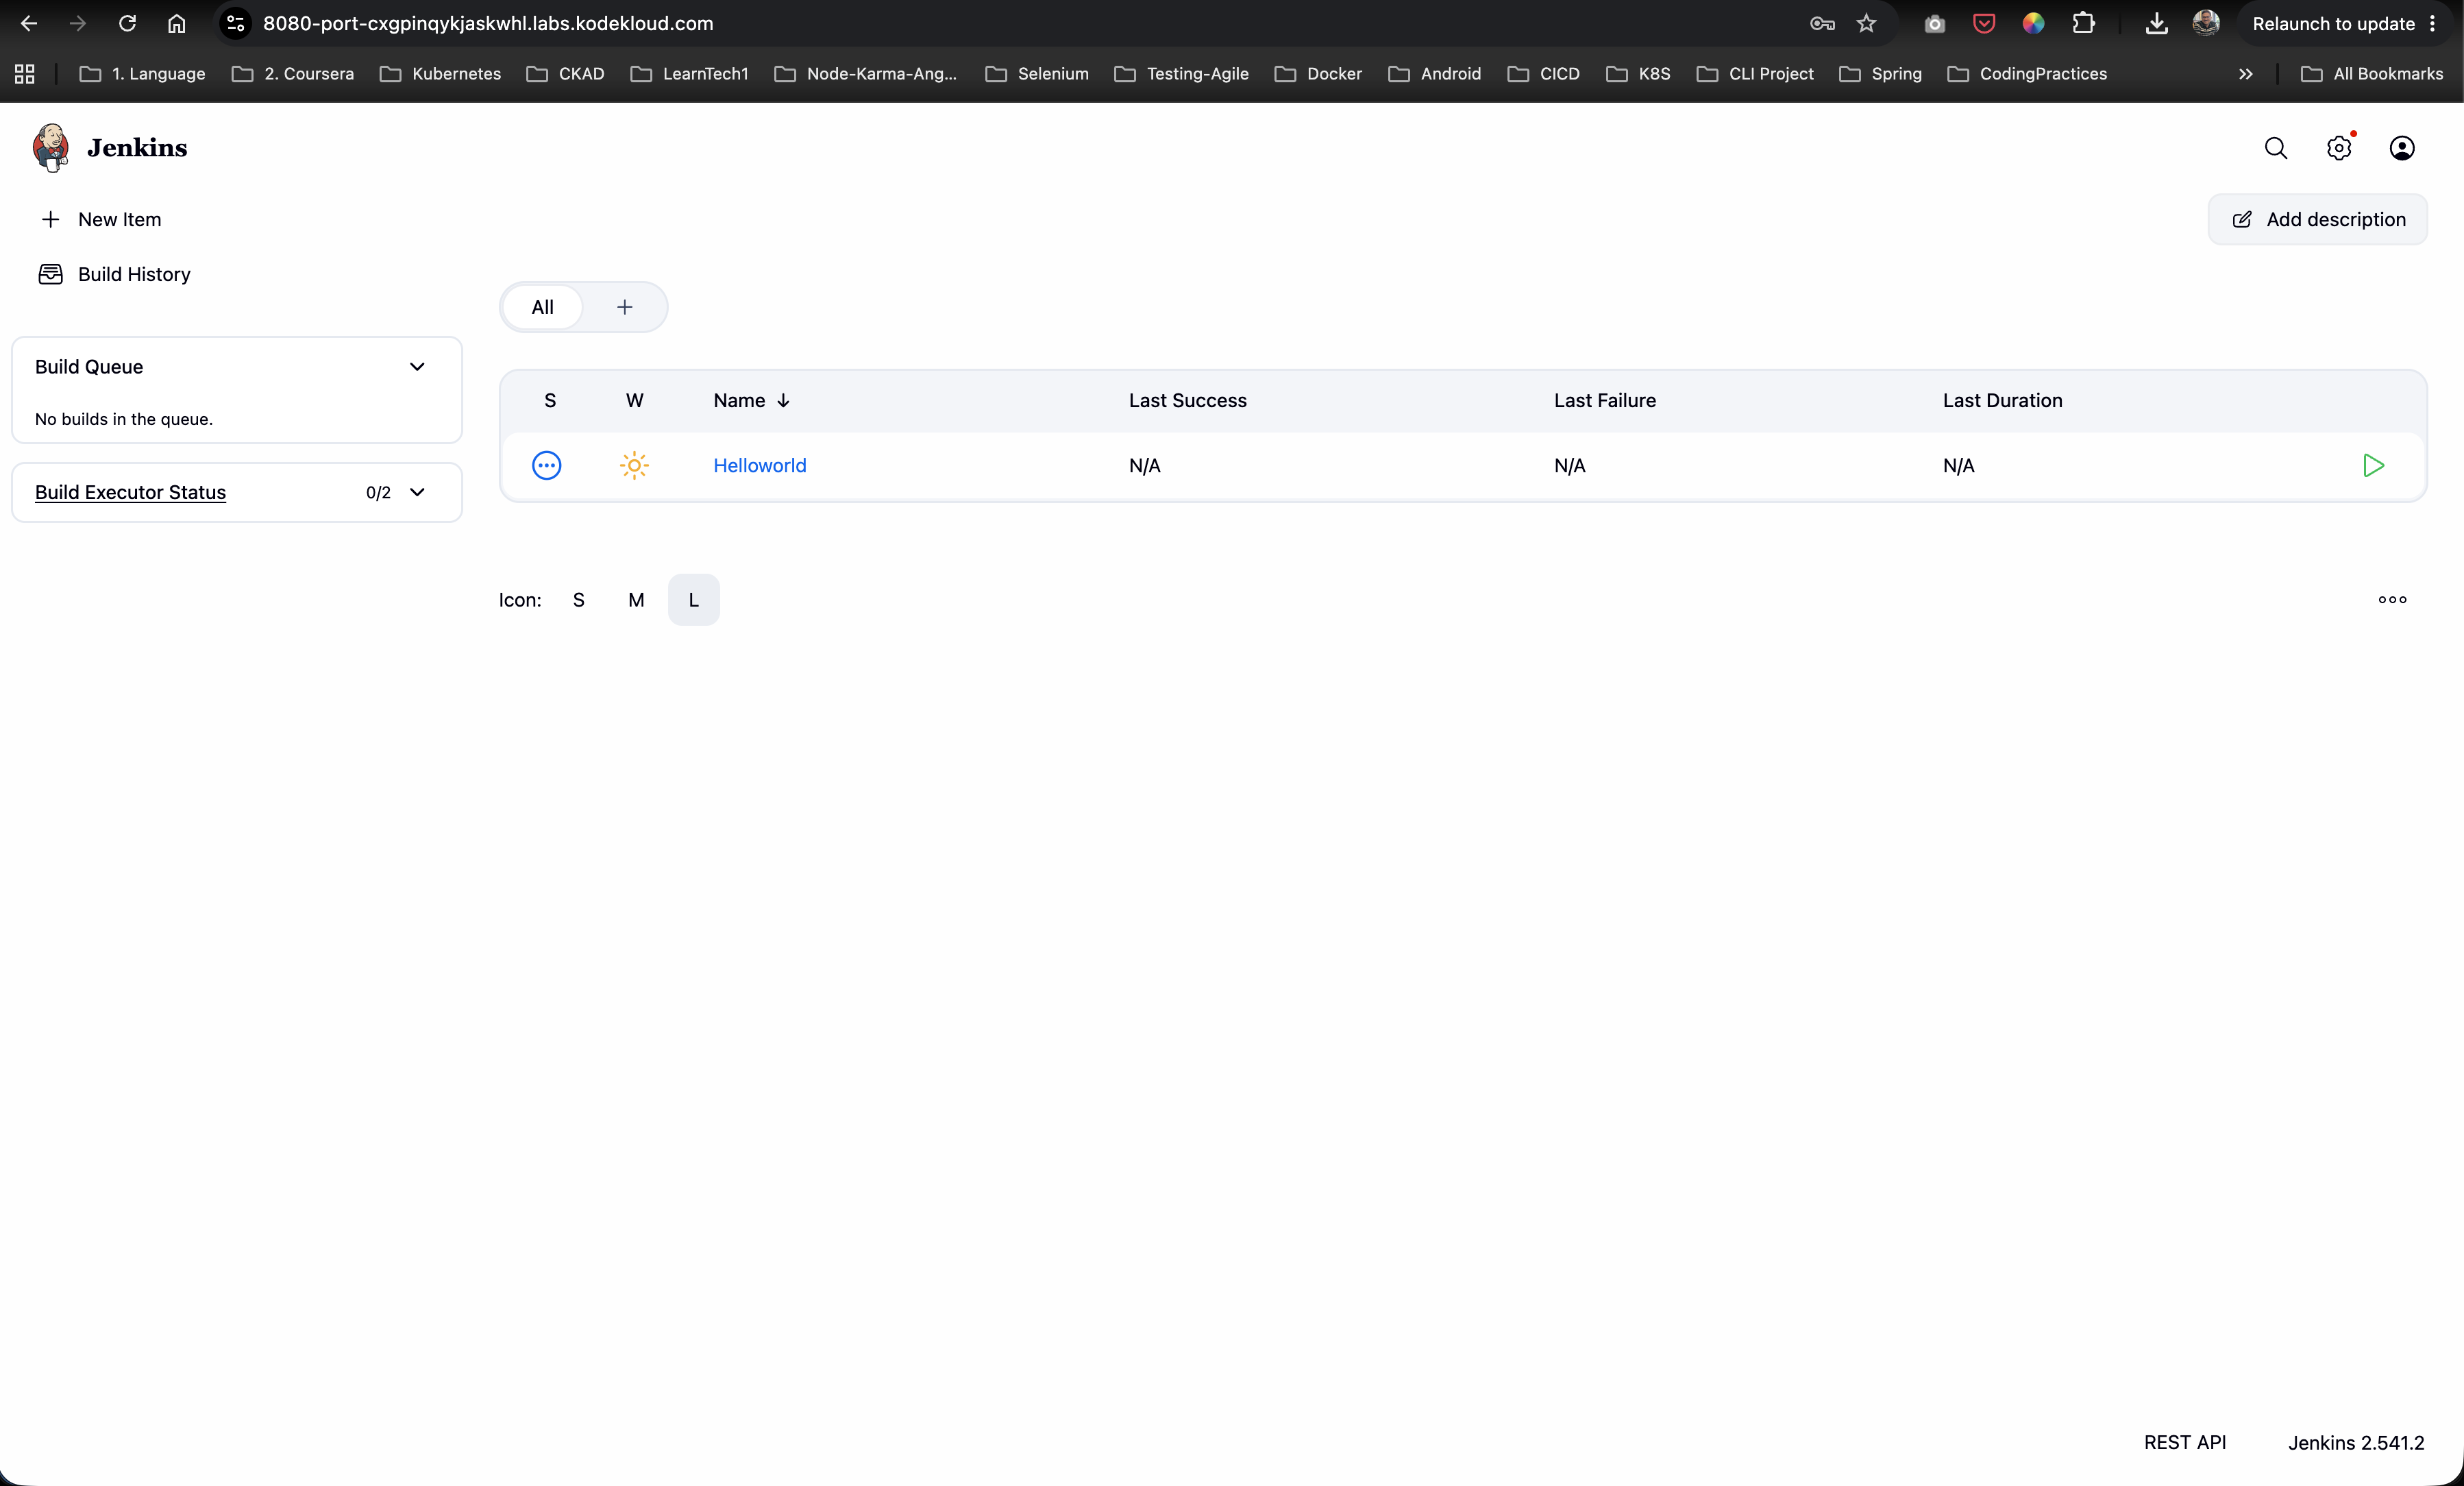
Upon successful login, you will land on the admin dashboard, where you can see the existing job Helloworld:
Step 2: Navigate to User Settings
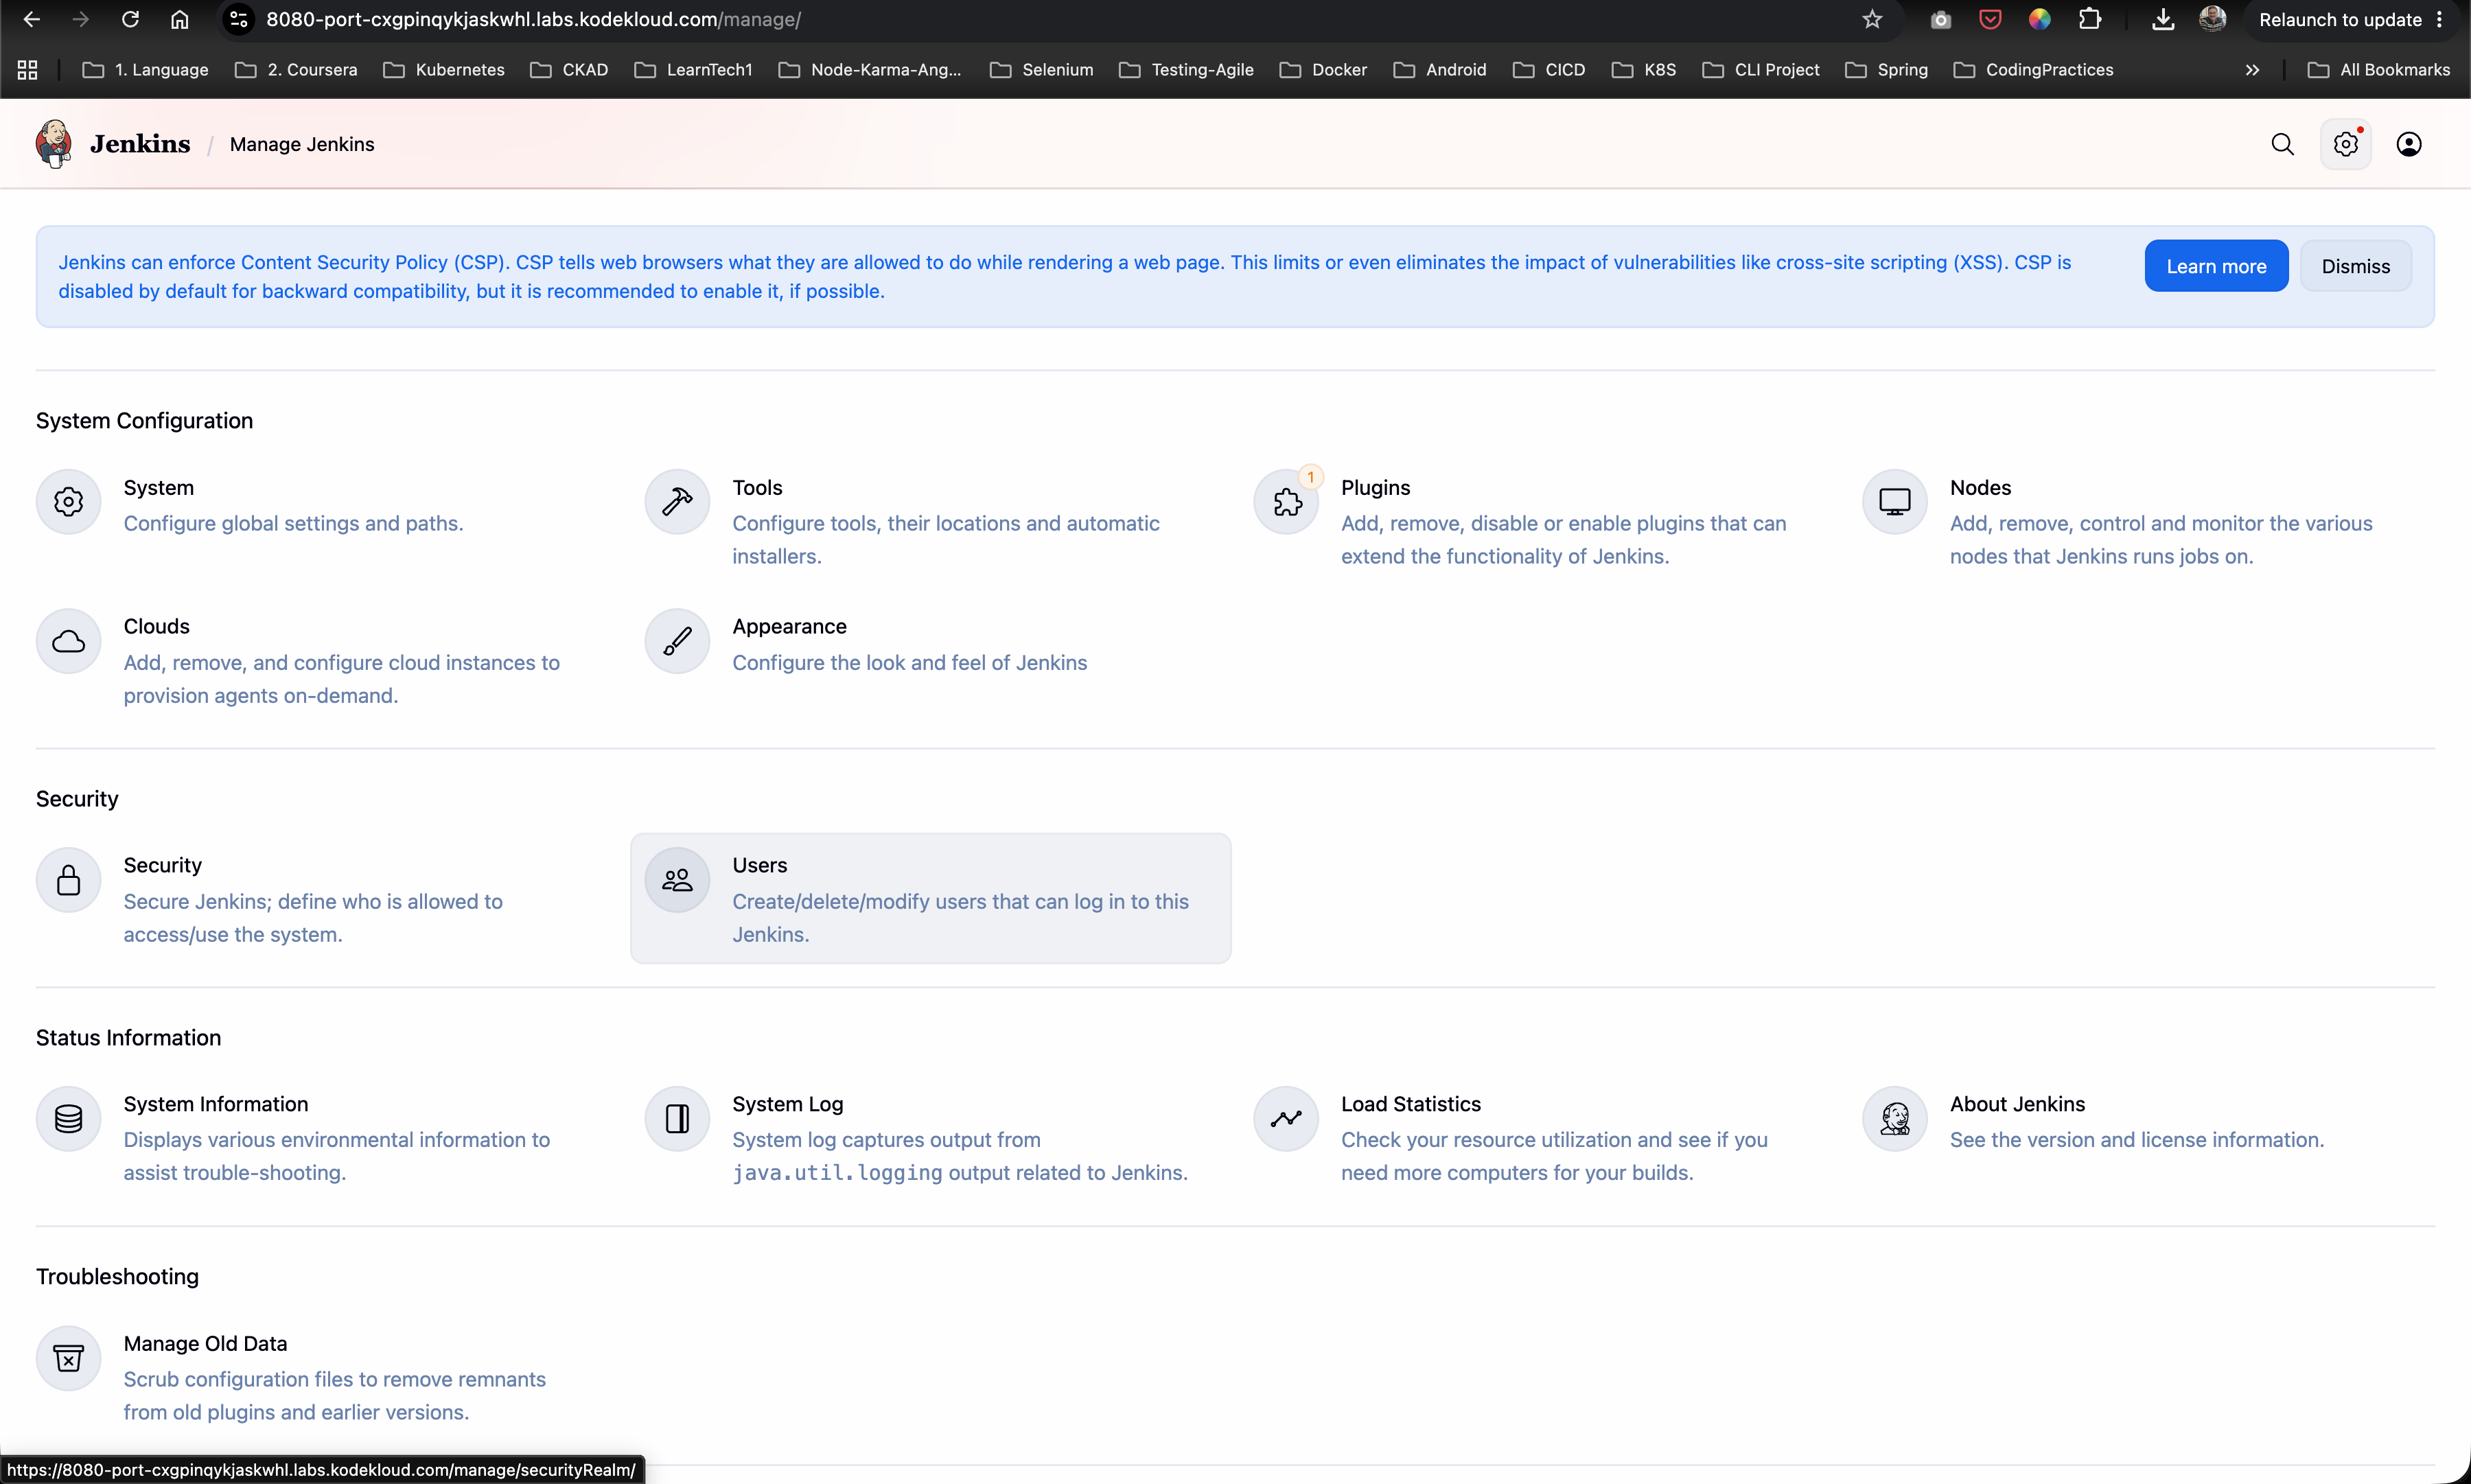
- From the left sidebar, click on Manage Jenkins.
- Scroll down to the Security section and click on Users:
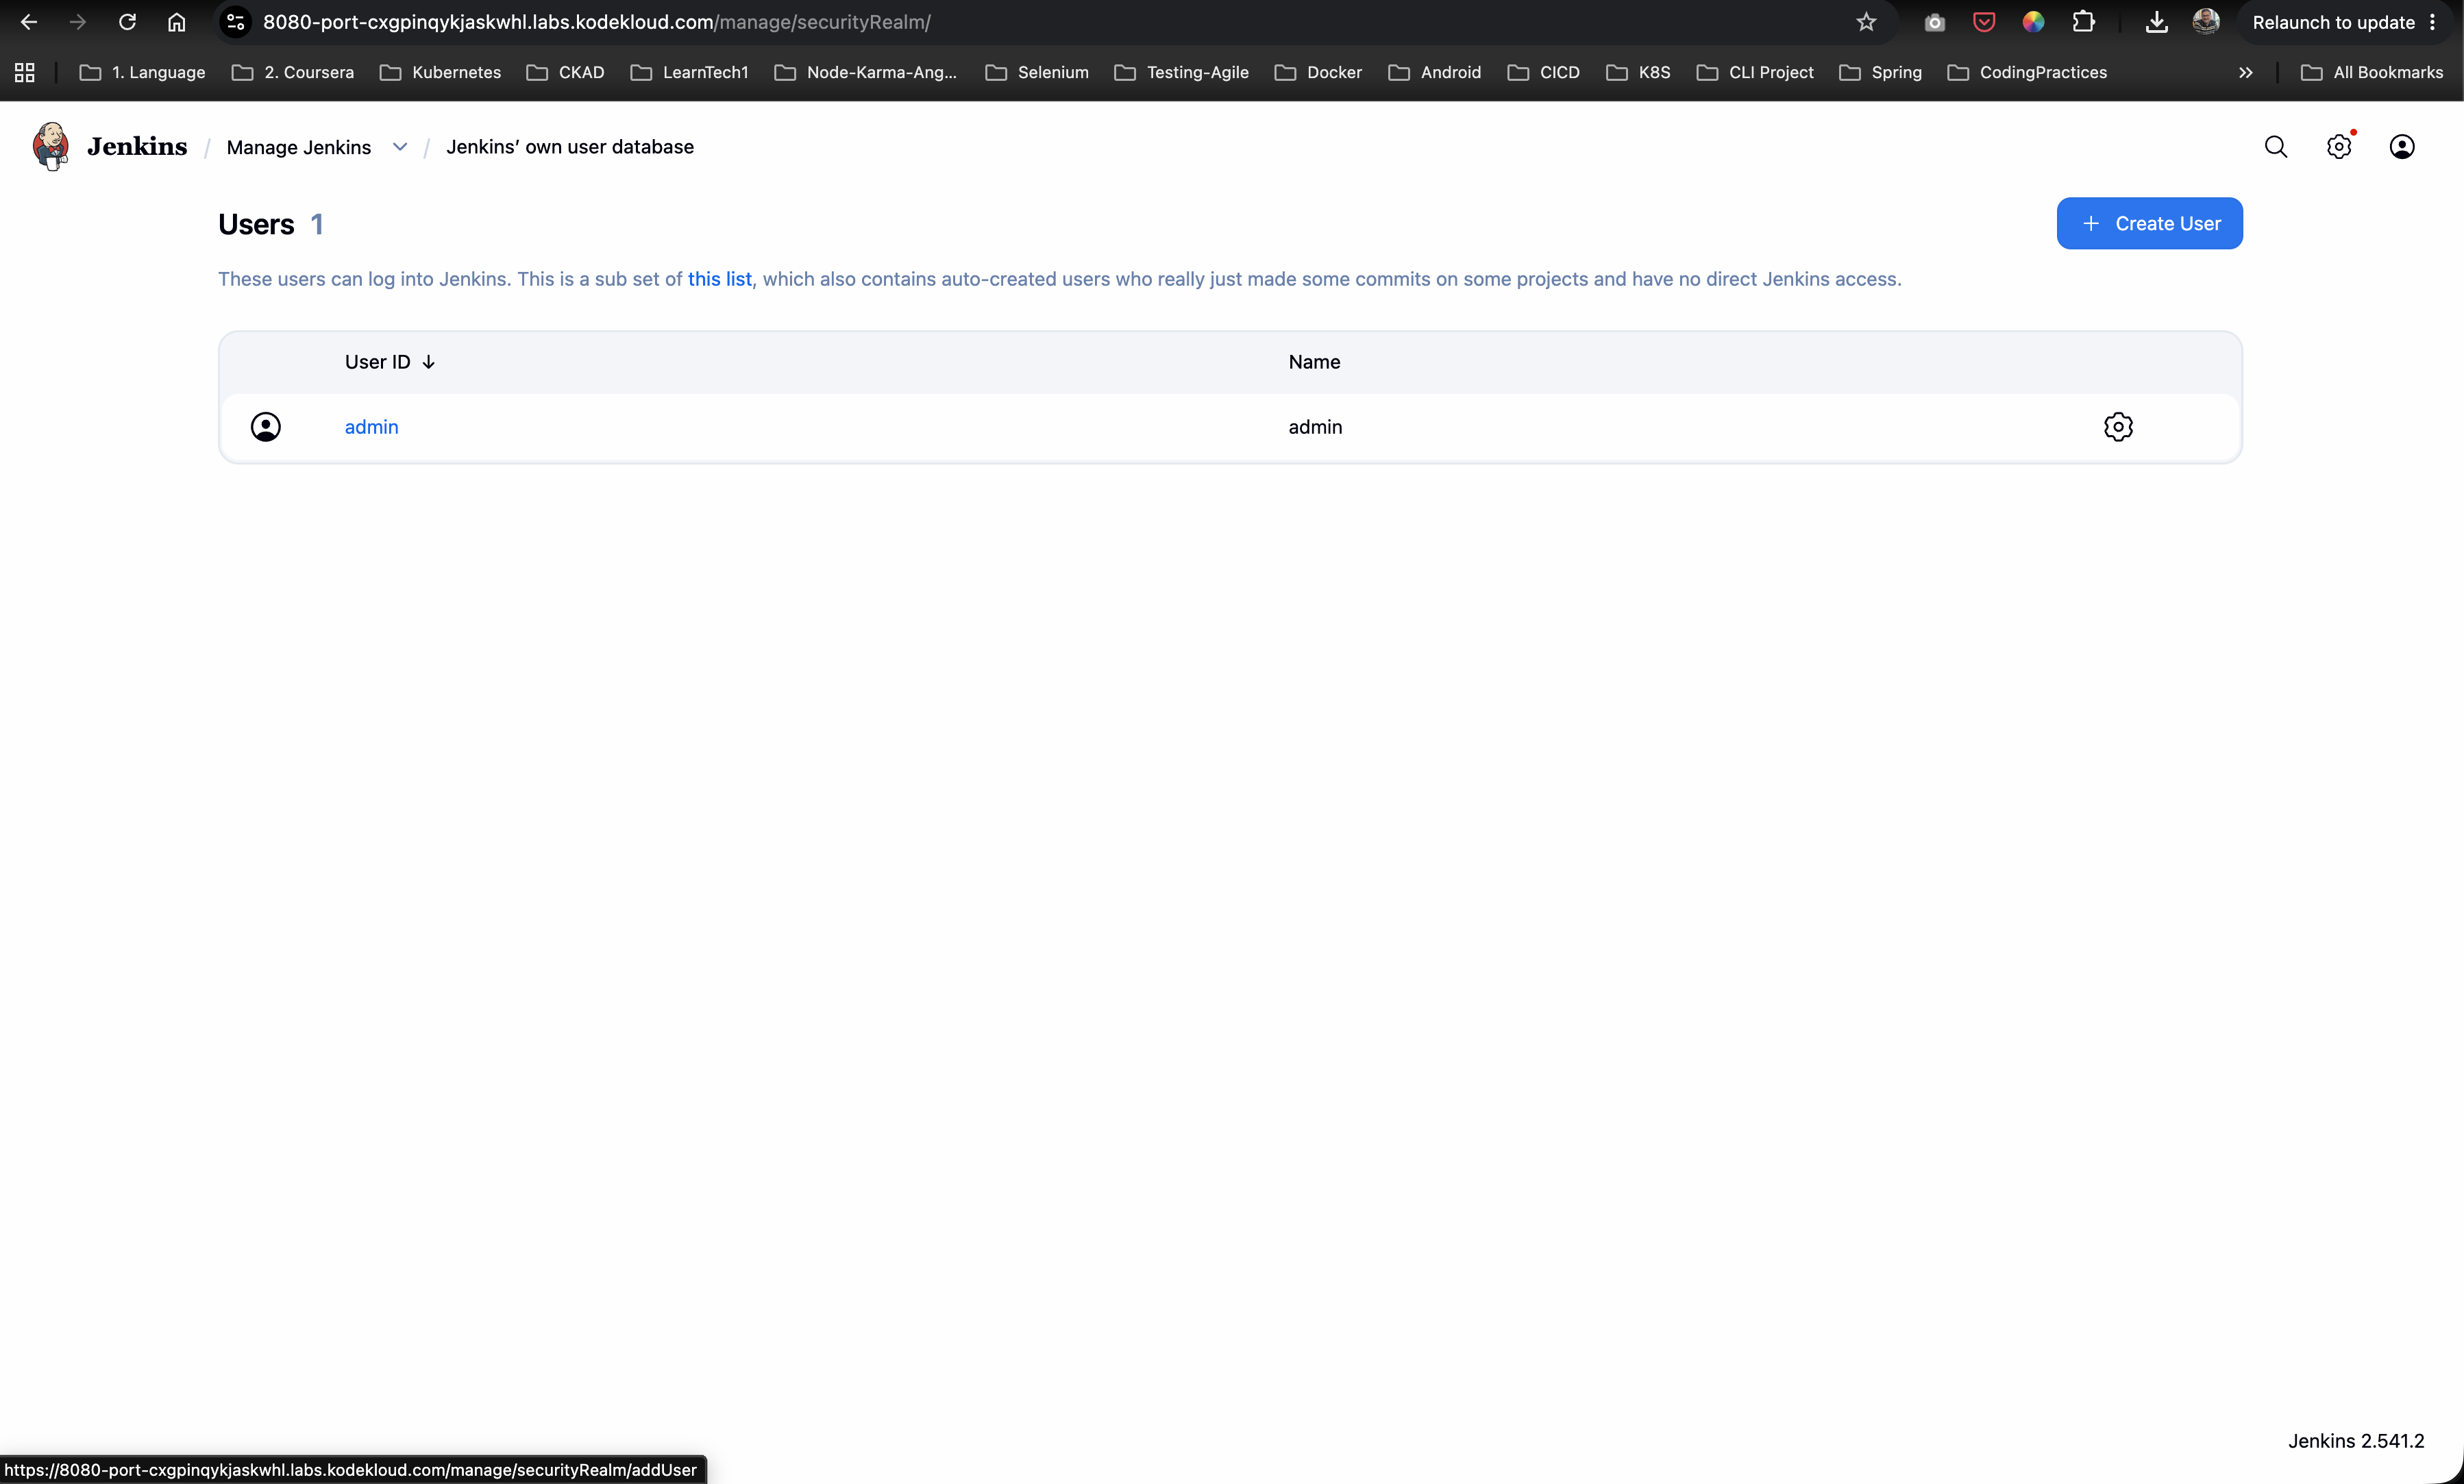
Step 3: Create the Rose User
- On the Users page, click the + Create User button in the top right:
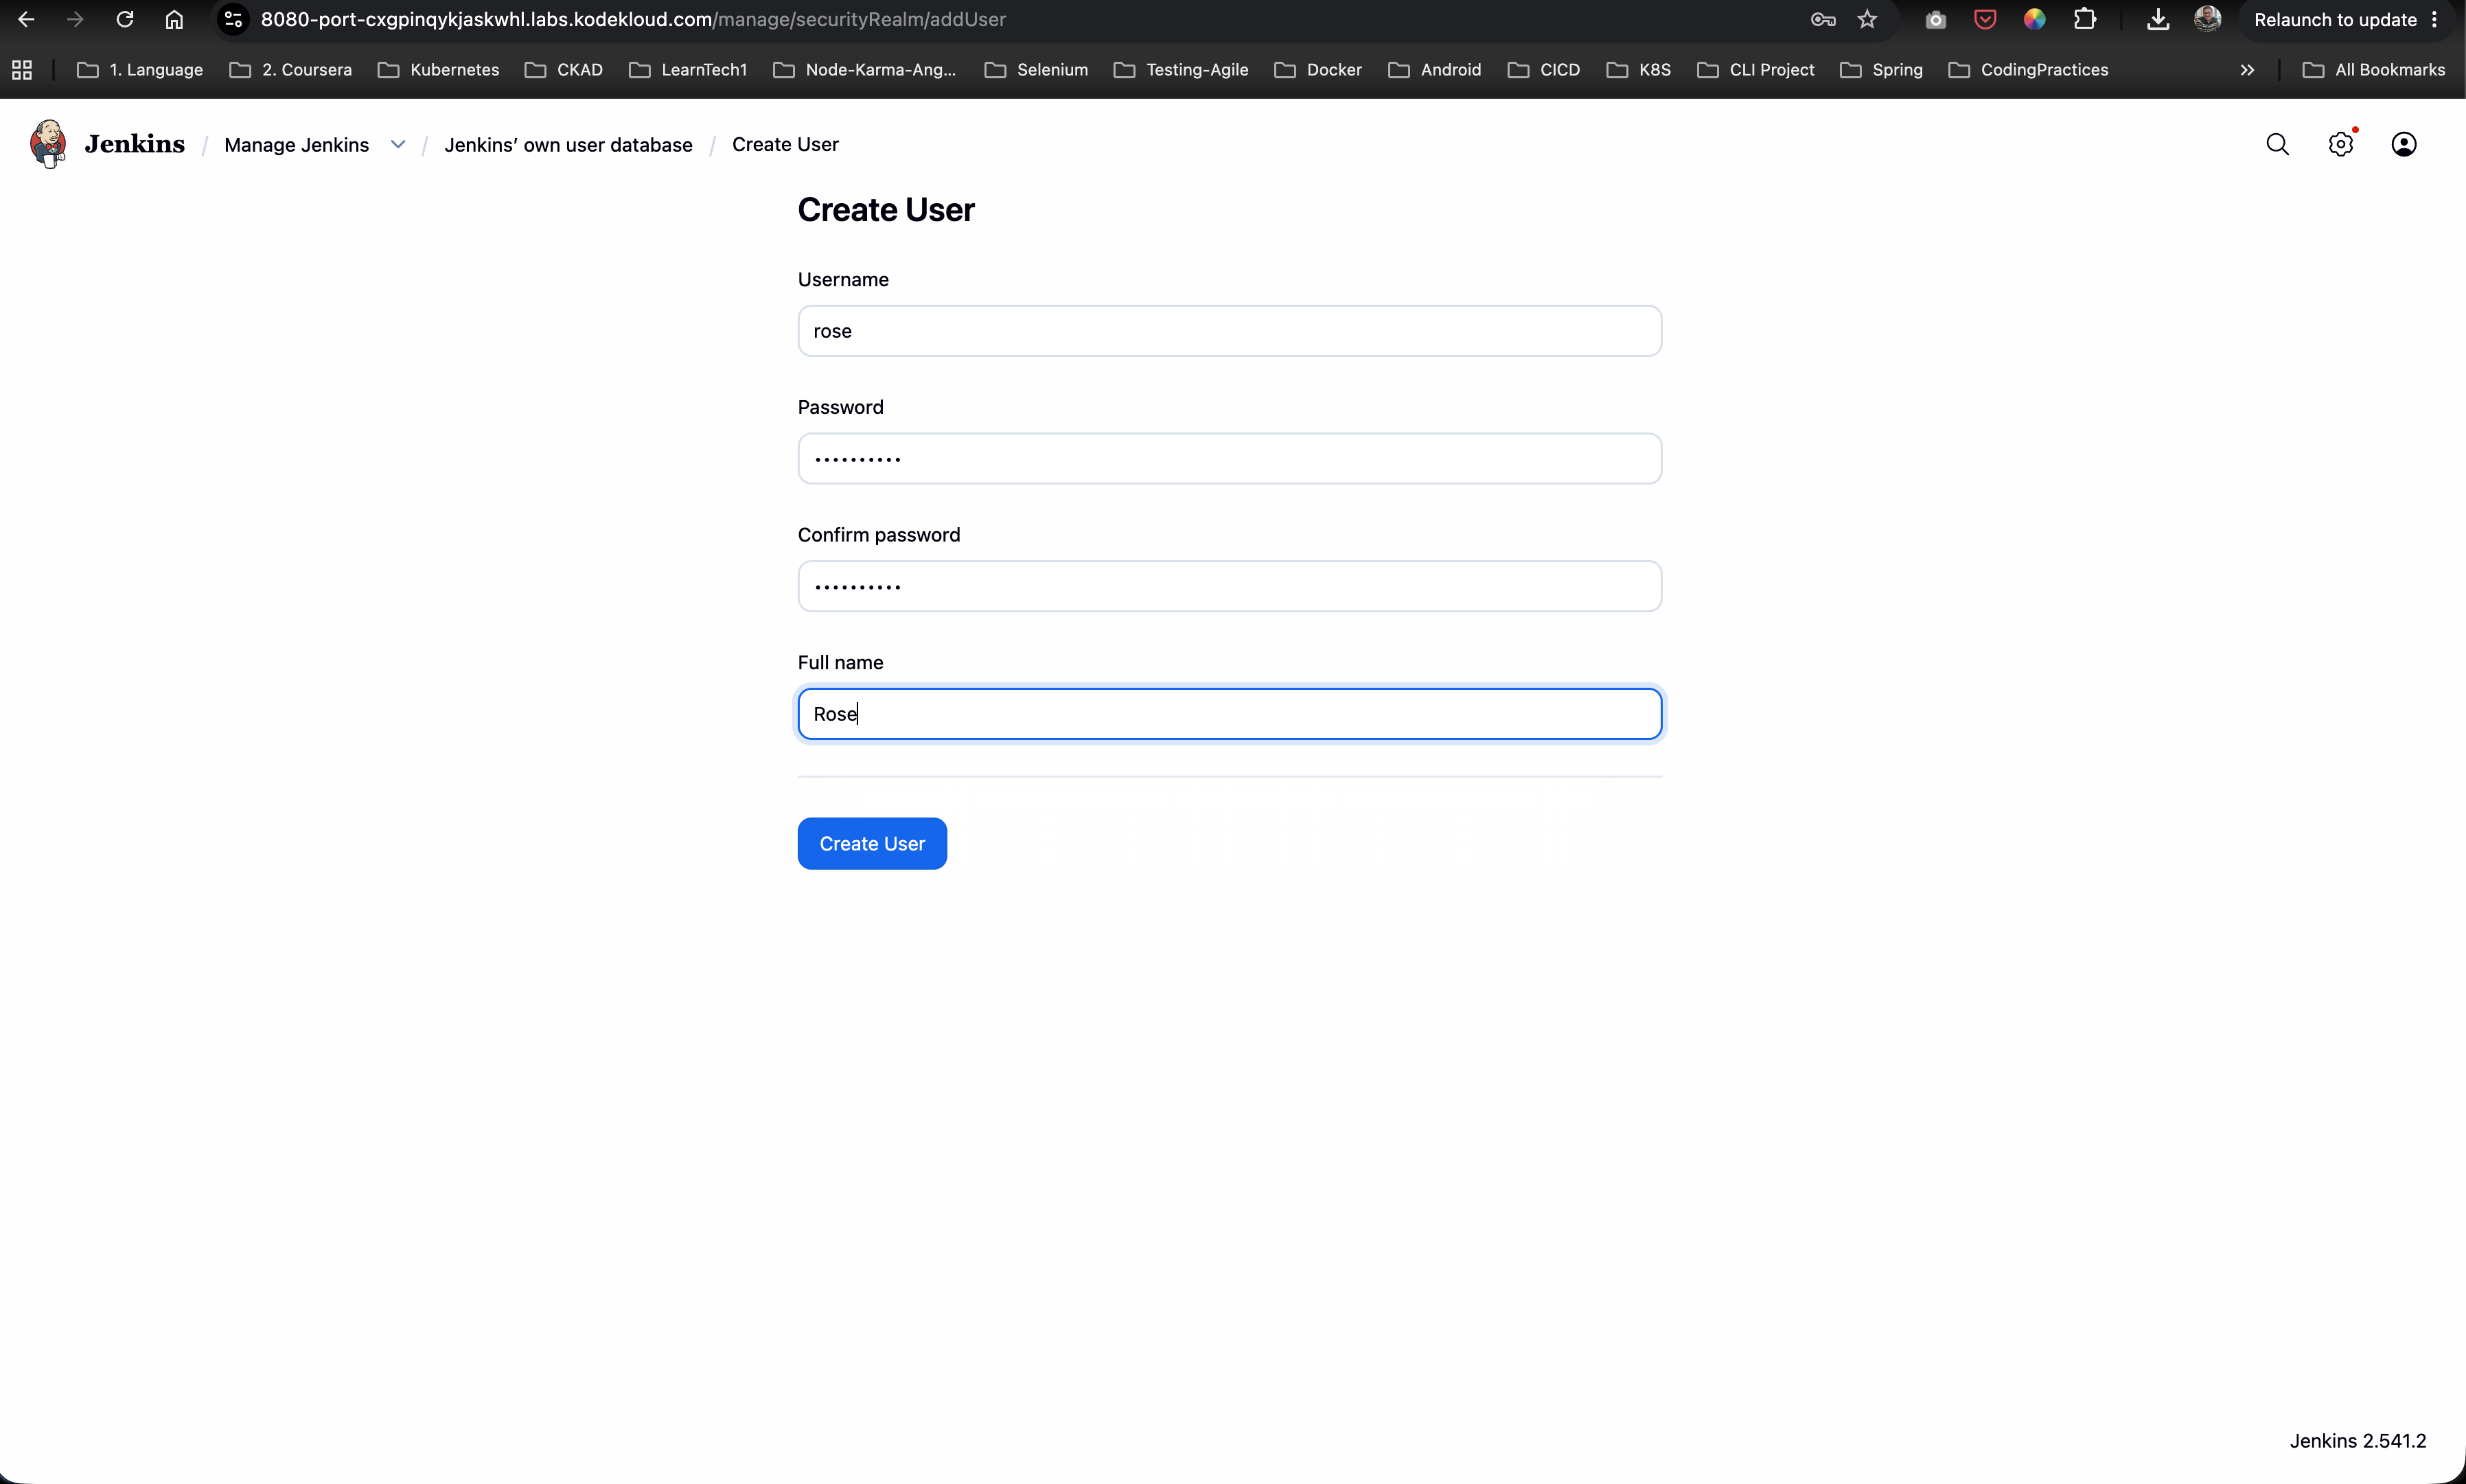
- Fill in the form with the specified developer credentials:
- Username:
rose - Password:
TmPcZjtRQx - Confirm password:
TmPcZjtRQx - Full name:
Rose
- Username:
- Click the blue Create User button at the bottom:
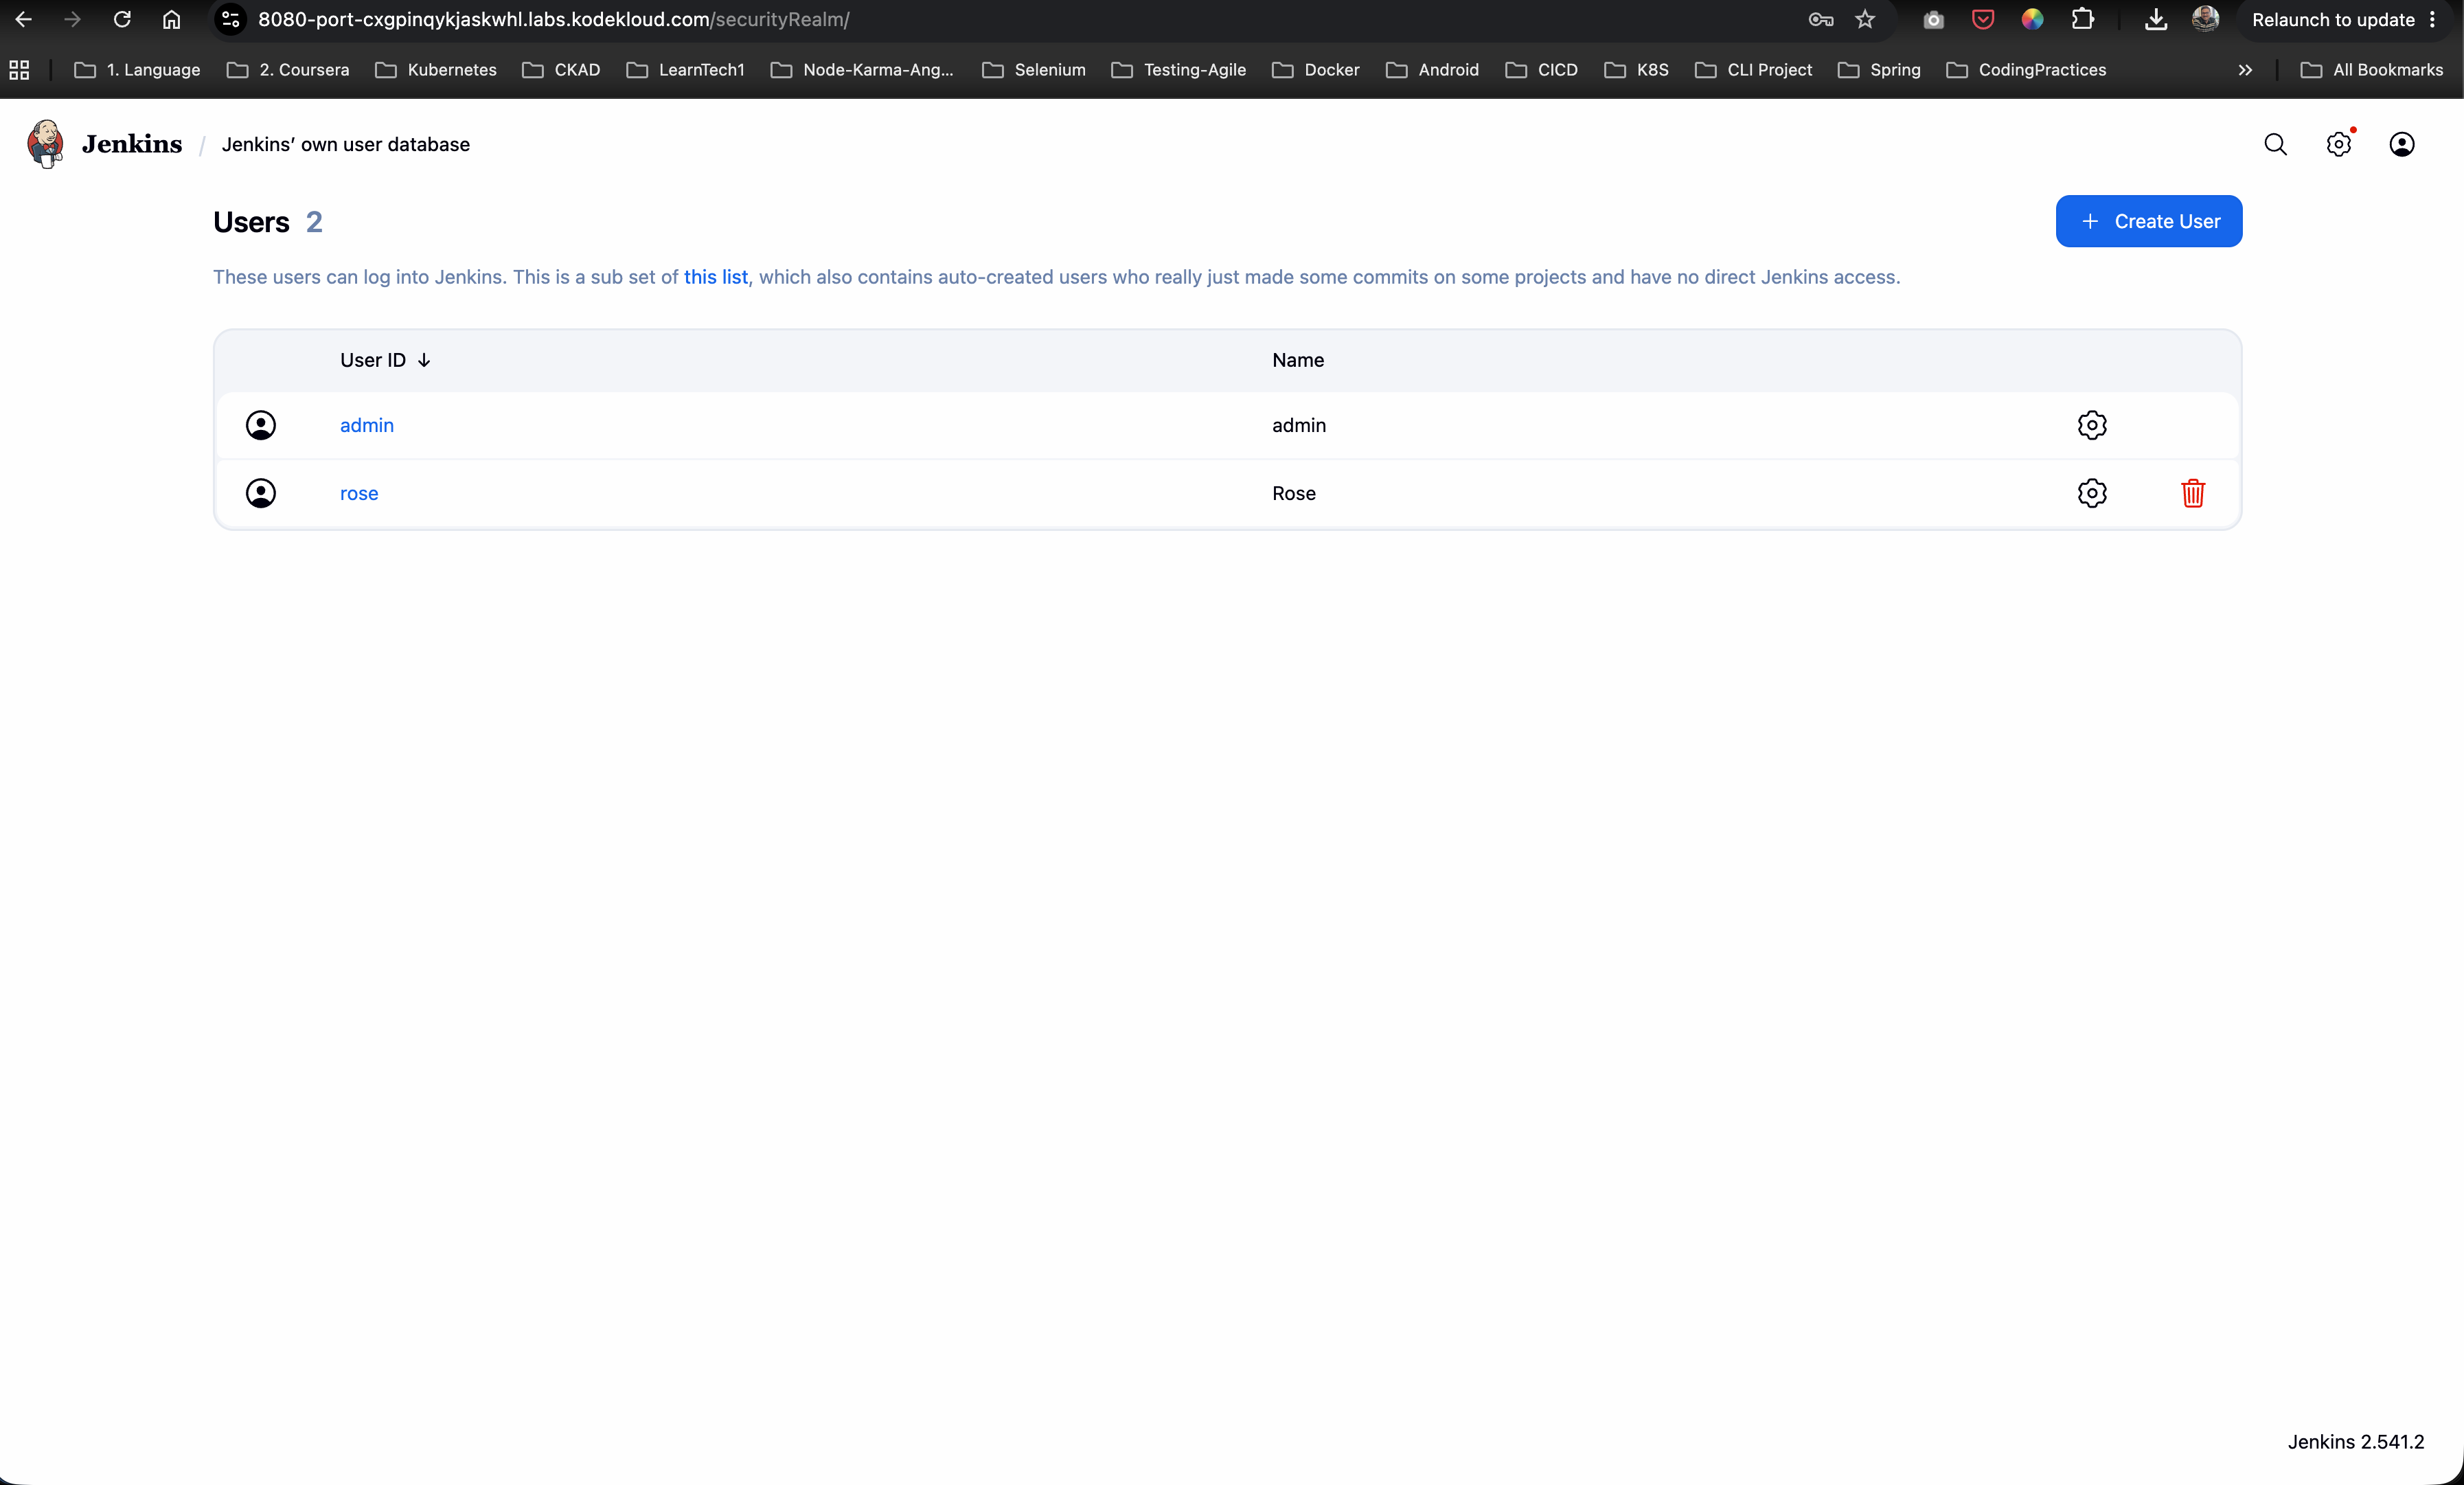
- Verify that the user
rosehas been successfully added to the user registry list:
Step 4: Install the Matrix Authorization Strategy Plugin
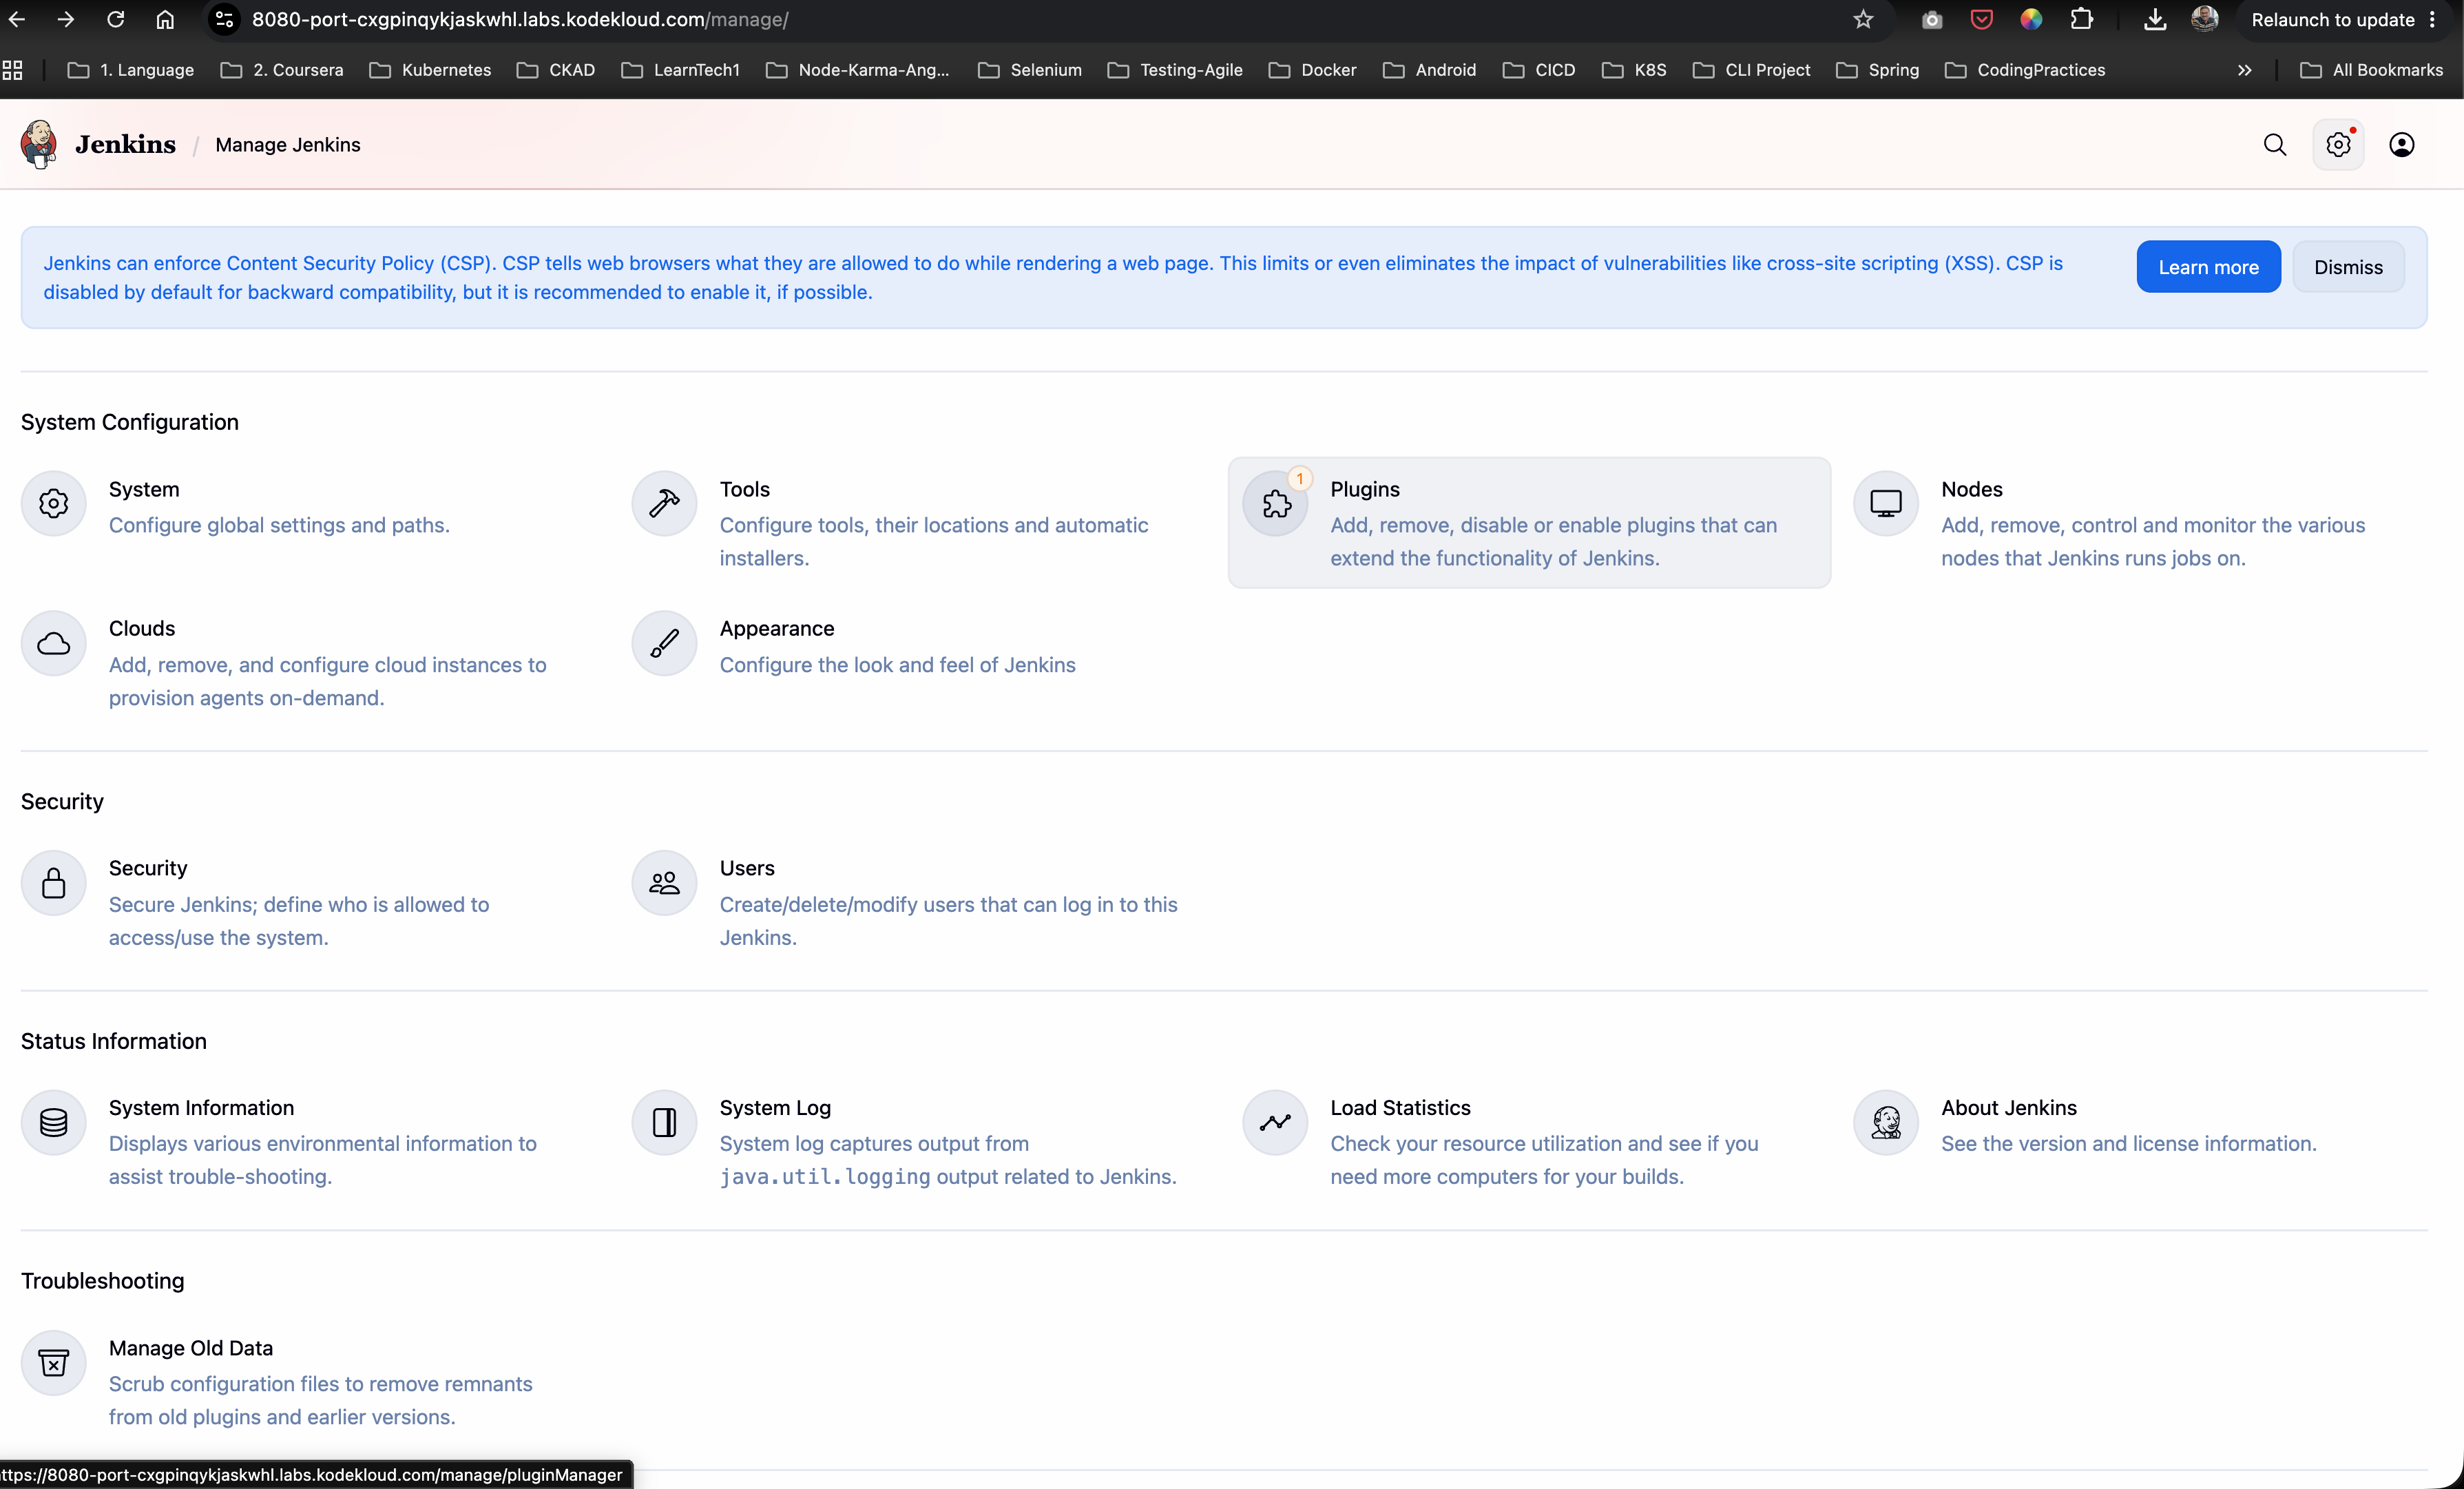
- Go back to Manage Jenkins and click on Plugins under System Configuration section:
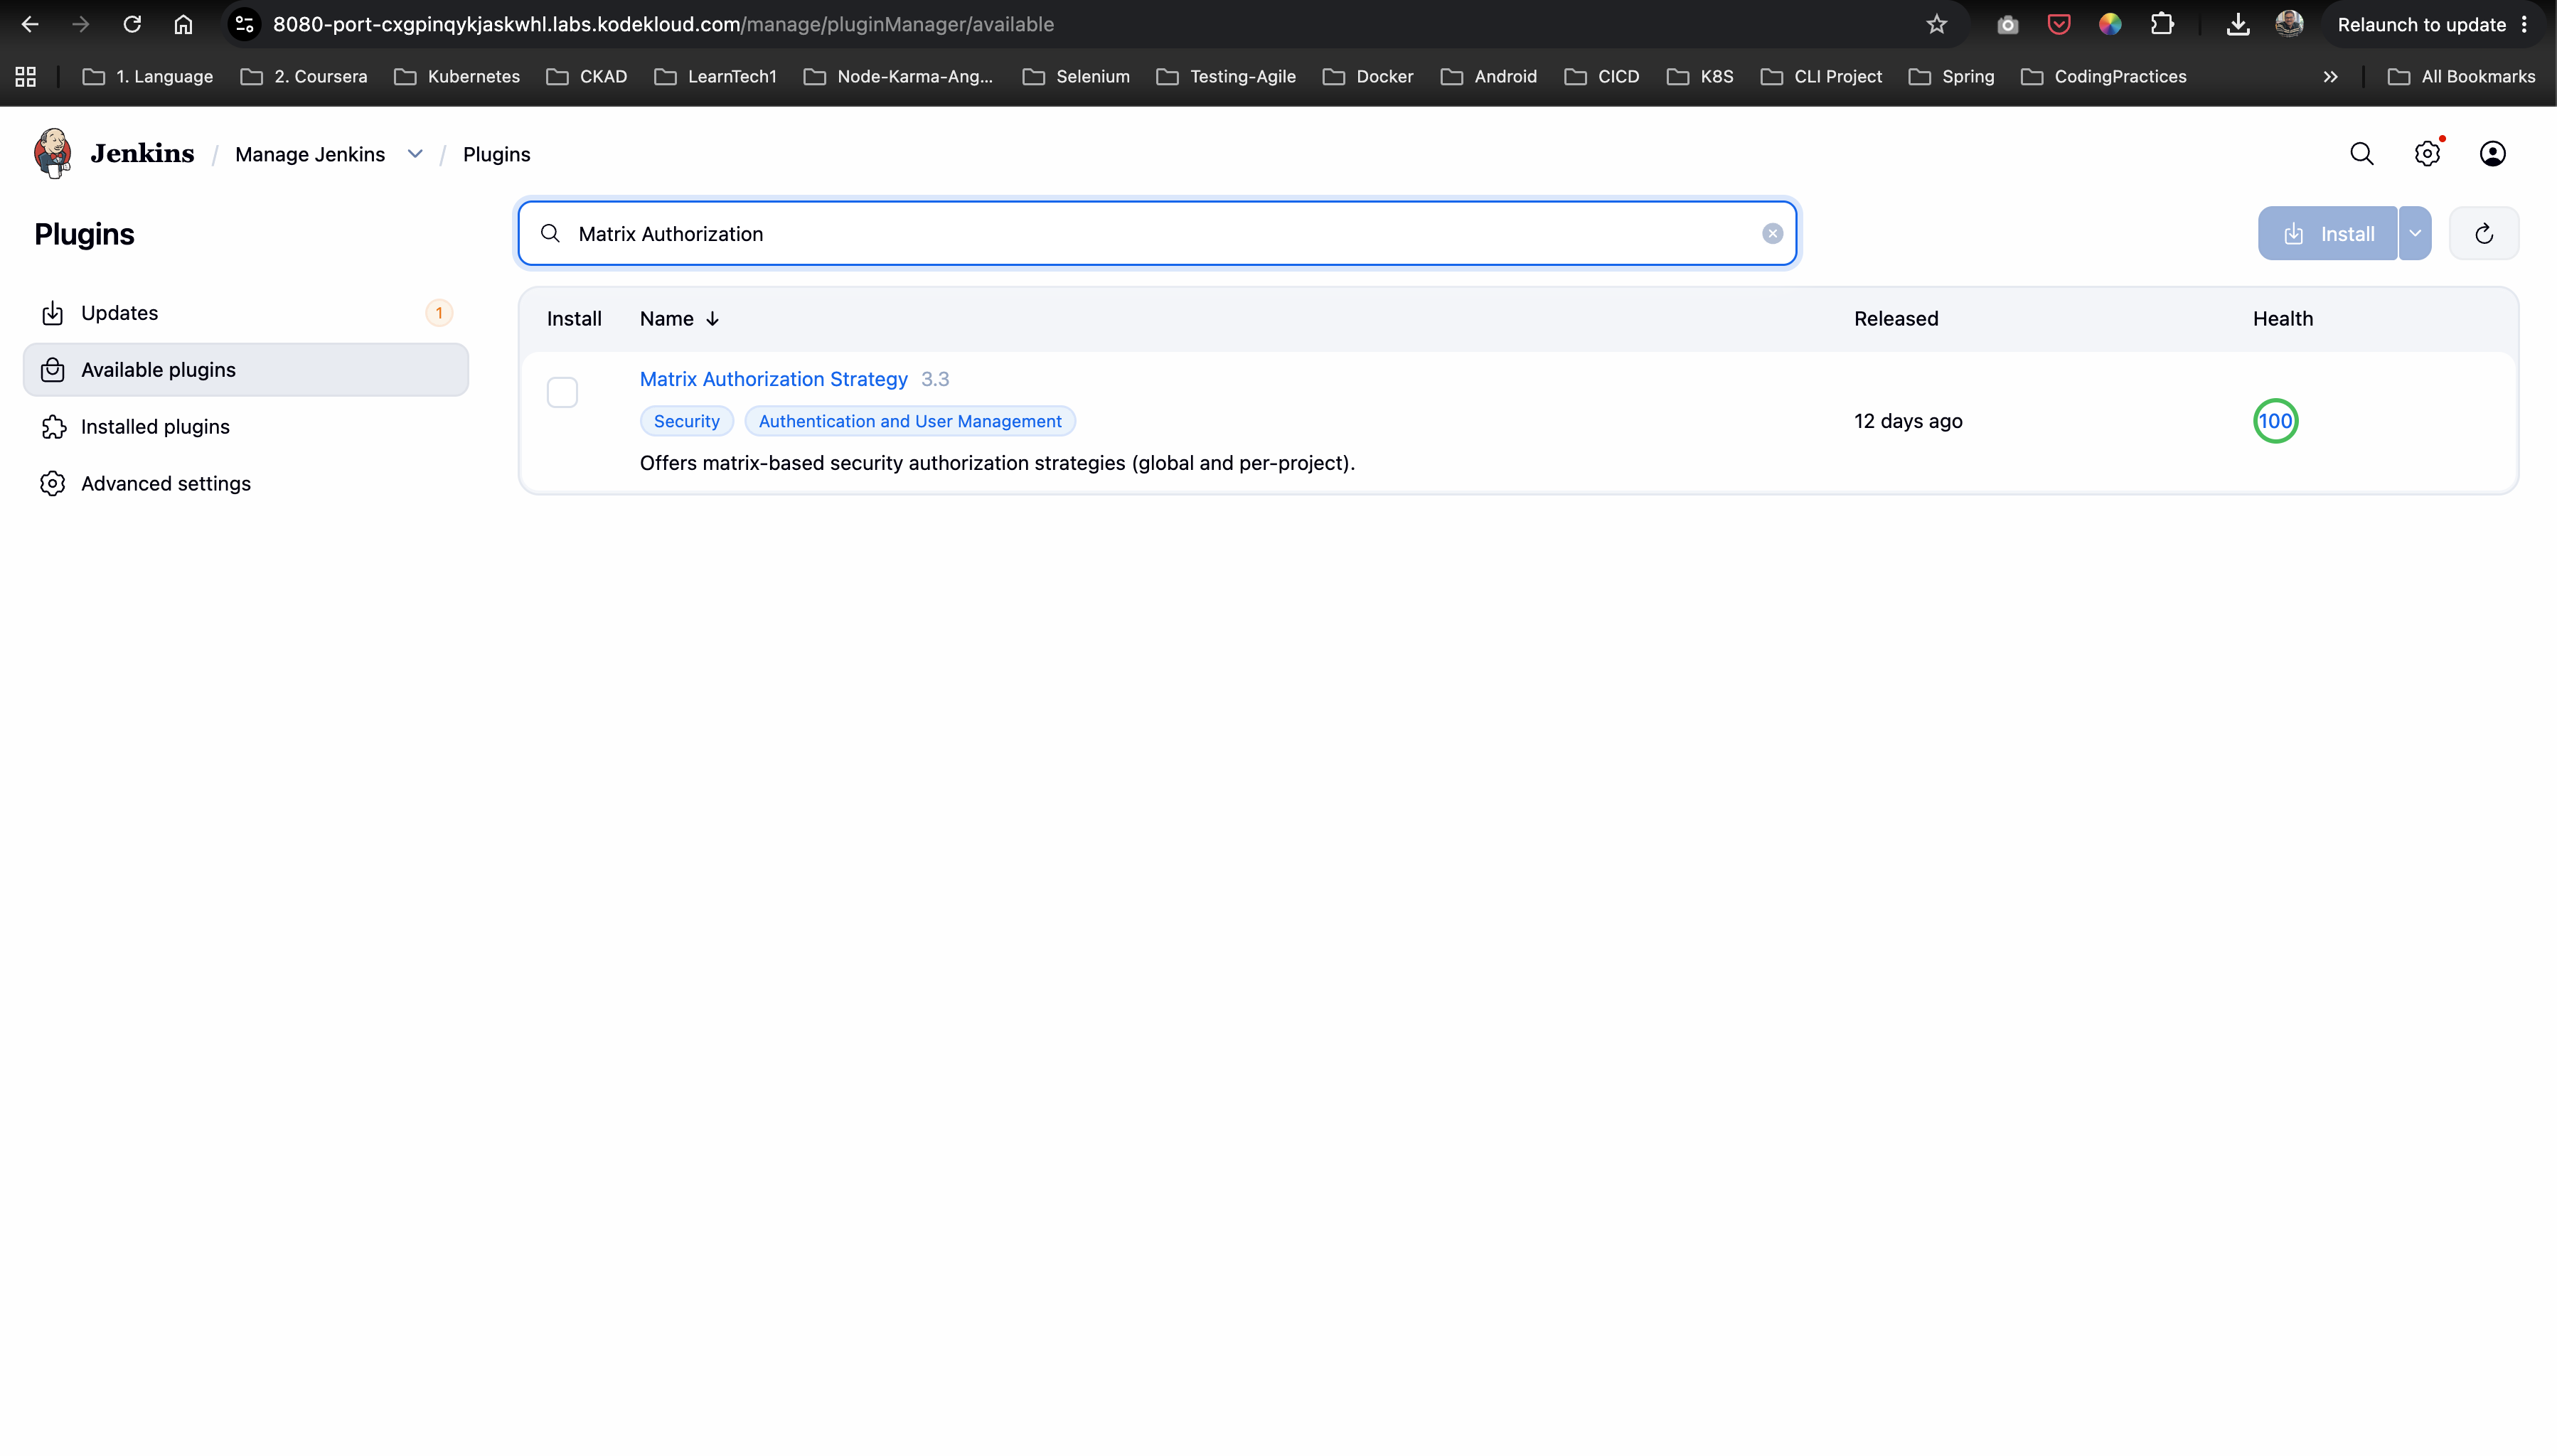
- Click on the Available plugins tab on the left.
- In the search bar, type
Matrix Authorization. - Check the box next to Matrix Authorization Strategy.
- Click the Install button.
- Once installation is complete, check the option: “Restart Jenkins when installation is complete and no jobs are running”:
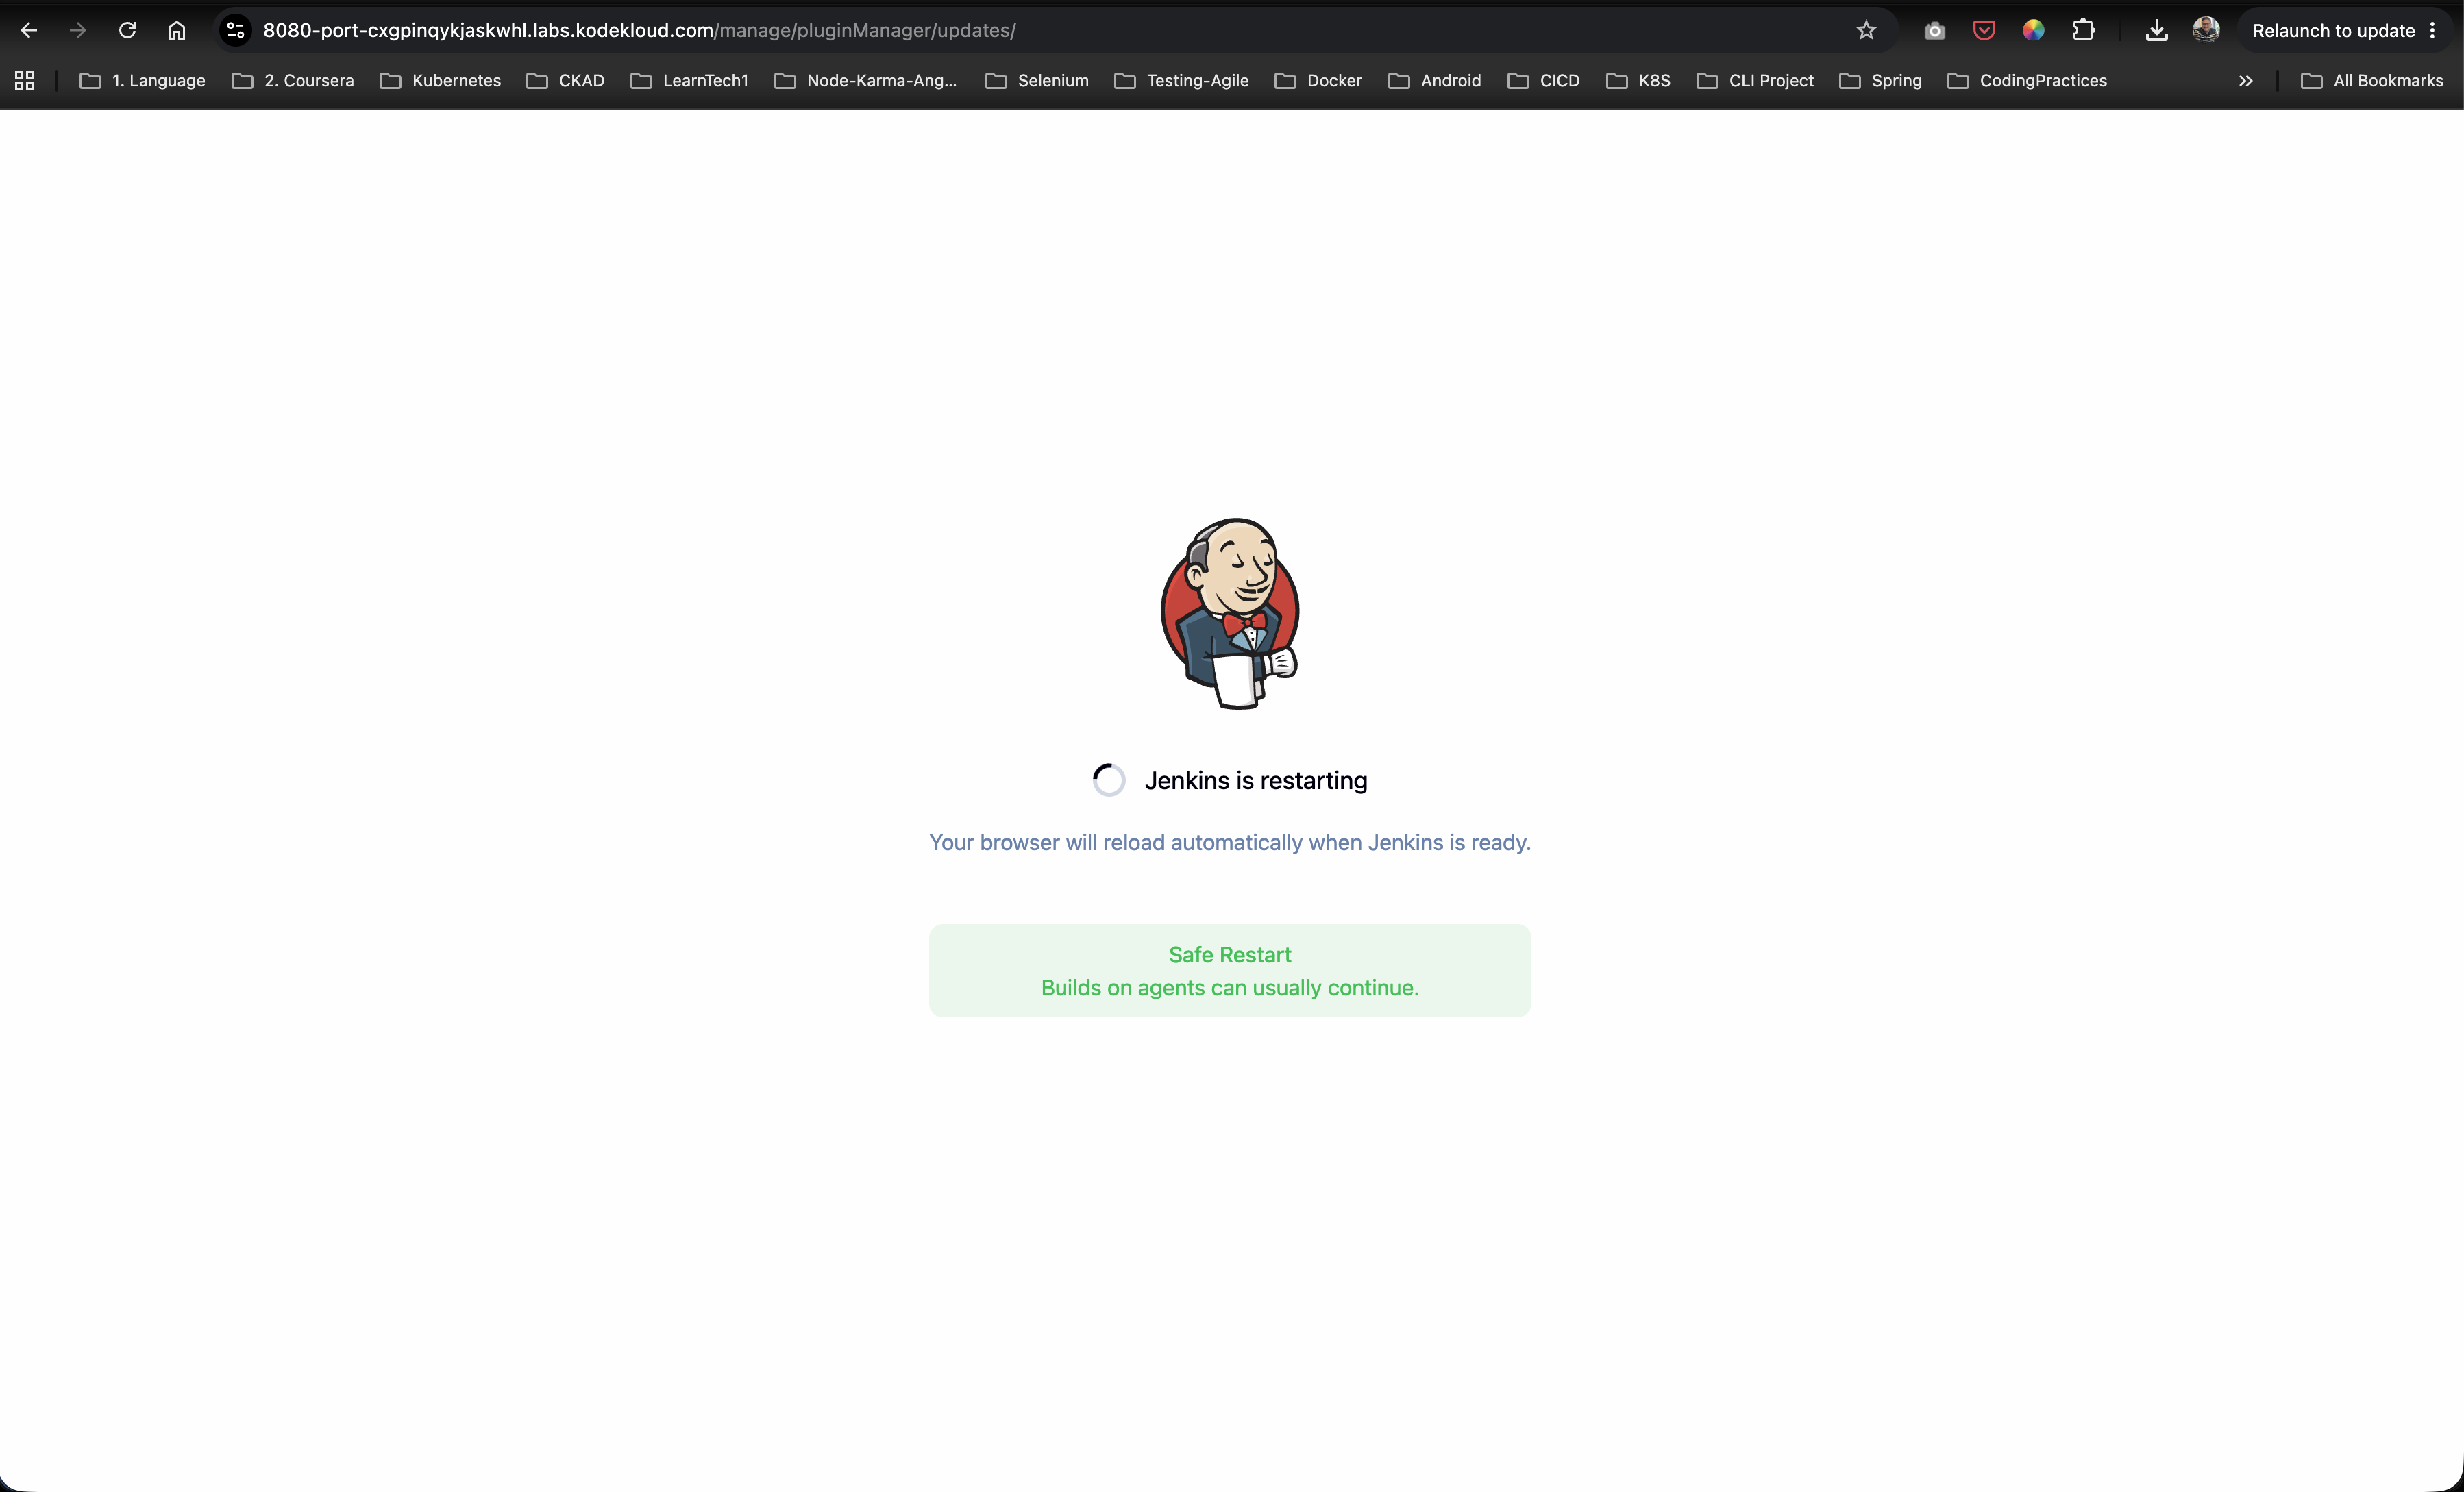
- Wait for Jenkins to initiate its shutdown and restart cycle. Do not close or refresh the page until the login screen reappears:
Step 5: Configure Global Security Strategy
- Log back into the dashboard as
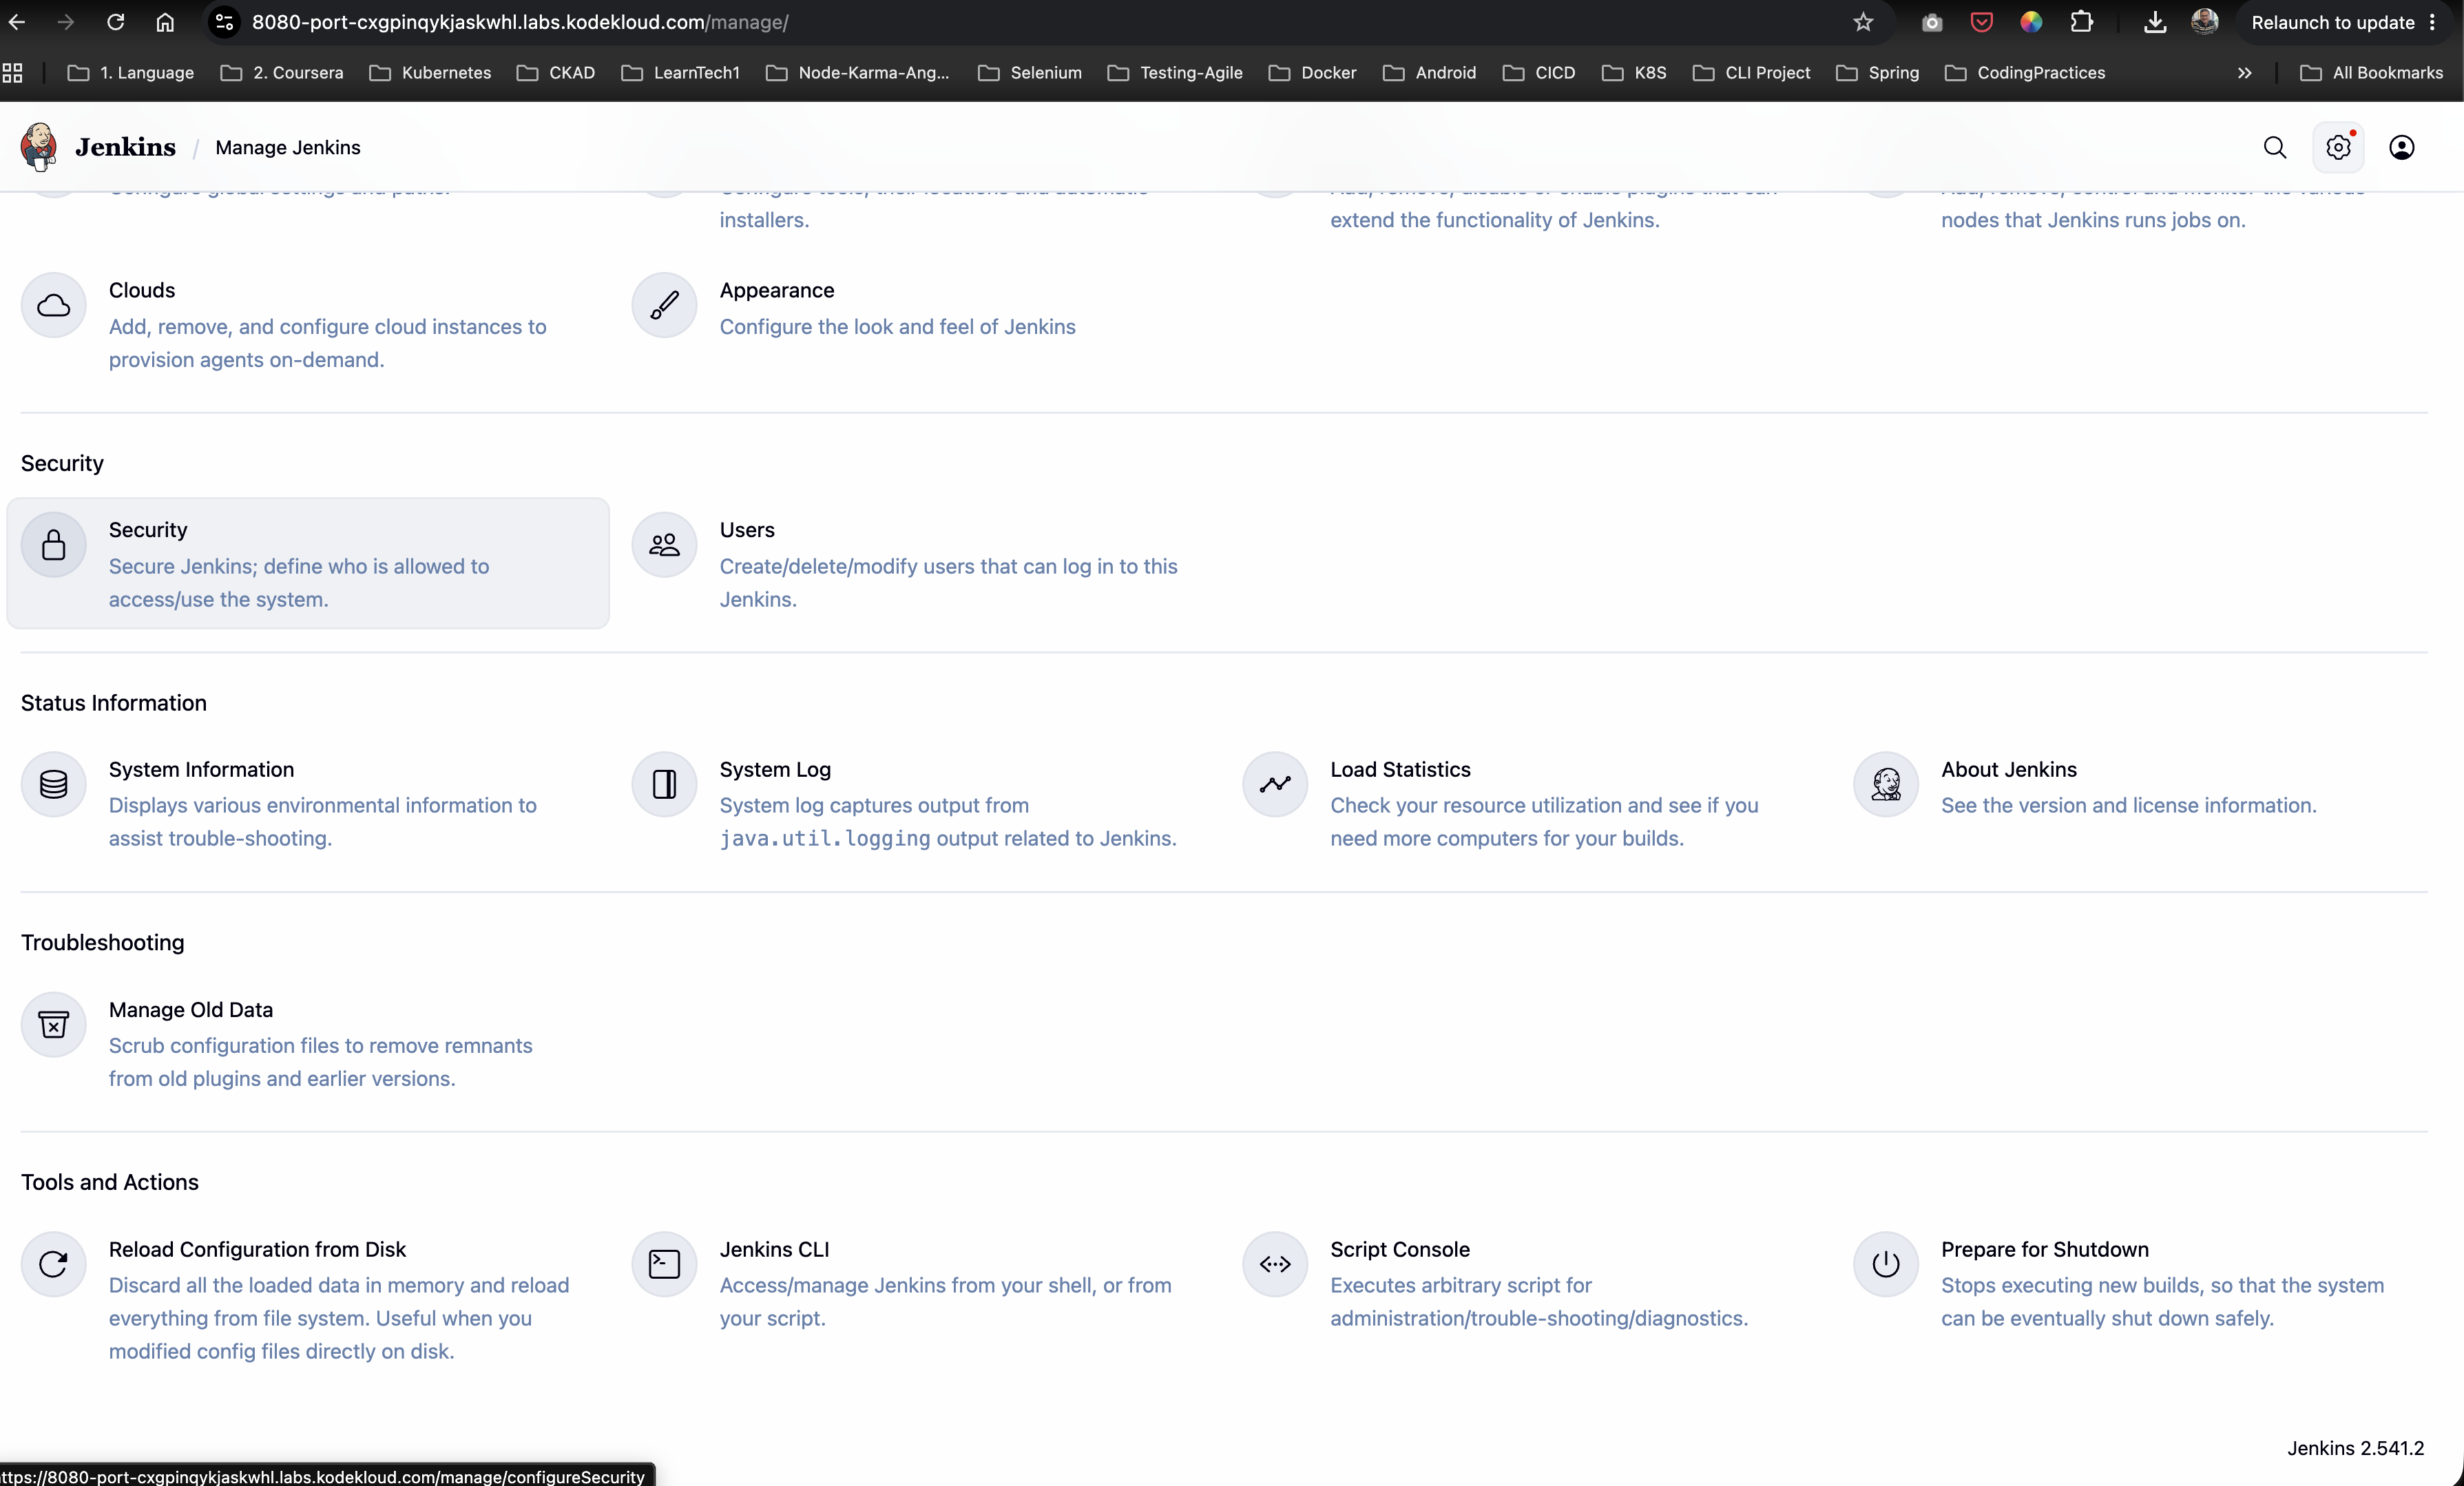
admin(Adm!n321). - Navigate to Manage Jenkins -> Security:
- Scroll down to the Authorization section.
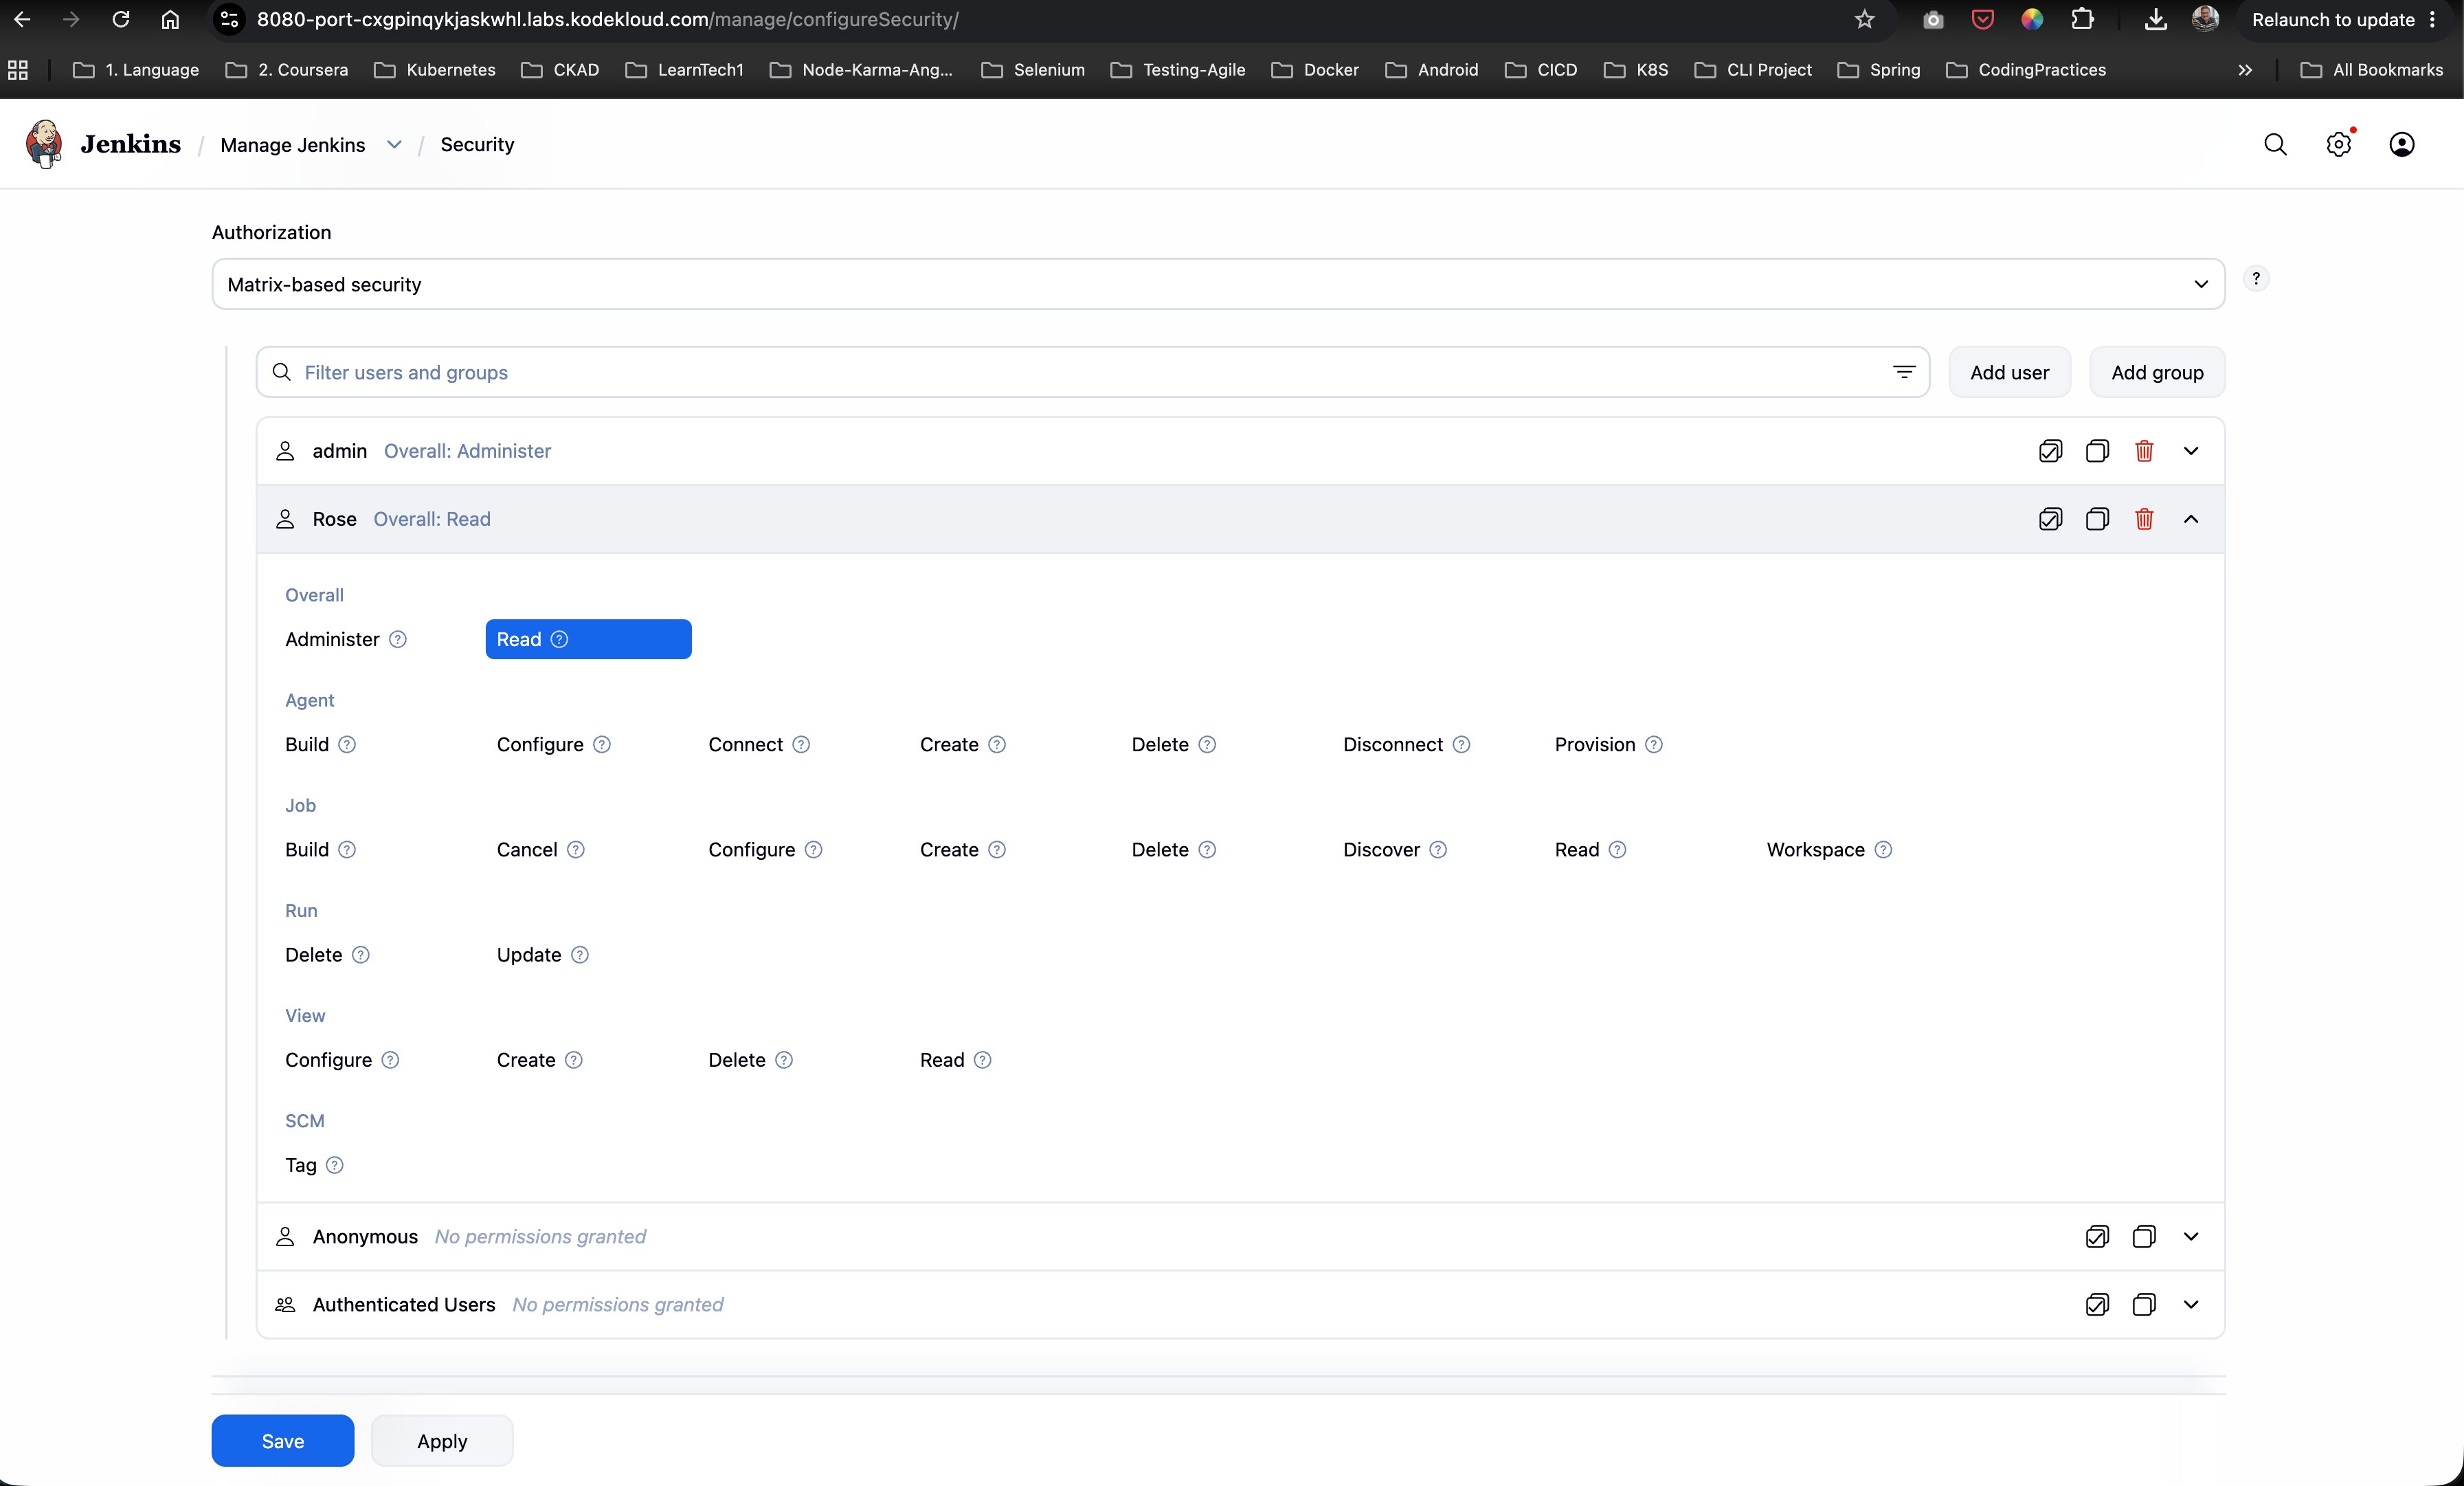
- Change the strategy option from the default selection to Project-based Matrix Authorization Strategy (or Matrix-based security depending on the installed version representation).
- Click Add user to add the user entry for
rose. - For the
roseuser row, check Overall -> Read permission. Make sure all other checkboxes in the row remain unchecked:
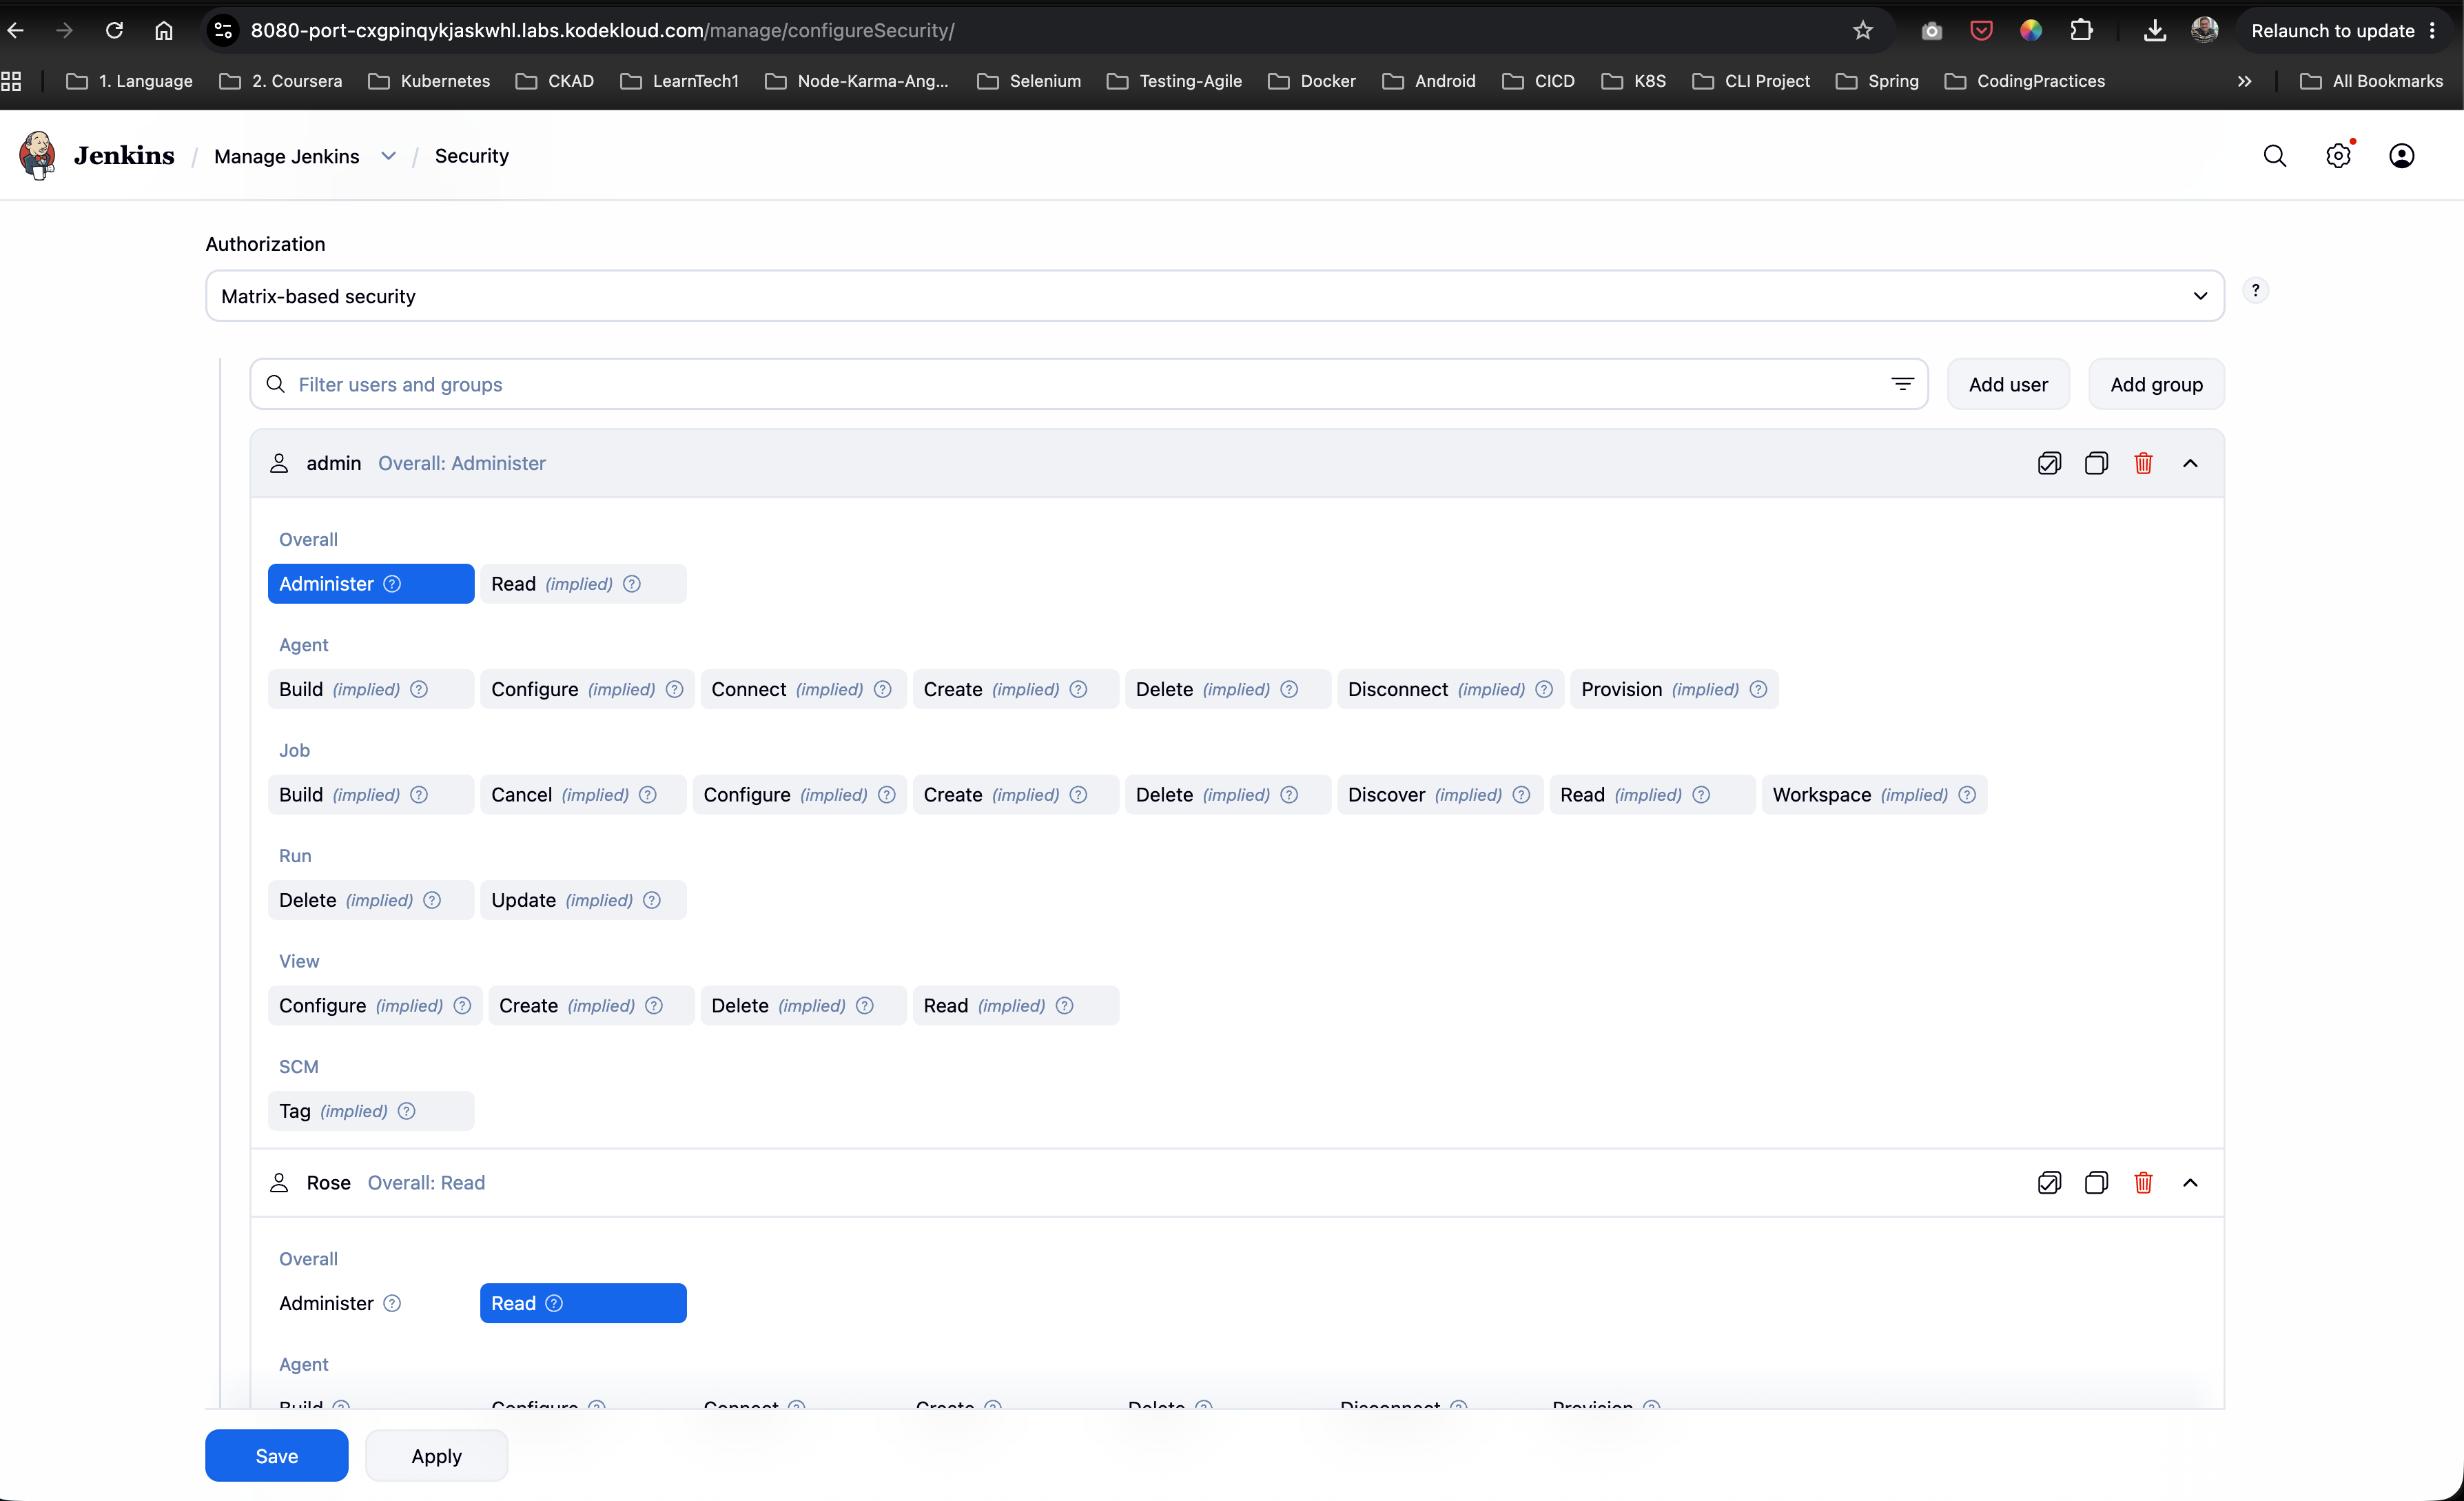
- Verify that:
adminuser retains the Overall -> Administer permission checked (giving them implied access to everything).roseuser has Overall -> Read checked.Anonymoushas all permissions unchecked.
- Click the Save button:
Step 6: Configure Project-Level Permissions
- Go back to the main dashboard.
- Click on the existing job Helloworld.
- Click on Configure in the left-hand navigation pane.
- In the configuration page, scroll down and check the box Enable project-based security.
- Click Add user and enter
rose. - In the permissions grid for
rose, check the Job -> Read box. Keep all other checkboxes (such as Build, SCM, workspace, etc.) unchecked. - Click Save.
Step 7: Verify Access permissions
- Click the user profile icon at the top right and select Log out.
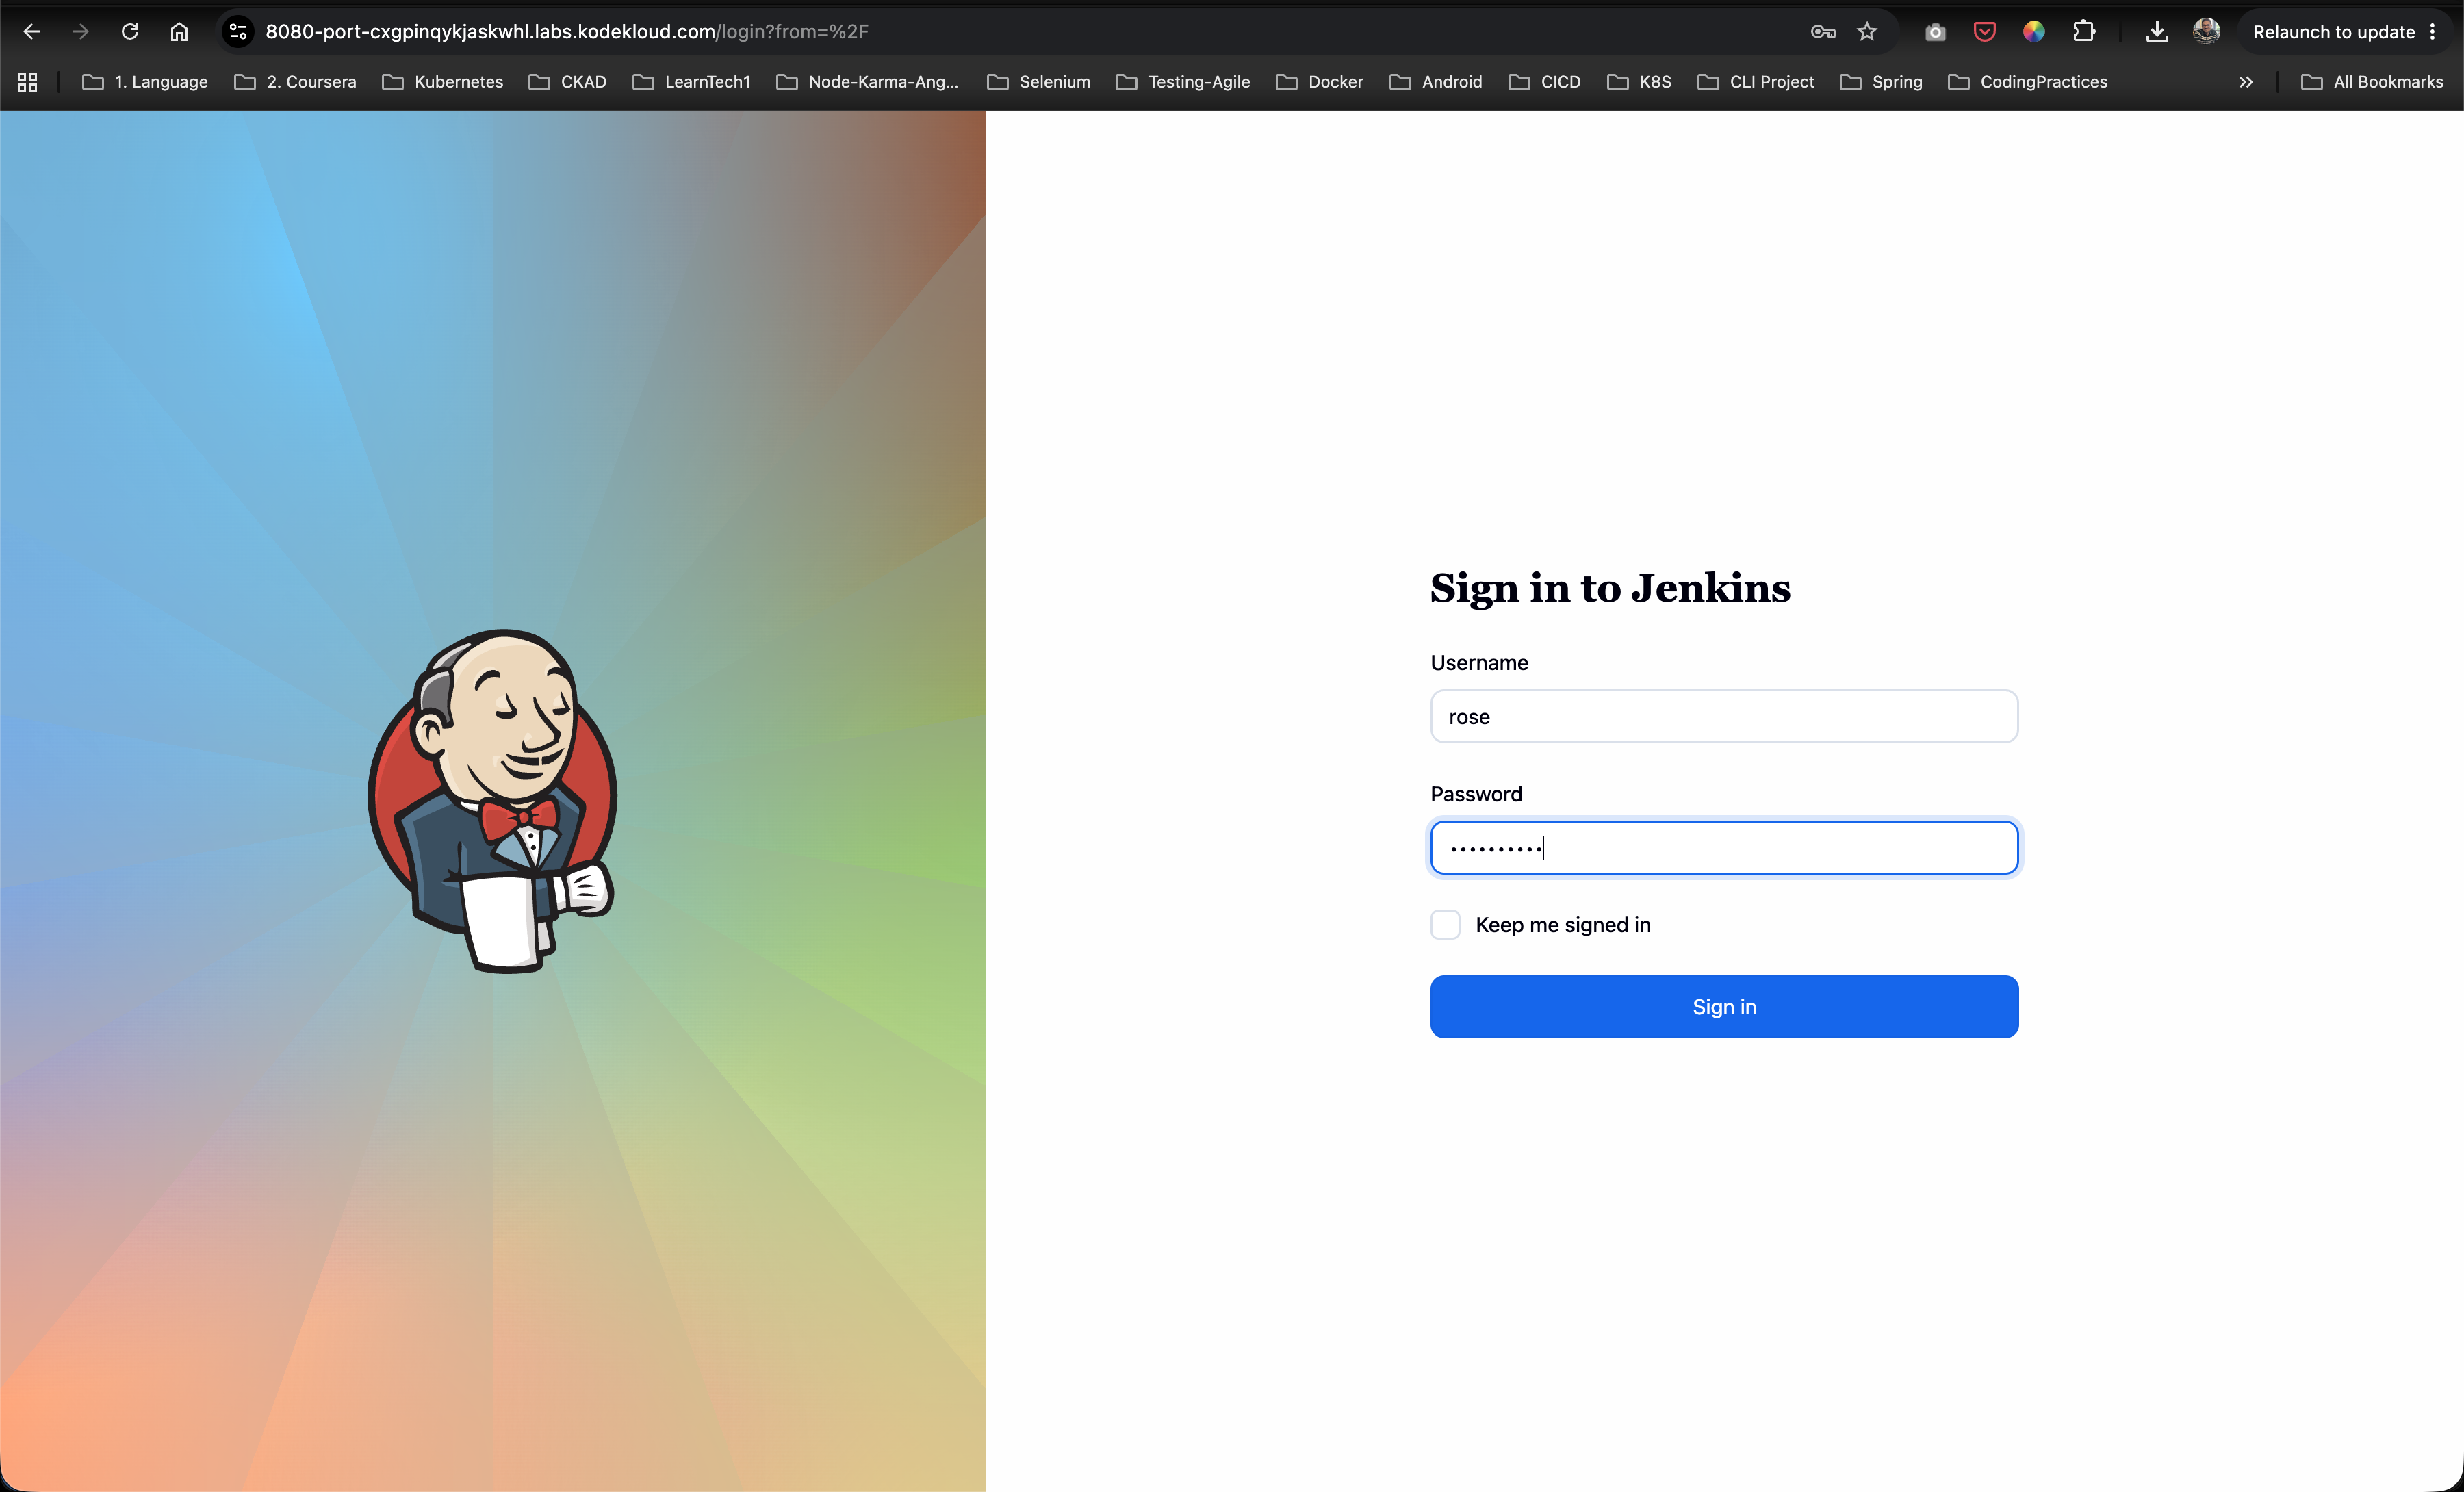
- Log in as user
rosewith passwordTmPcZjtRQx:
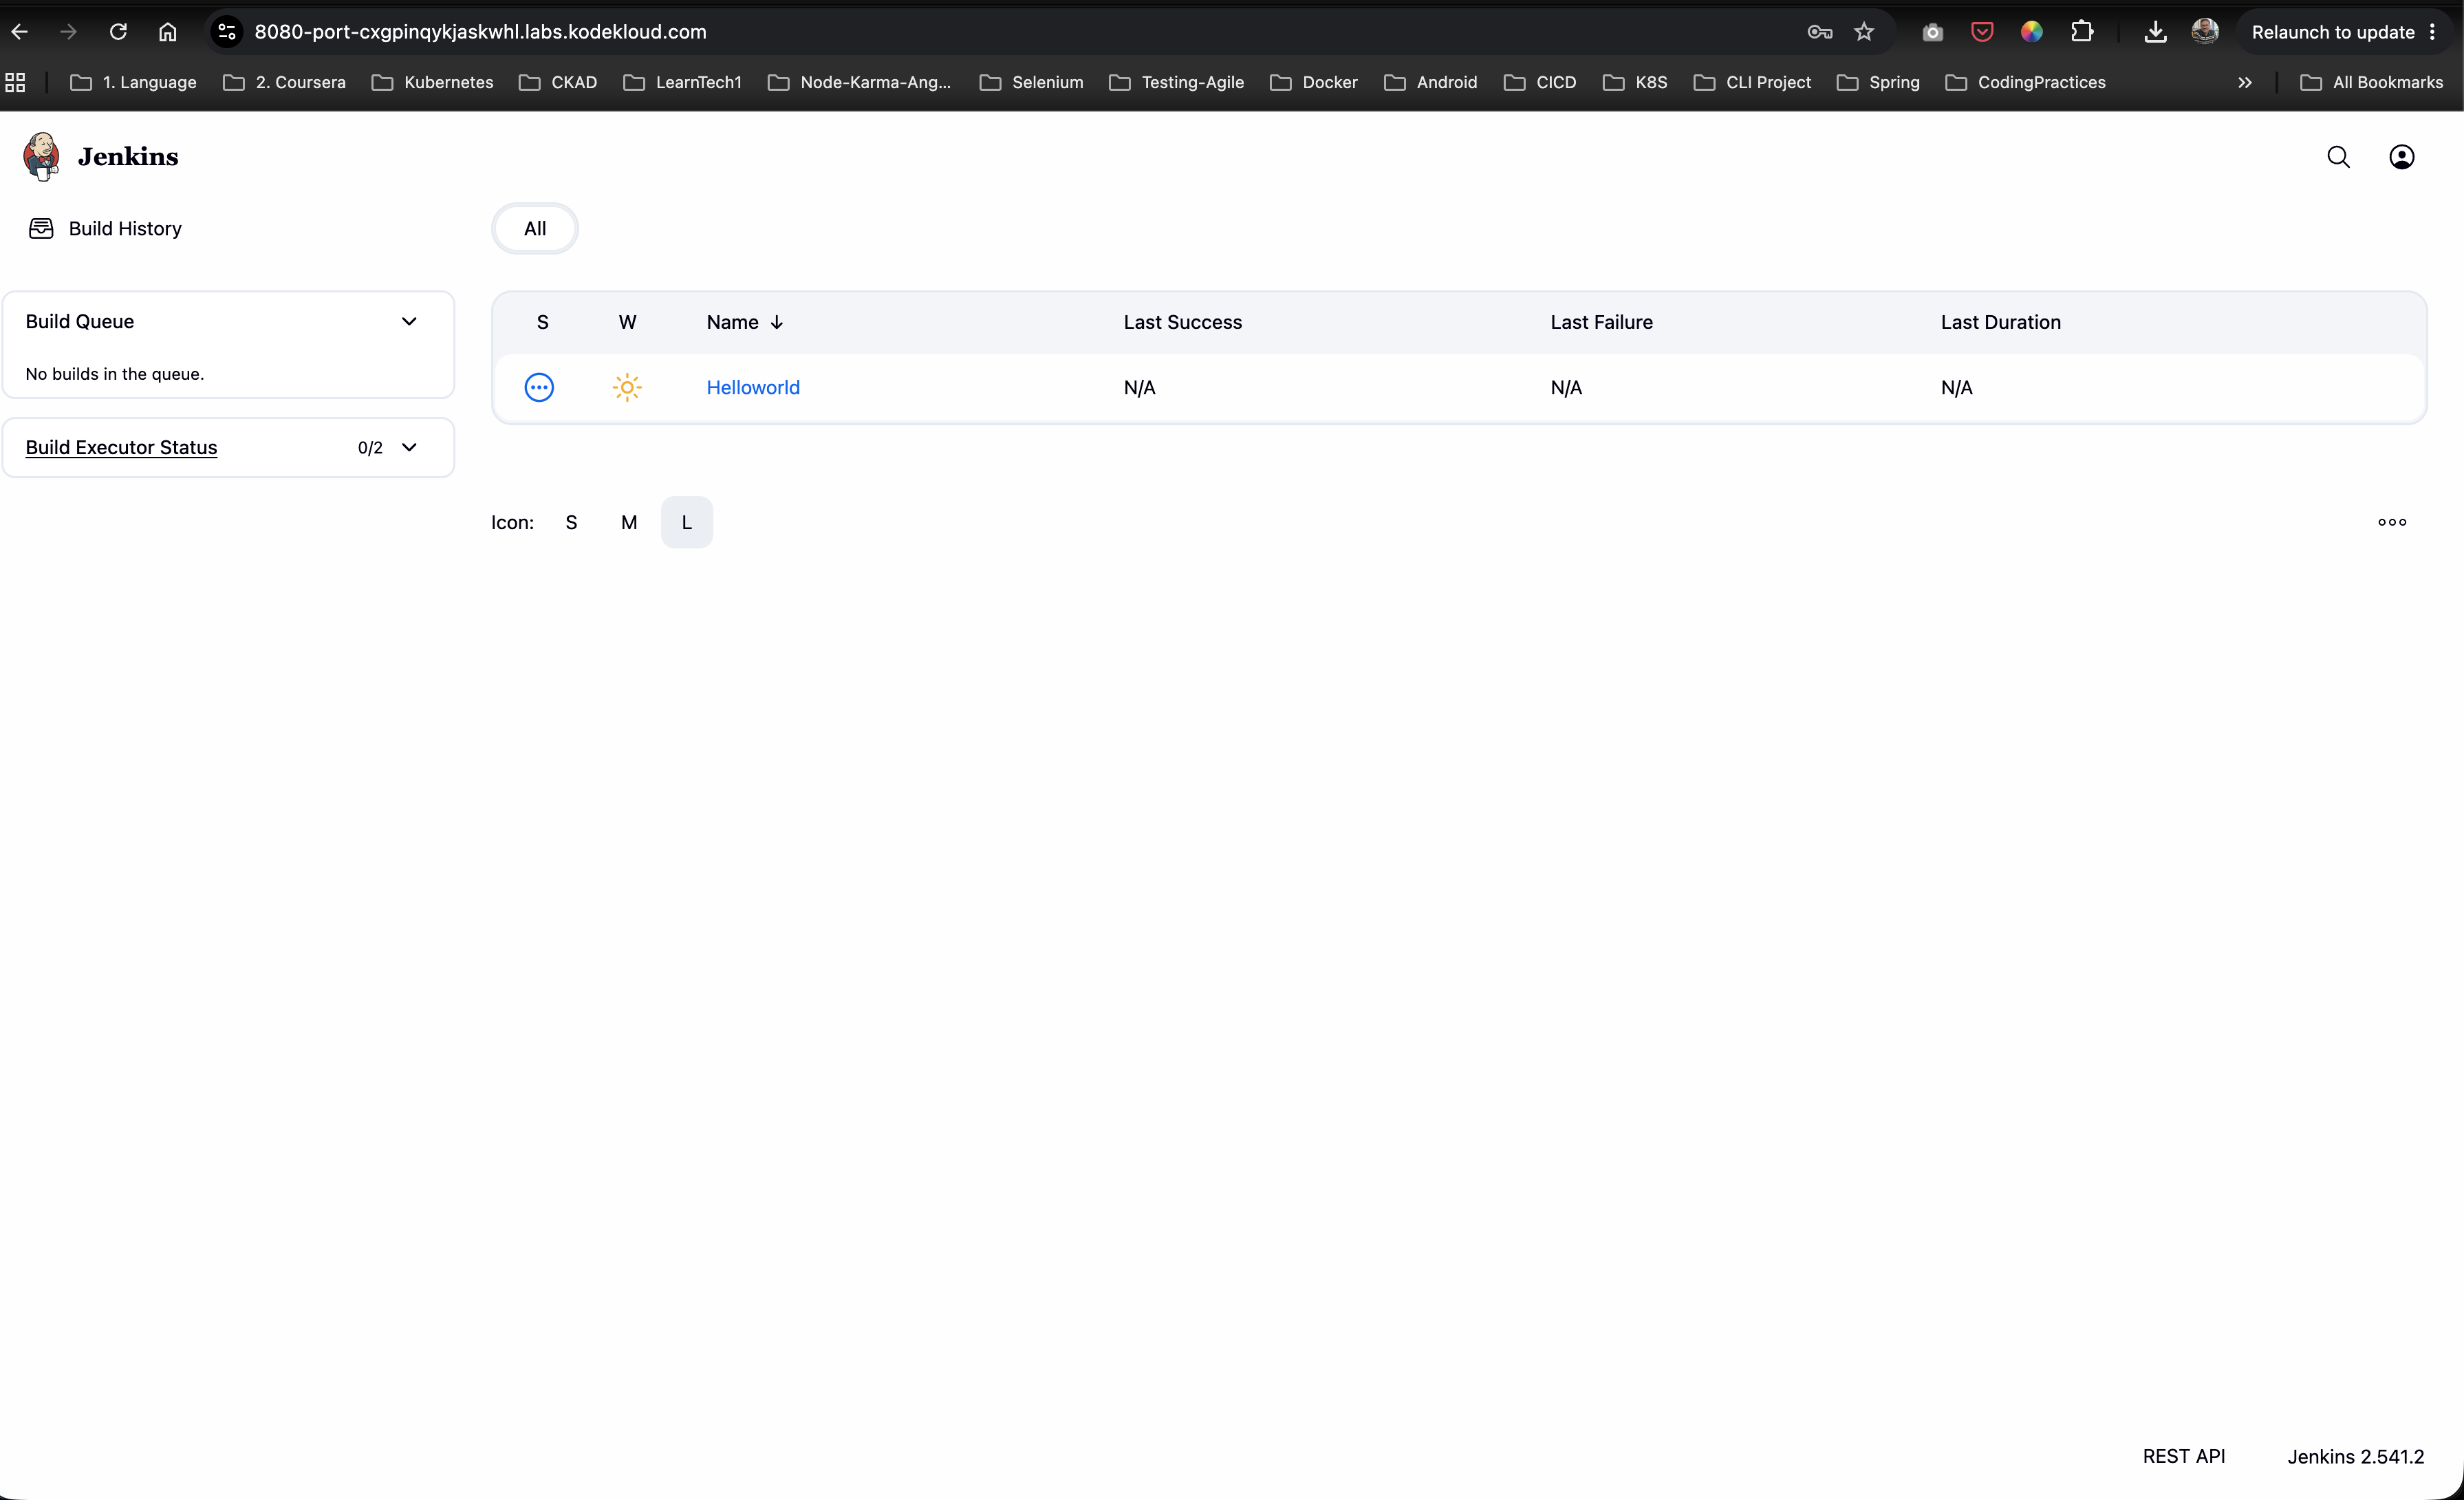
- Confirm that the dashboard loads. The
Helloworldjob is listed, but the sidebar options are restricted (no administrative gear icons or configuration logs are shown):
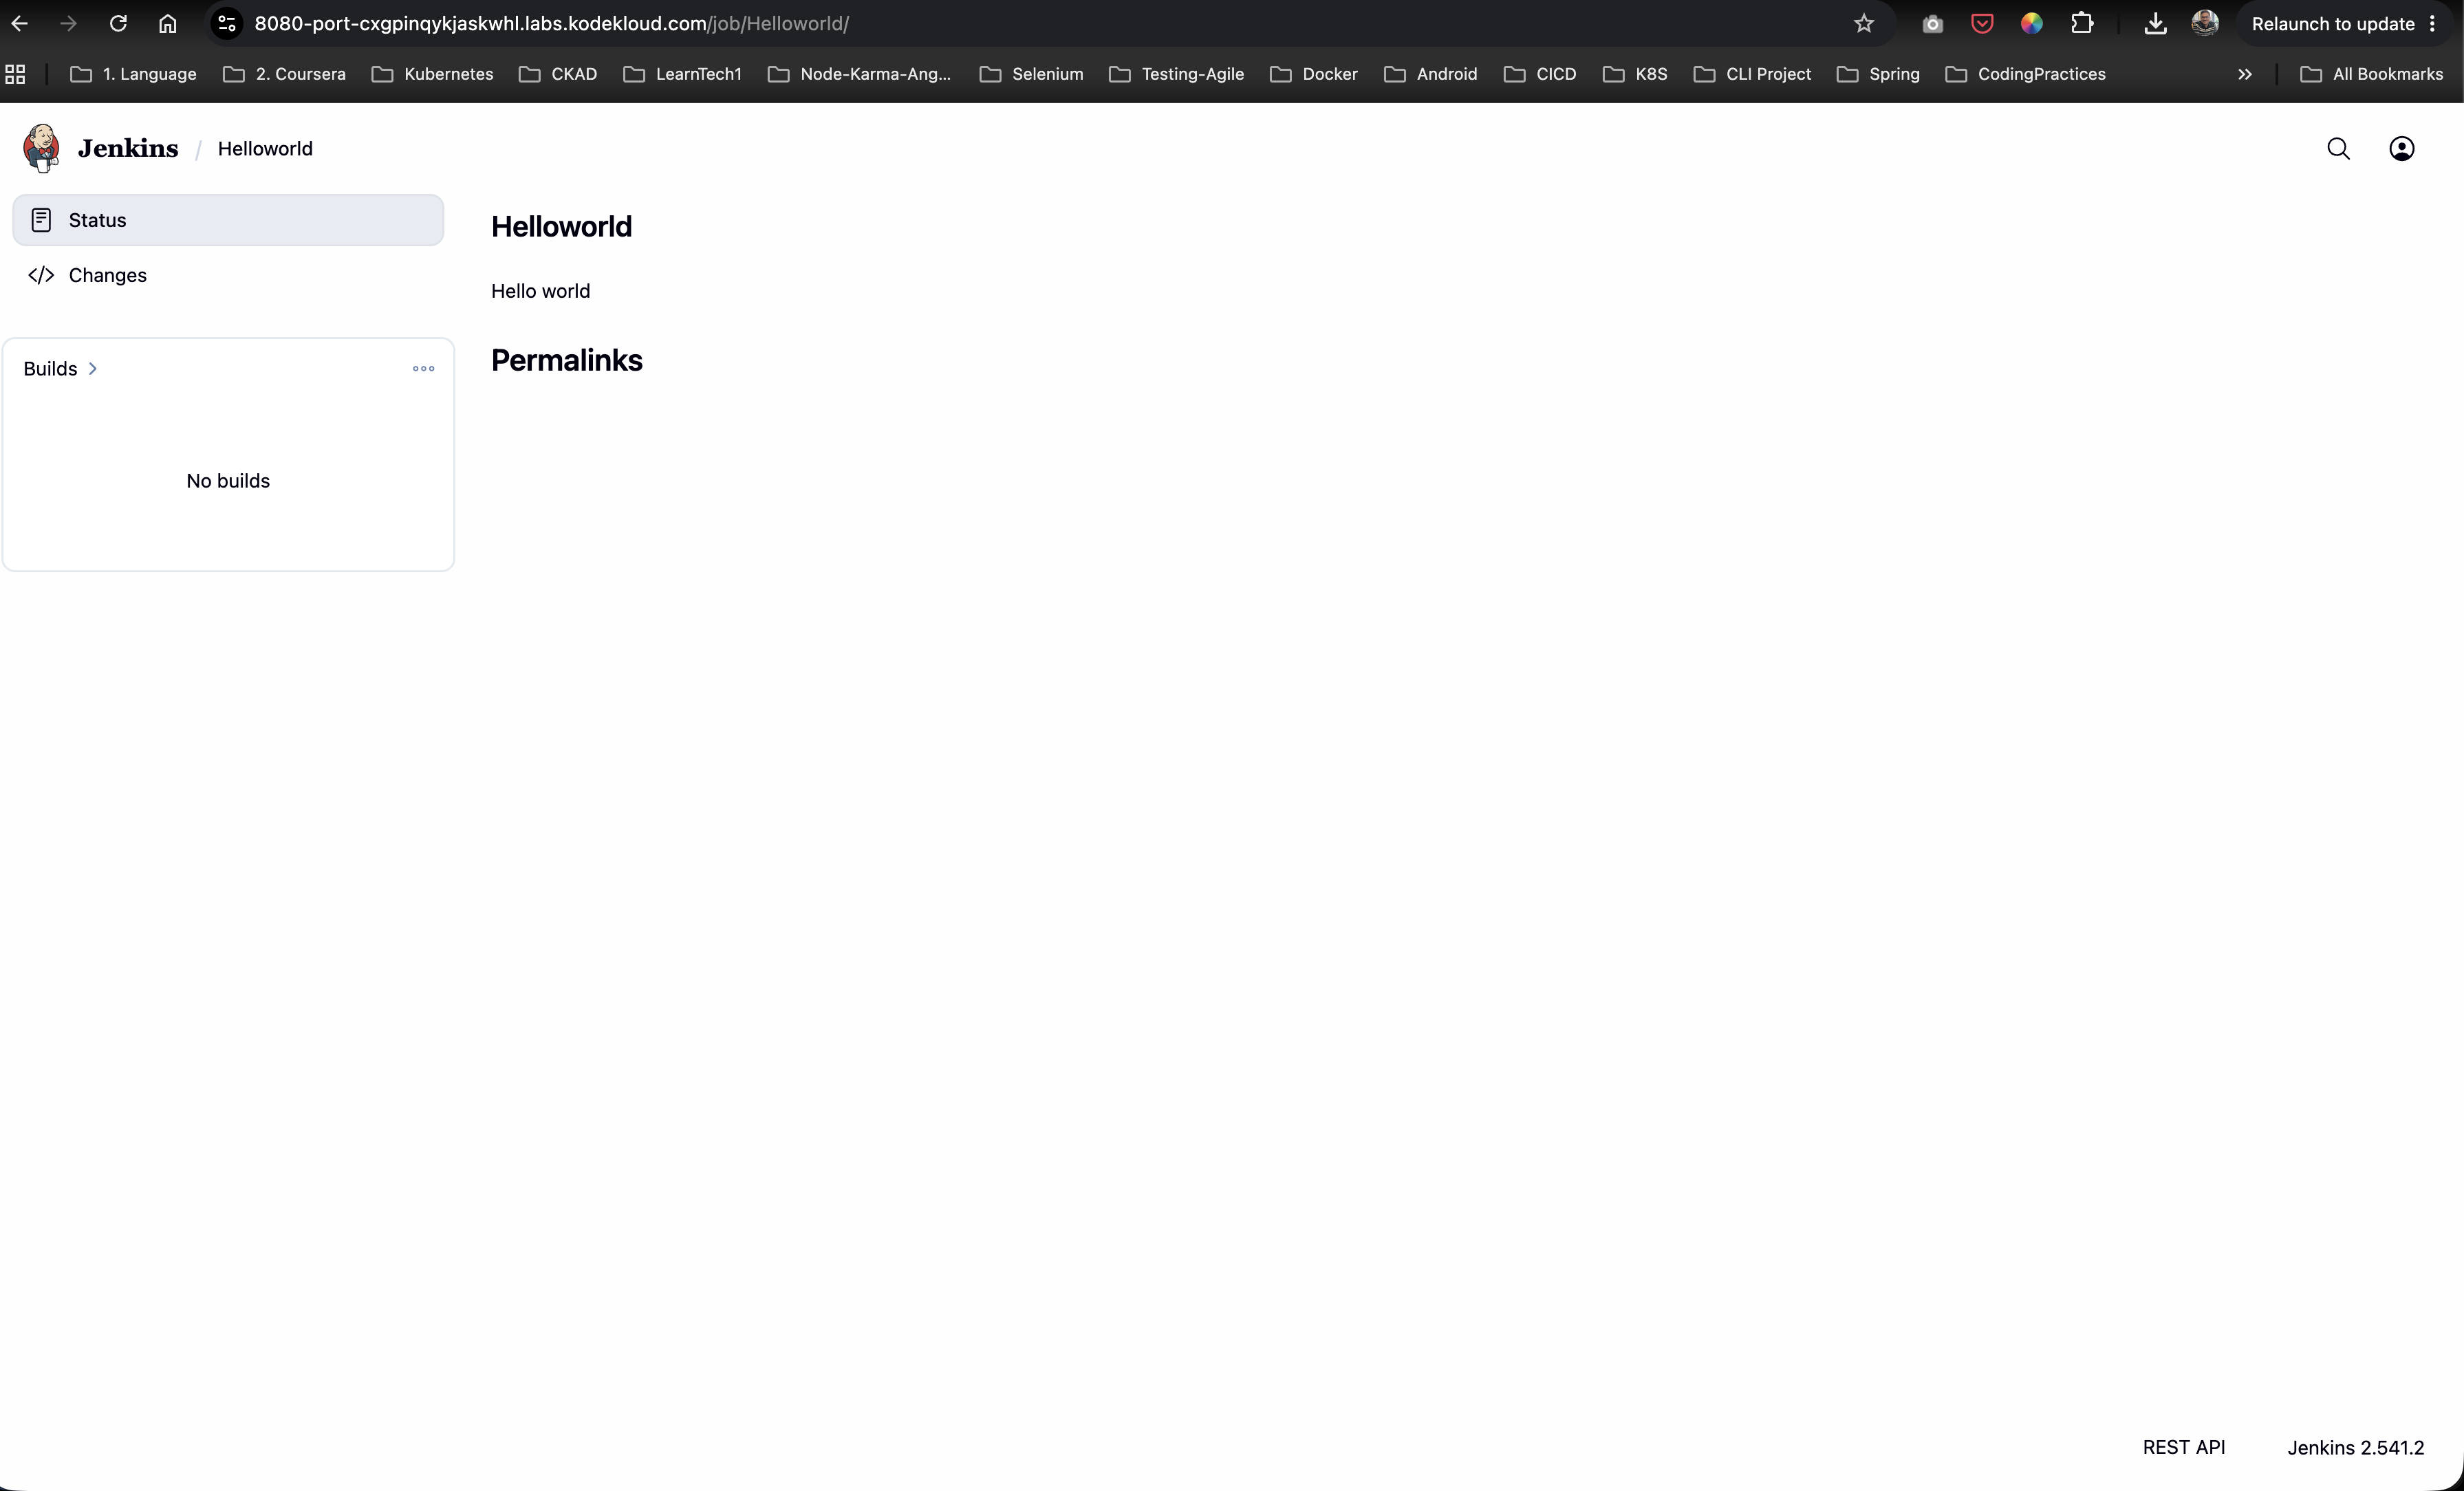
- Click on the
Helloworldjob. Verify thatrosecan only view the status and changes. They cannot trigger new builds (“Build Now” is missing) or adjust configurations (“Configure” is missing):
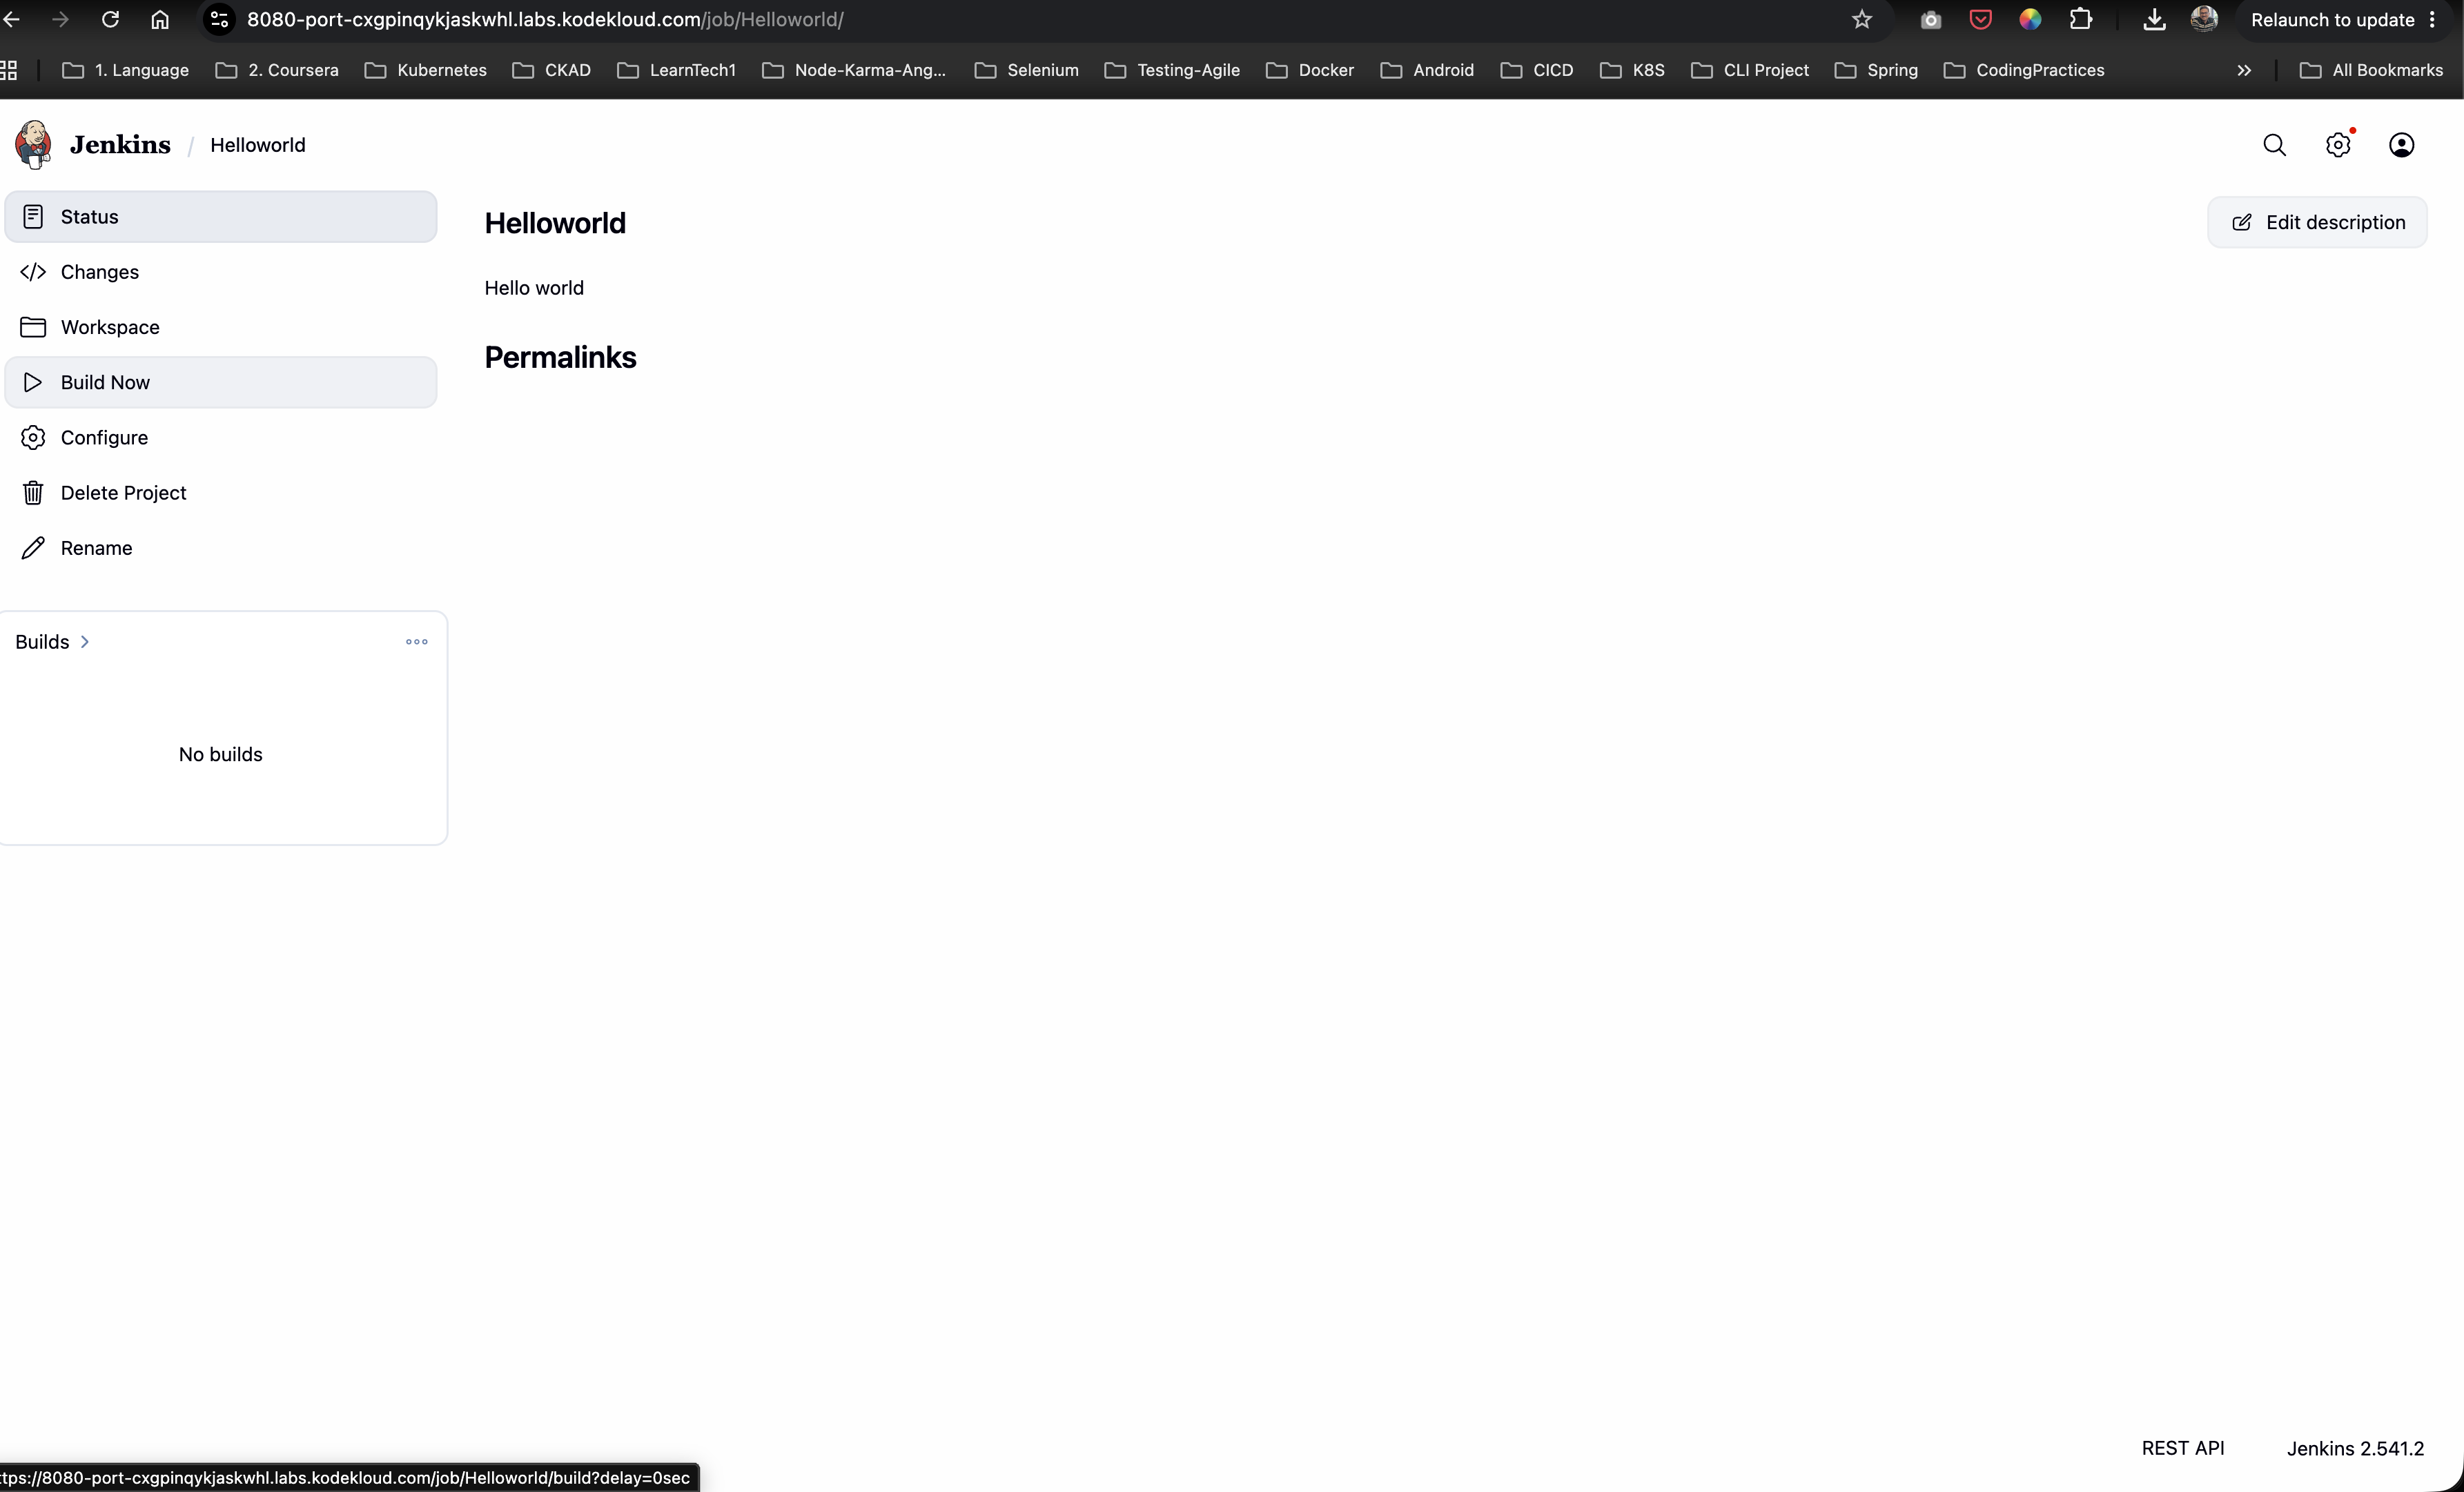
- Log out and log back in as
admin. Access theHelloworldjob to verify that the administrator has full action privileges, including triggering manual builds:
The project authorization policy is now successfully configured!