dev-ops-challenges
Add Jenkins SSH Build Agent Nodes
Technical Overview
As software projects grow in complexity and scale, executing all continuous integration builds on a single Jenkins controller node creates CPU, memory, and disk bottlenecks. To achieve horizontal scalability and workload isolation, Jenkins supports a Distributed Build Architecture using Agent Nodes (formerly known as Slaves).
In this architecture:
- Jenkins Controller (Master): Handles the web UI, parses job configurations, schedules builds, and dispatches build tasks to remote agent nodes.
- SSH Build Agents: Remote Linux machines attached to the controller via SSH. The controller launches a Java remoting process (
slave.jar/agent.jar) on the agent over an SSH channel. - Java 17 Runtime Prerequisite: Modern Jenkins controllers and agent remoting protocols require Java 17 OpenJDK installed on every target agent server to initialize the agent JVM runtime.
- Label-Based Scheduling: Labels assigned to each node (
stapp01,stapp02,stapp03) allow pipeline jobs to target specific application environments or infrastructure types.
graph TD
    subgraph ControllerLayer ["Jenkins Controller"]
        UI["Jenkins Web UI / Scheduler"]
        AgentPlugin["SSH Build Agents Plugin"]
    end

    subgraph AppServer1 ["App Server 1: stapp01"]
        JVM1["Java 17 OpenJDK Runtime"]
        Remoting1["Jenkins Agent Process<br/>Remote Root: /home/tony/jenkins"]
    end

    subgraph AppServer2 ["App Server 2: stapp02"]
        JVM2["Java 17 OpenJDK Runtime"]
        Remoting2["Jenkins Agent Process<br/>Remote Root: /home/steve/jenkins"]
    end

    subgraph AppServer3 ["App Server 3: stapp03"]
        JVM3["Java 17 OpenJDK Runtime"]
        Remoting3["Jenkins Agent Process<br/>Remote Root: /home/banner/jenkins"]
    end

    UI -->|"Dispatches Jobs"| AgentPlugin
    AgentPlugin -->|"1. SSH Connection - User: tony"| Remoting1
    AgentPlugin -->|"2. SSH Connection - User: steve"| Remoting2
    AgentPlugin -->|"3. SSH Connection - User: banner"| Remoting3

    Remoting1 --- JVM1
    Remoting2 --- JVM2
    Remoting3 --- JVM3
Distributed Agent Architecture Deep Dive
1. SSH Agent Launch Protocol
When a node configured with the Launch agents via SSH method is initialized:
- The Jenkins controller connects to the remote host over TCP port
22using SSH credentials. - The controller automatically uploads or verifies the
remoting.jarbinary inside the node’s Remote root directory. - The controller executes
java -jar remoting.jaron the remote host, establishing a bidirectional channel between controller and agent.
2. Java 17 Dependency
Jenkins version 2.357+ requires Java 17 for both controller and agent remoting processes. If Java 17 is missing on the remote agent node, the SSH connection attempt will fail with java: command not found or Java version mismatch errors.
3. Remote Working Directory Isolation
Each agent node defines an isolated workspace root:
App_server_1:/home/tony/jenkinsApp_server_2:/home/steve/jenkinsApp_server_3:/home/banner/jenkins
All build checkouts, temporary artifacts, and workspace files for jobs assigned to a specific node are scoped within its designated root directory.
Infrastructure & Configuration Requirements
- Jenkins Controller Access: Web Browser (HTTP) on port
8080 - Admin Credentials:
admin/Adm!n321 - Required Plugin:
SSH Build Agents
Agent Node Specifications Matrix
| Node Name | Hostname / IP | Label | Remote Root Directory | SSH Username | SSH Password |
|---|---|---|---|---|---|
App_server_1 |
stapp01 |
stapp01 |
/home/tony/jenkins |
tony |
Ir0nMan |
App_server_2 |
stapp02 |
stapp02 |
/home/steve/jenkins |
steve |
Am3r!ca |
App_server_3 |
stapp03 |
stapp03 |
/home/banner/jenkins |
banner |
BigBanner |
Step-by-Step Walkthrough
Step 0: Install Java 17 OpenJDK on Each Application Server
Before adding the nodes in Jenkins UI, install Java 17 OpenJDK on stapp01, stapp02, and stapp03 so the Jenkins agent remoting process can execute successfully:
- Install Java 17 on App Server 1 (
stapp01):ssh tony@stapp01 sudo dnf install -y java-17-openjdk-devel java -version - Install Java 17 on App Server 2 (
stapp02):ssh steve@stapp02 sudo dnf install -y java-17-openjdk-devel java -version - Install Java 17 on App Server 3 (
stapp03):ssh banner@stapp03 sudo dnf install -y java-17-openjdk-devel java -version
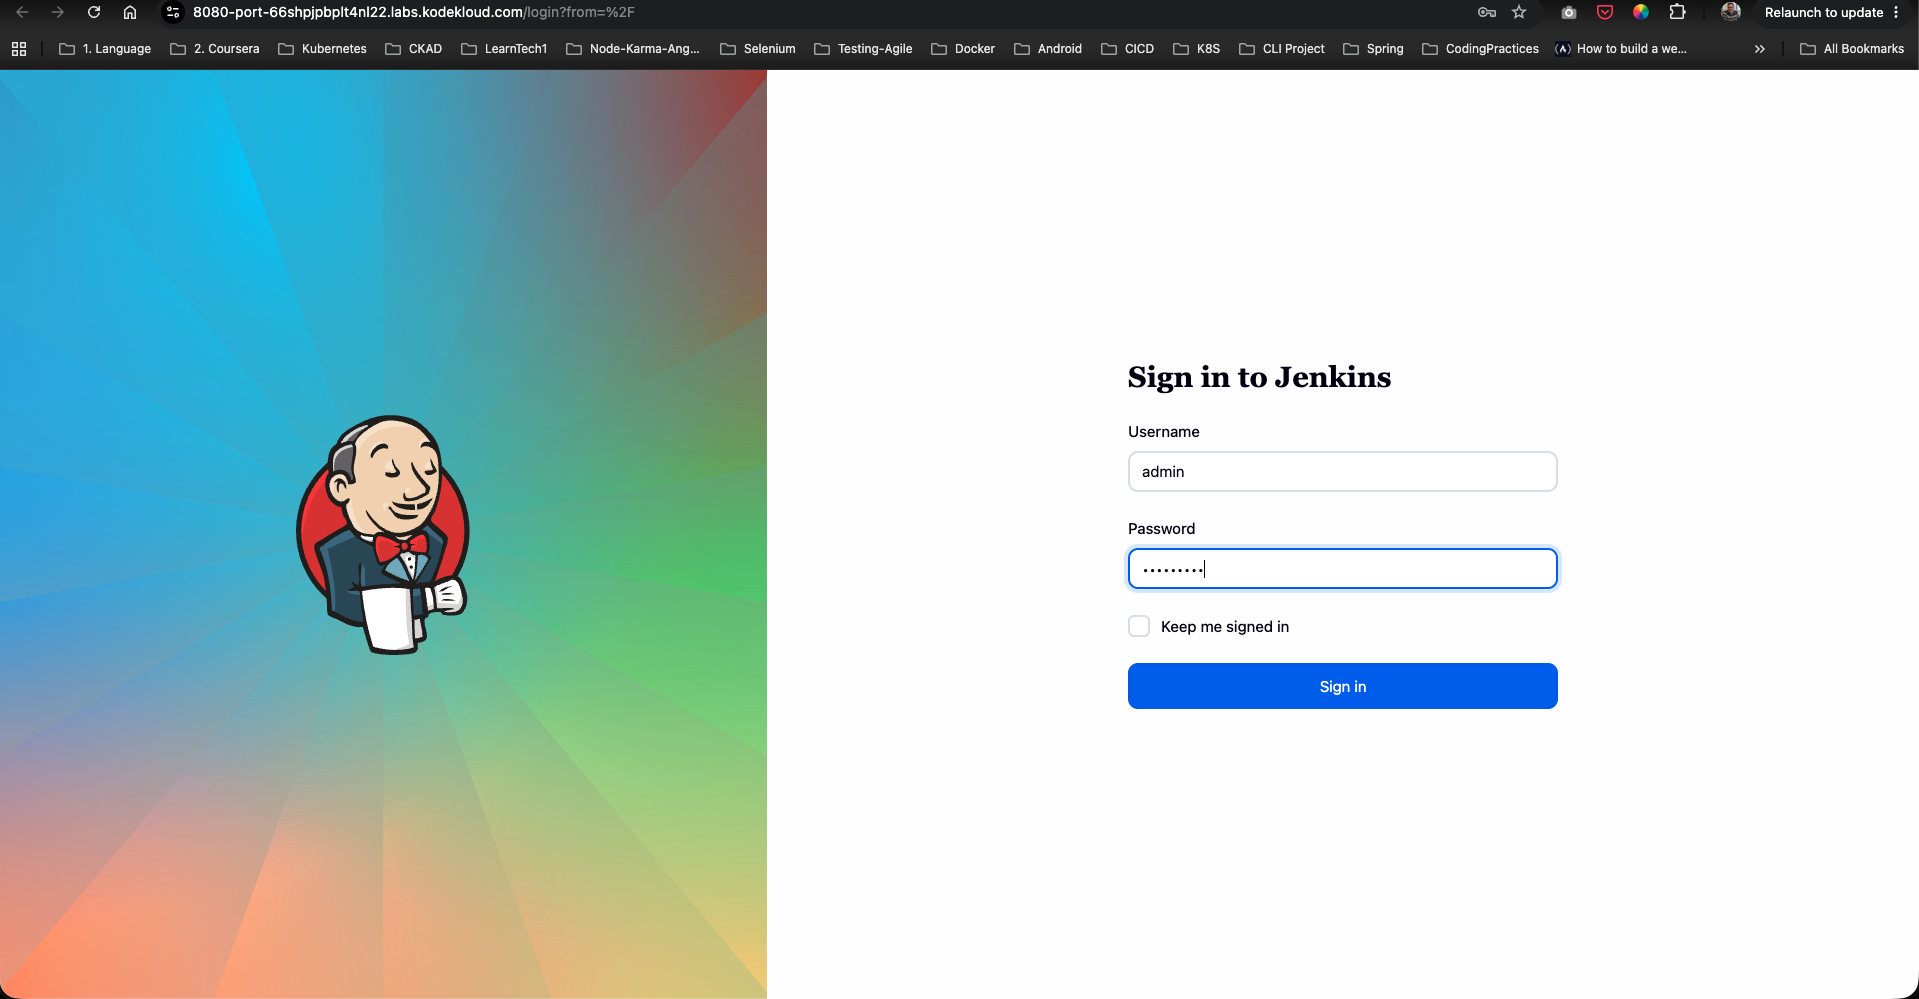
Step 1: Log in to the Jenkins Console
- Open your browser and navigate to the Jenkins login interface.
- Sign in using the administrative credentials:
- Username:
admin - Password:
Adm!n321
- Username:
Step 2: Access the Dashboard
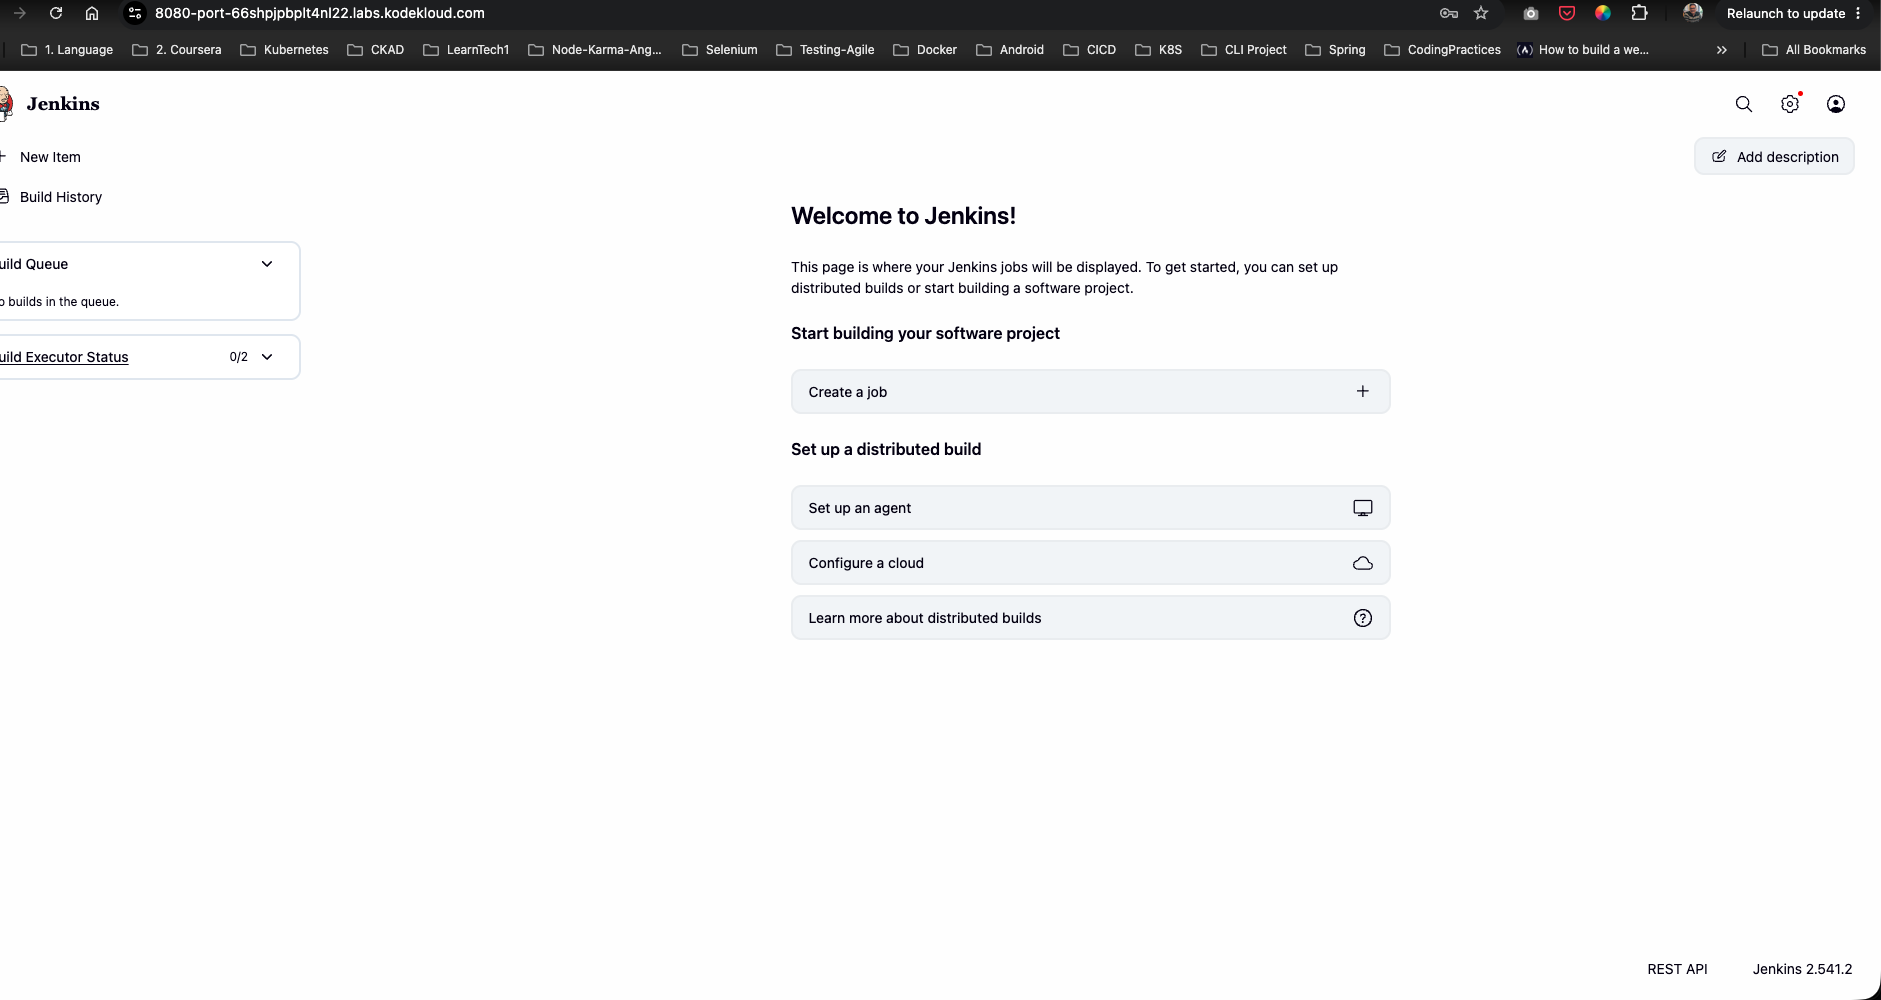
Upon successful authentication, verify access to the main landing page:
Step 3: Open Manage Jenkins
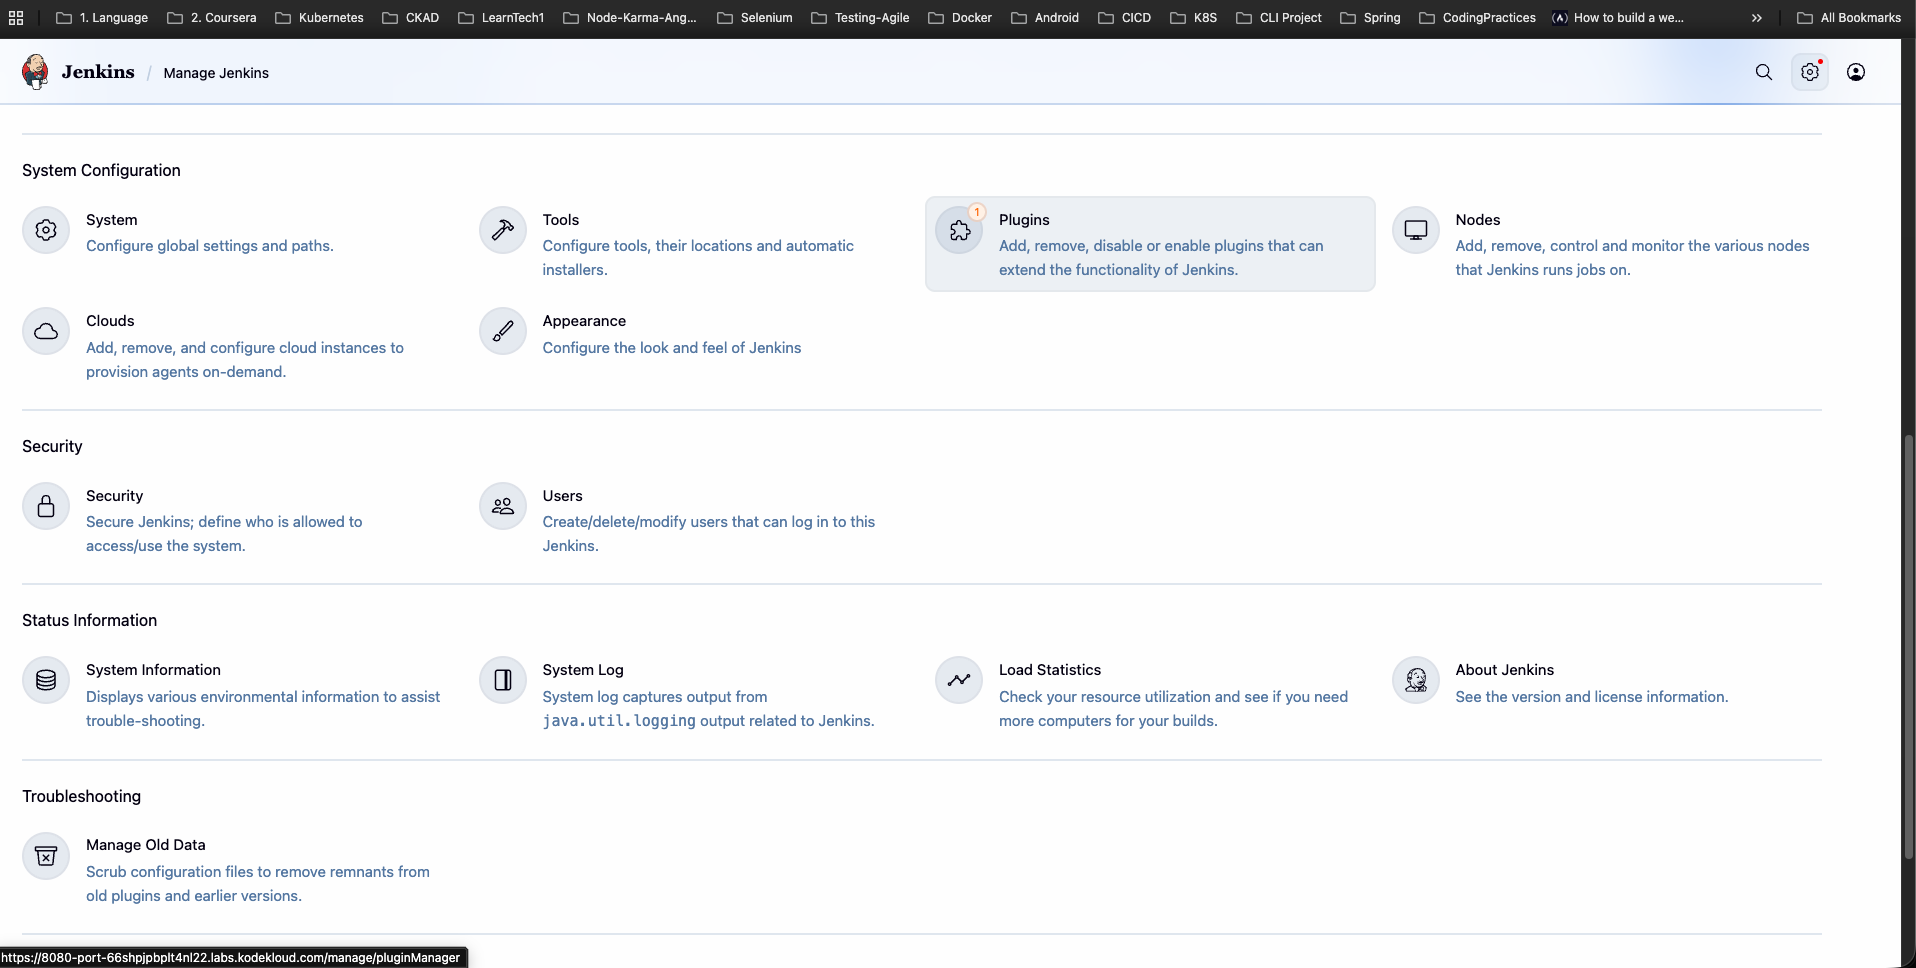
From the left navigation sidebar, click Manage Jenkins:
Step 4: Install the SSH Build Agents Plugin
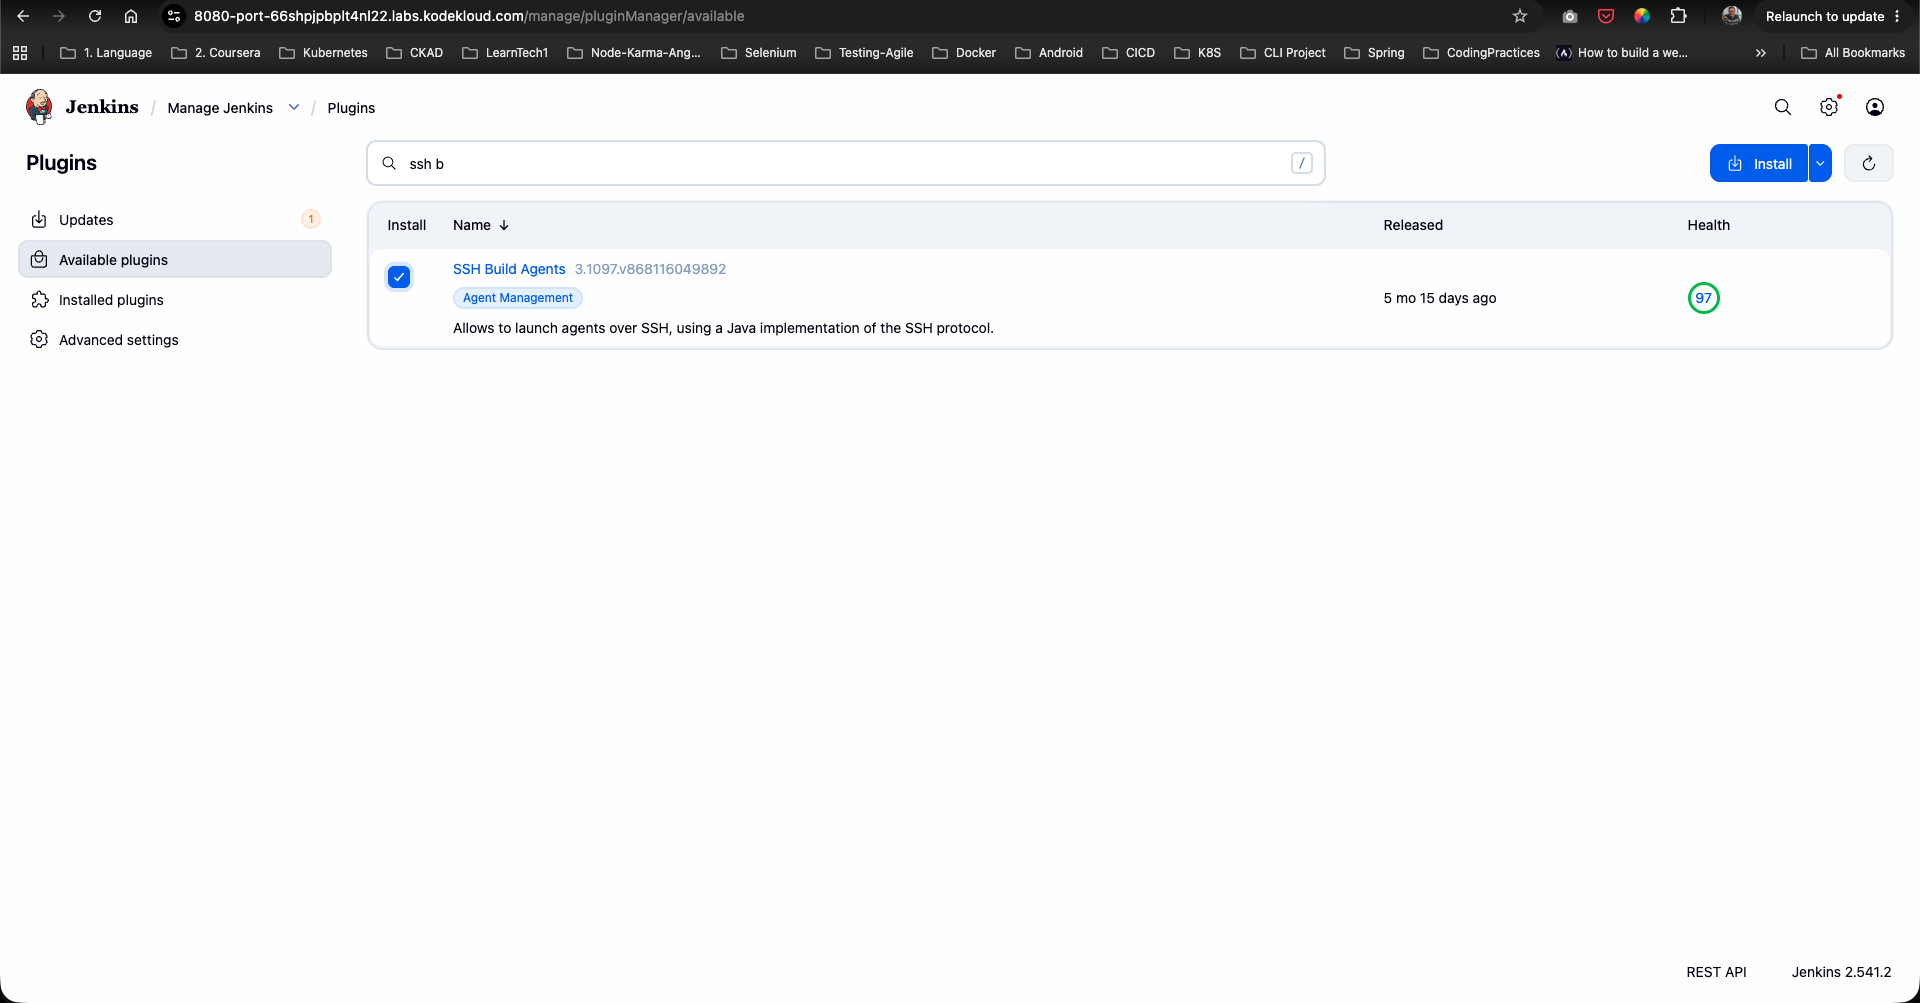
- Under System Configuration, click Plugins.
- Go to the Available plugins tab and search for
ssh build agents. - Select SSH Build Agents and click Install.
Step 5: Complete Installation and Restart Jenkins
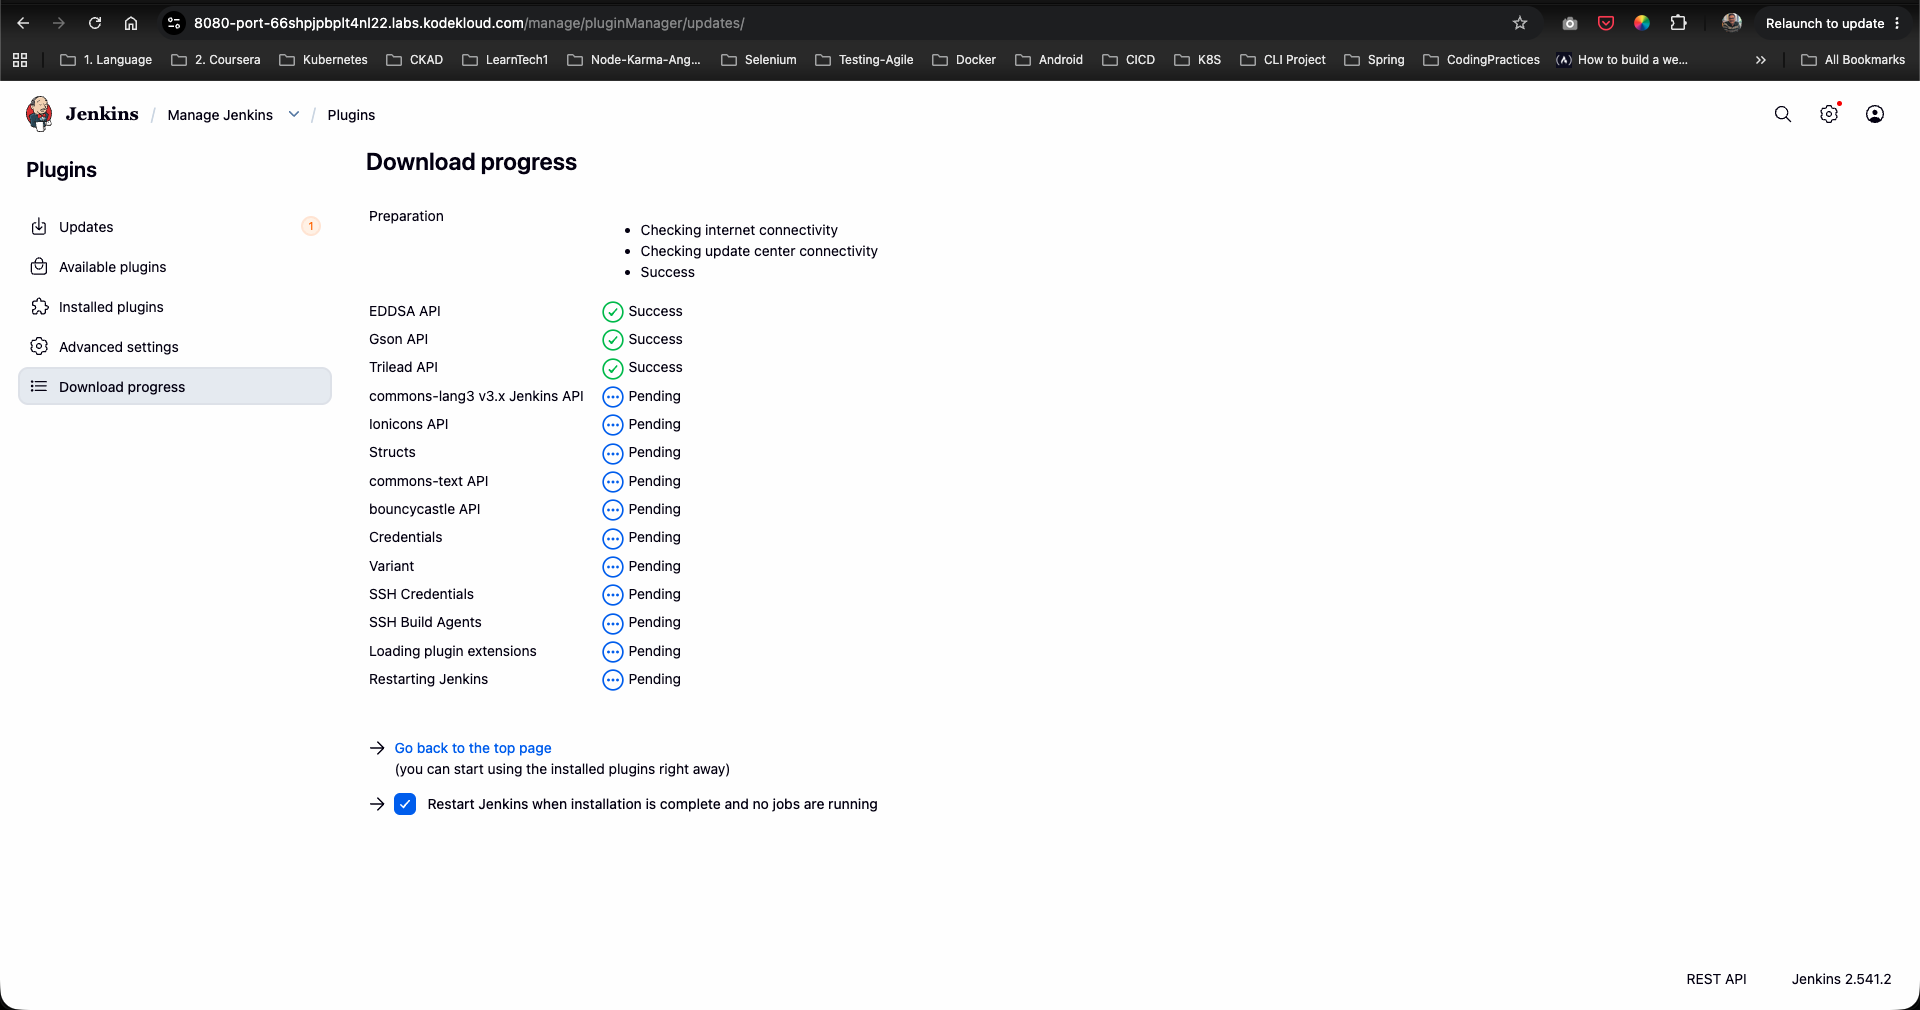
- On the plugin installation progress page, check Restart Jenkins when installation is complete and no jobs are running.
- Wait for Jenkins to reboot and refresh the login session.
Step 6: Navigate to Nodes Management
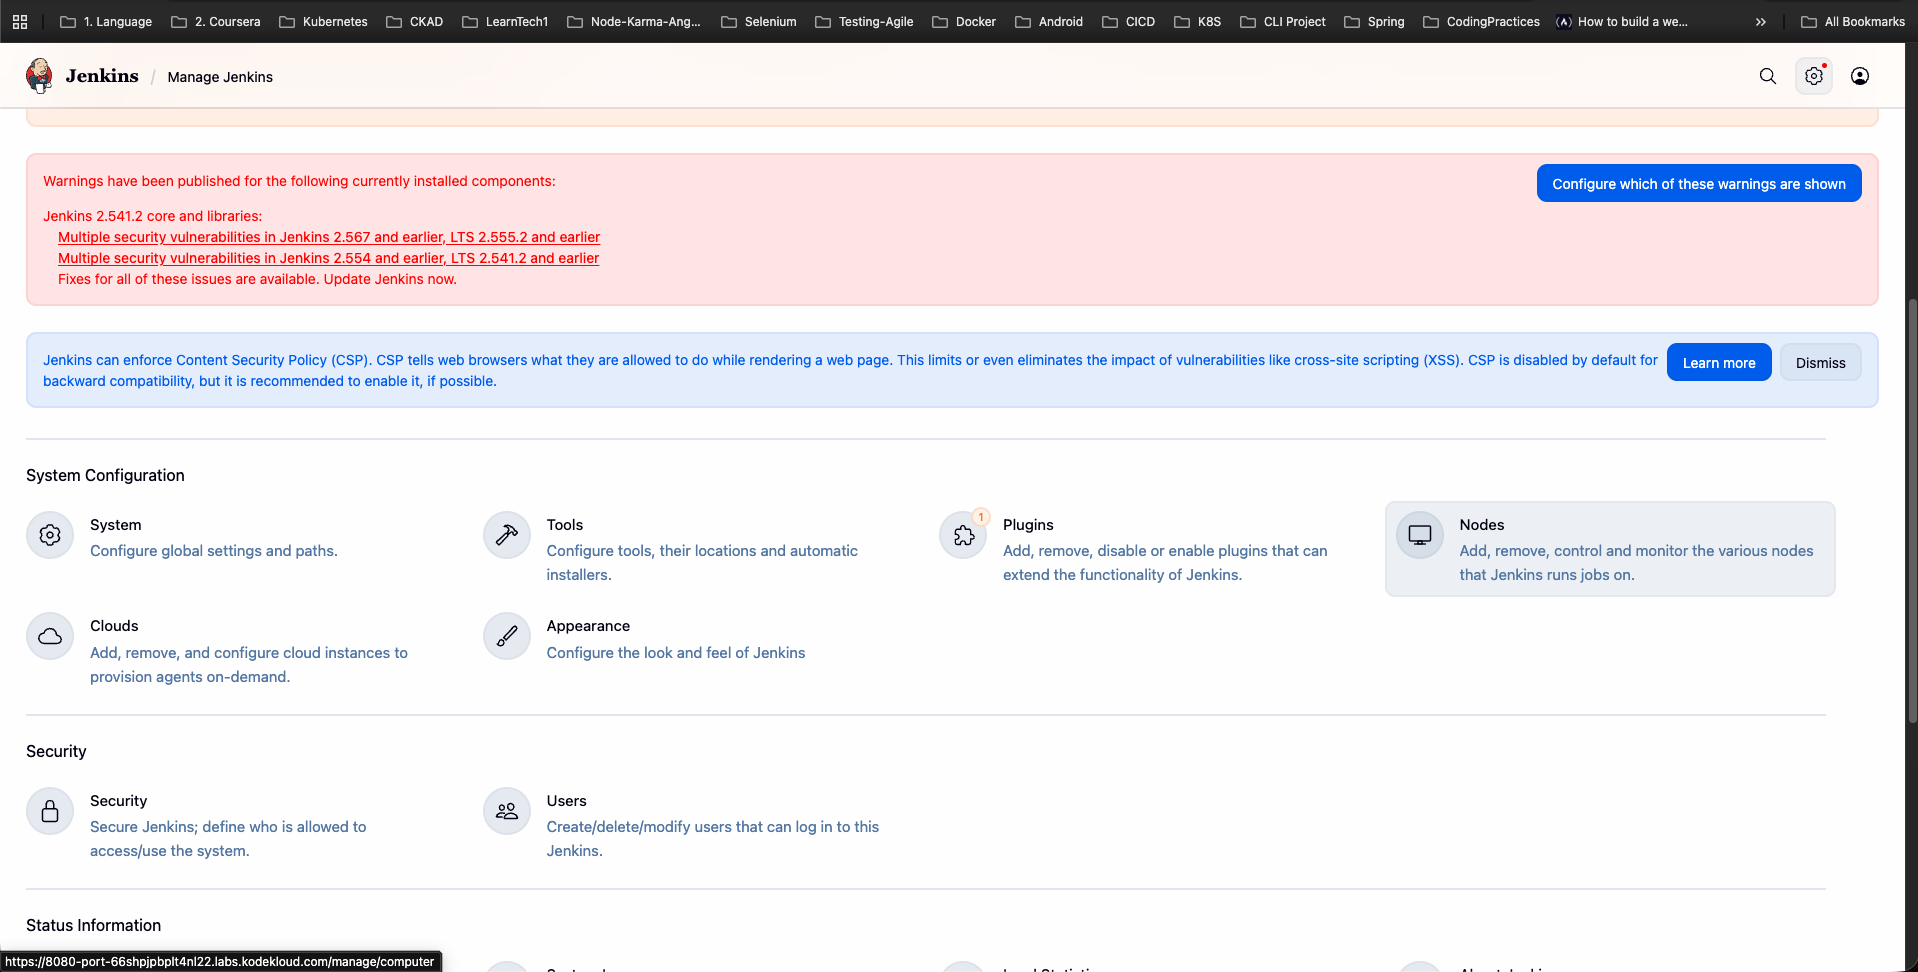
- Log back in as
admin. - Go to Manage Jenkins -> Nodes (under System Configuration).
Step 7: Nodes Overview Landing Page
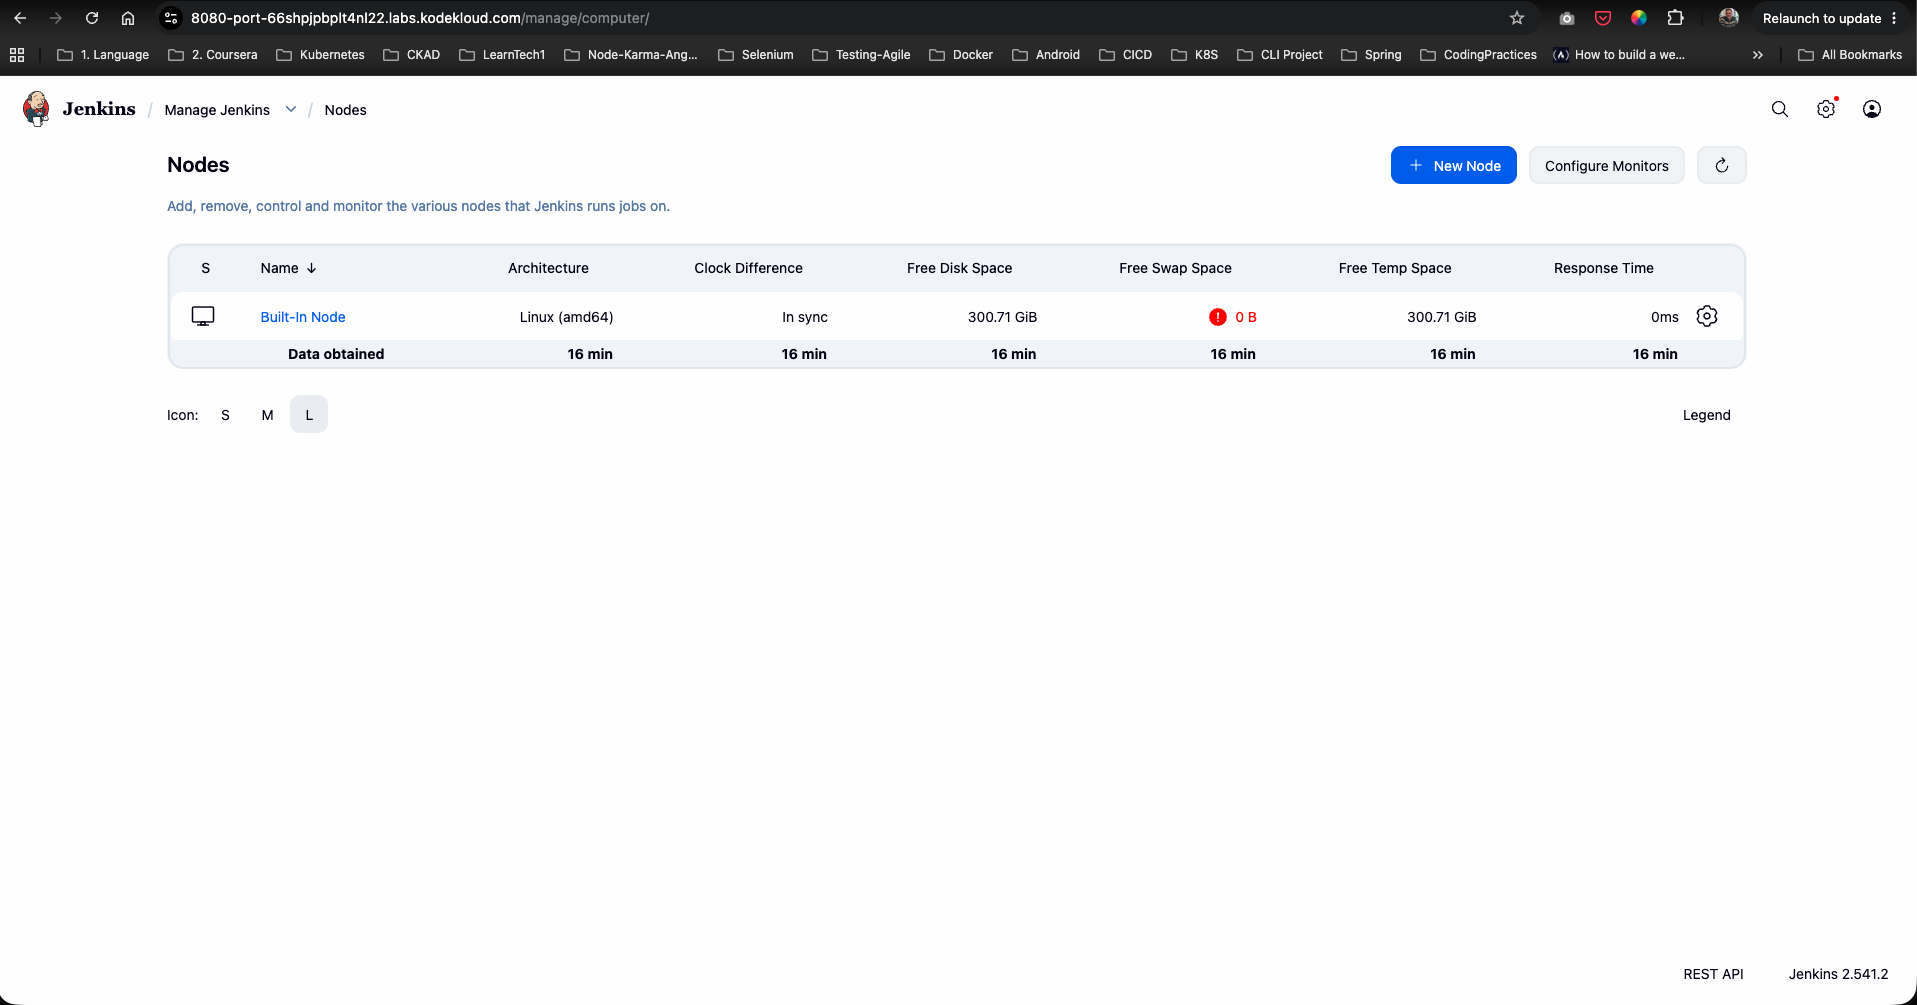
View the Nodes overview list showing the default Built-In Node. Click + New Node:
Step 8: Configure App_server_1 Node Settings
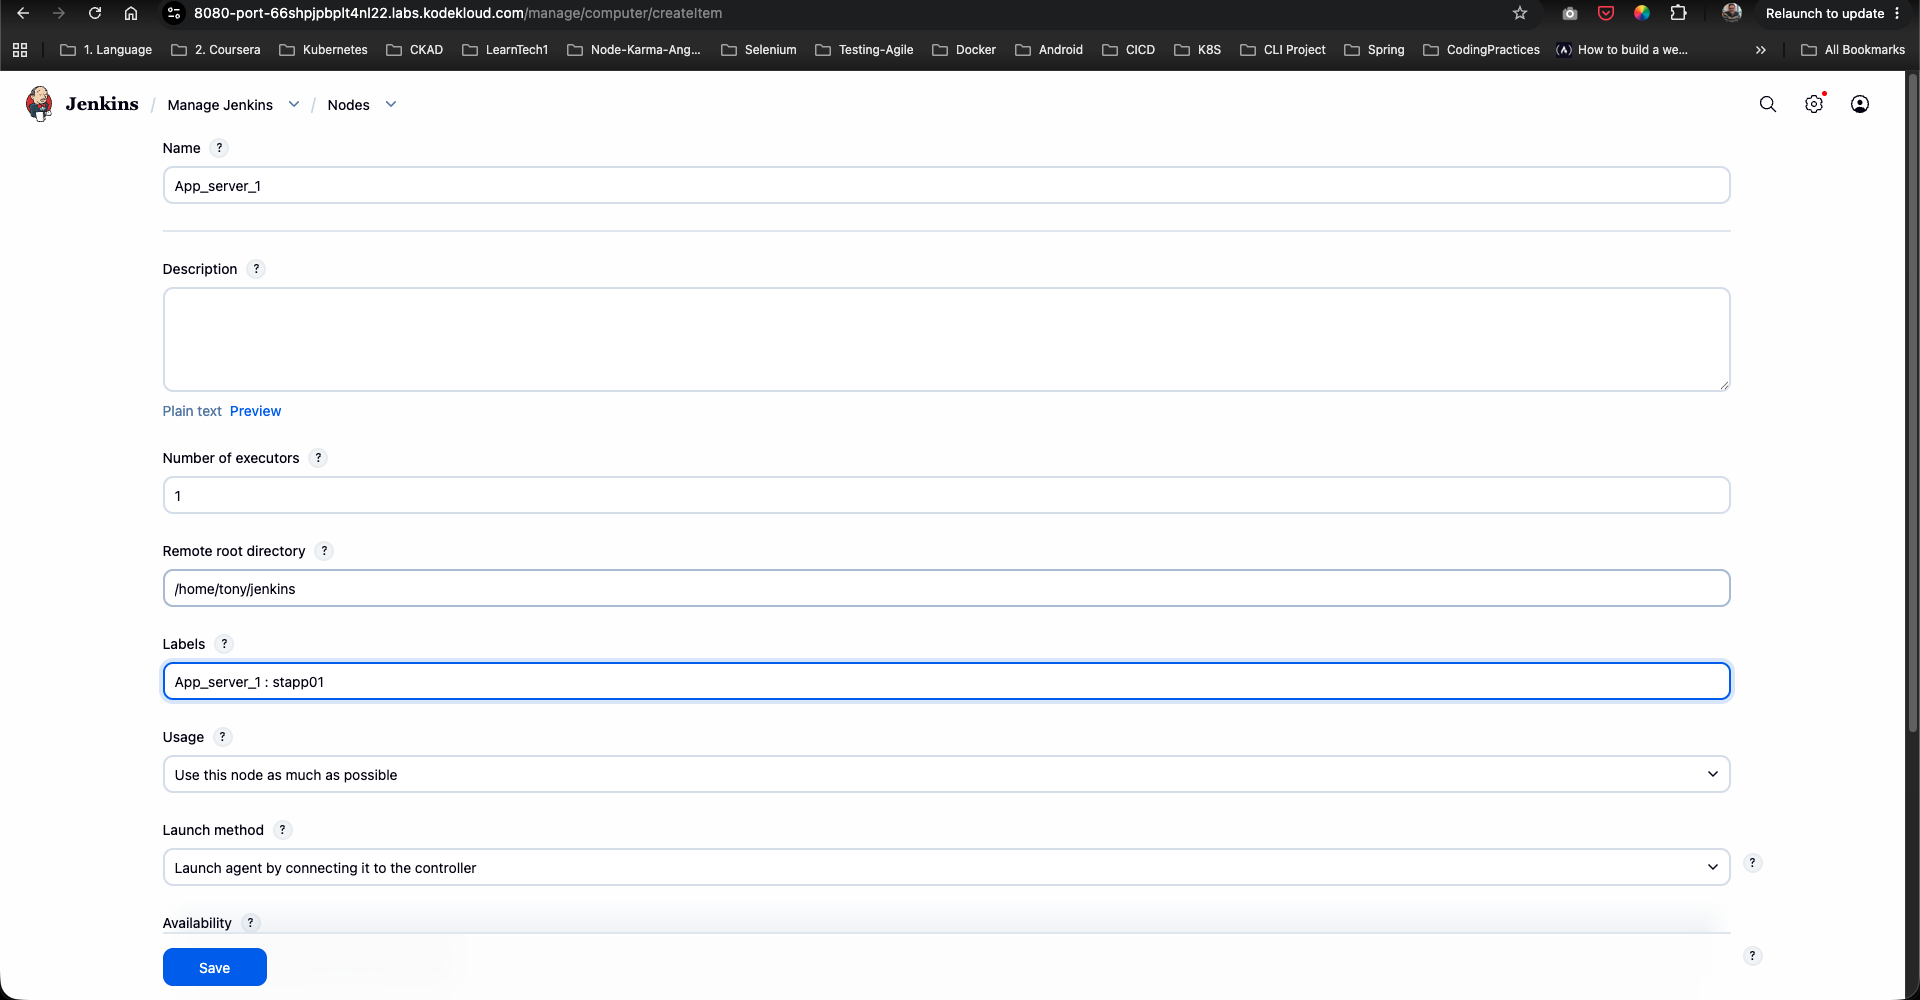
- Click + New Node.
- Enter Node name:
App_server_1. - Select Permanent Agent and click Create.
- Configure node properties:
- Number of executors:
1 - Remote root directory:
/home/tony/jenkins - Labels:
stapp01 - Usage:
Use this node as much as possible
- Number of executors:
Step 9: Select Launch Method via SSH
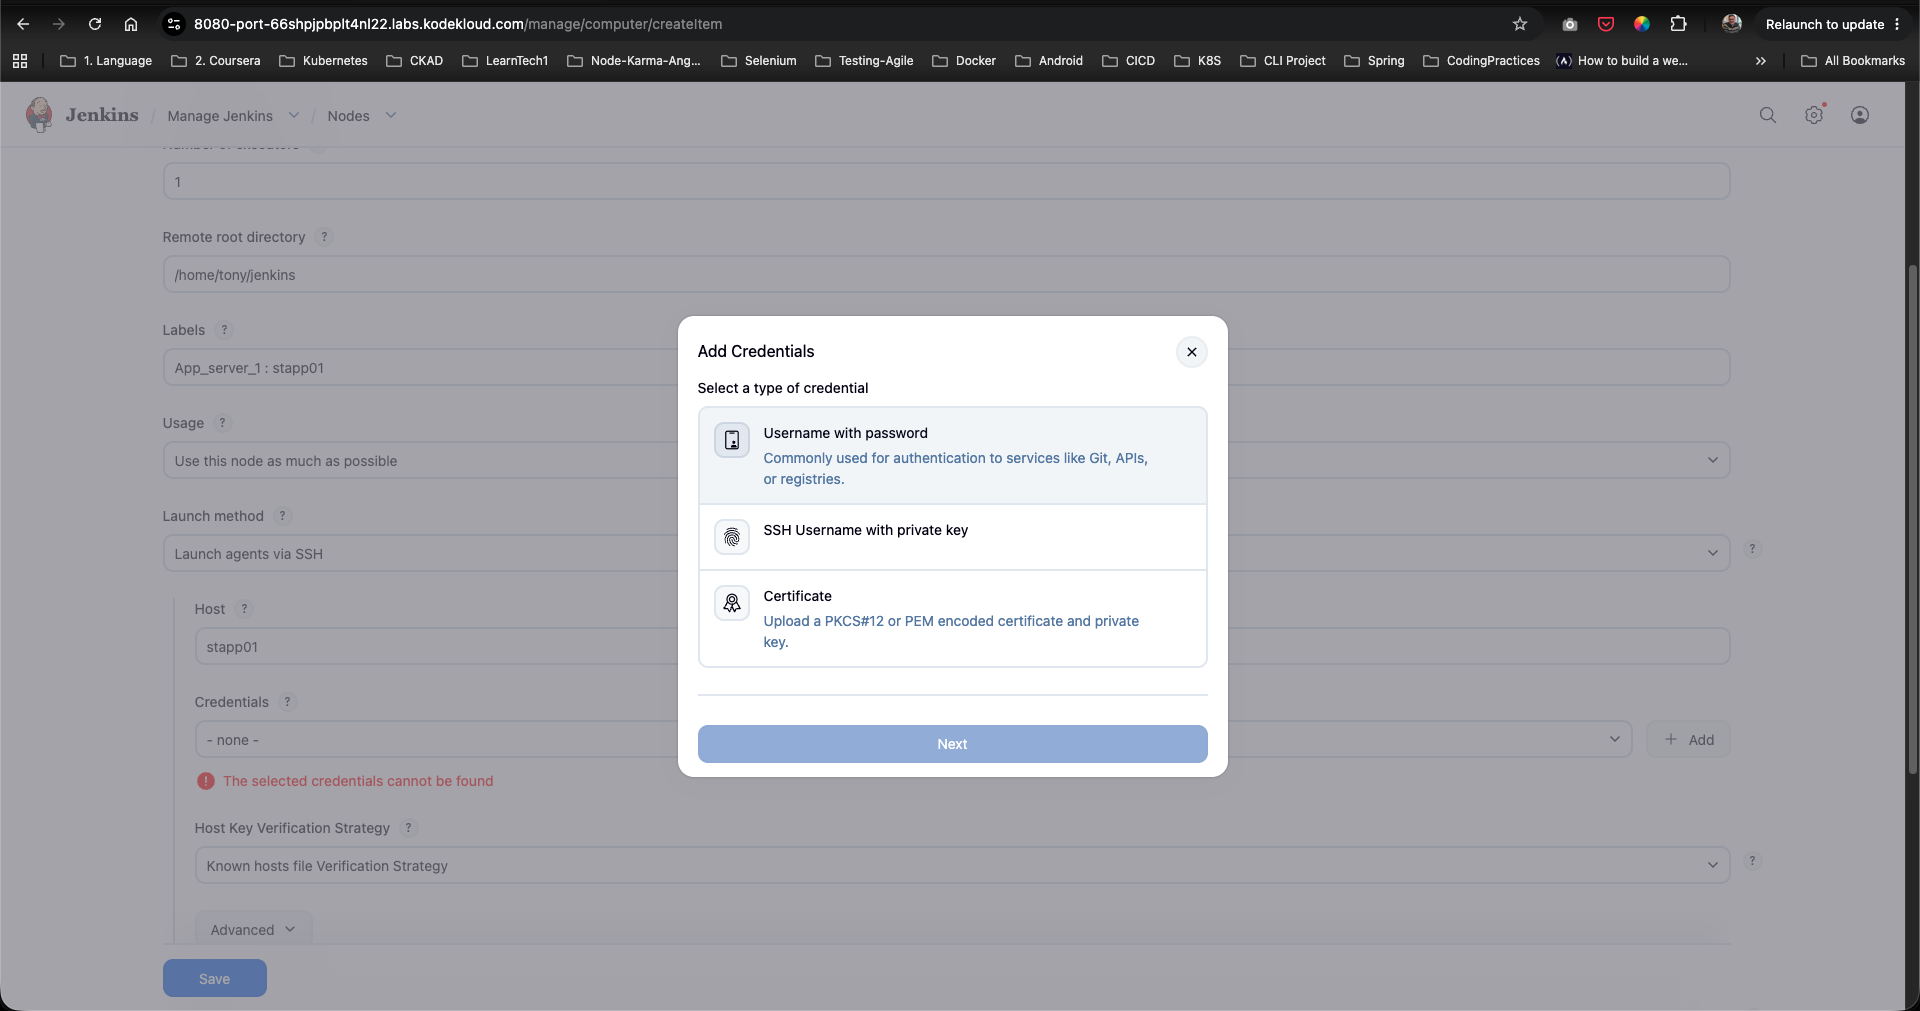
- In the Launch method dropdown, select Launch agents via SSH.
- Set Host:
stapp01. - Next to Credentials, click + Add and select Jenkins.
Step 10: Add SSH User Credentials for tony
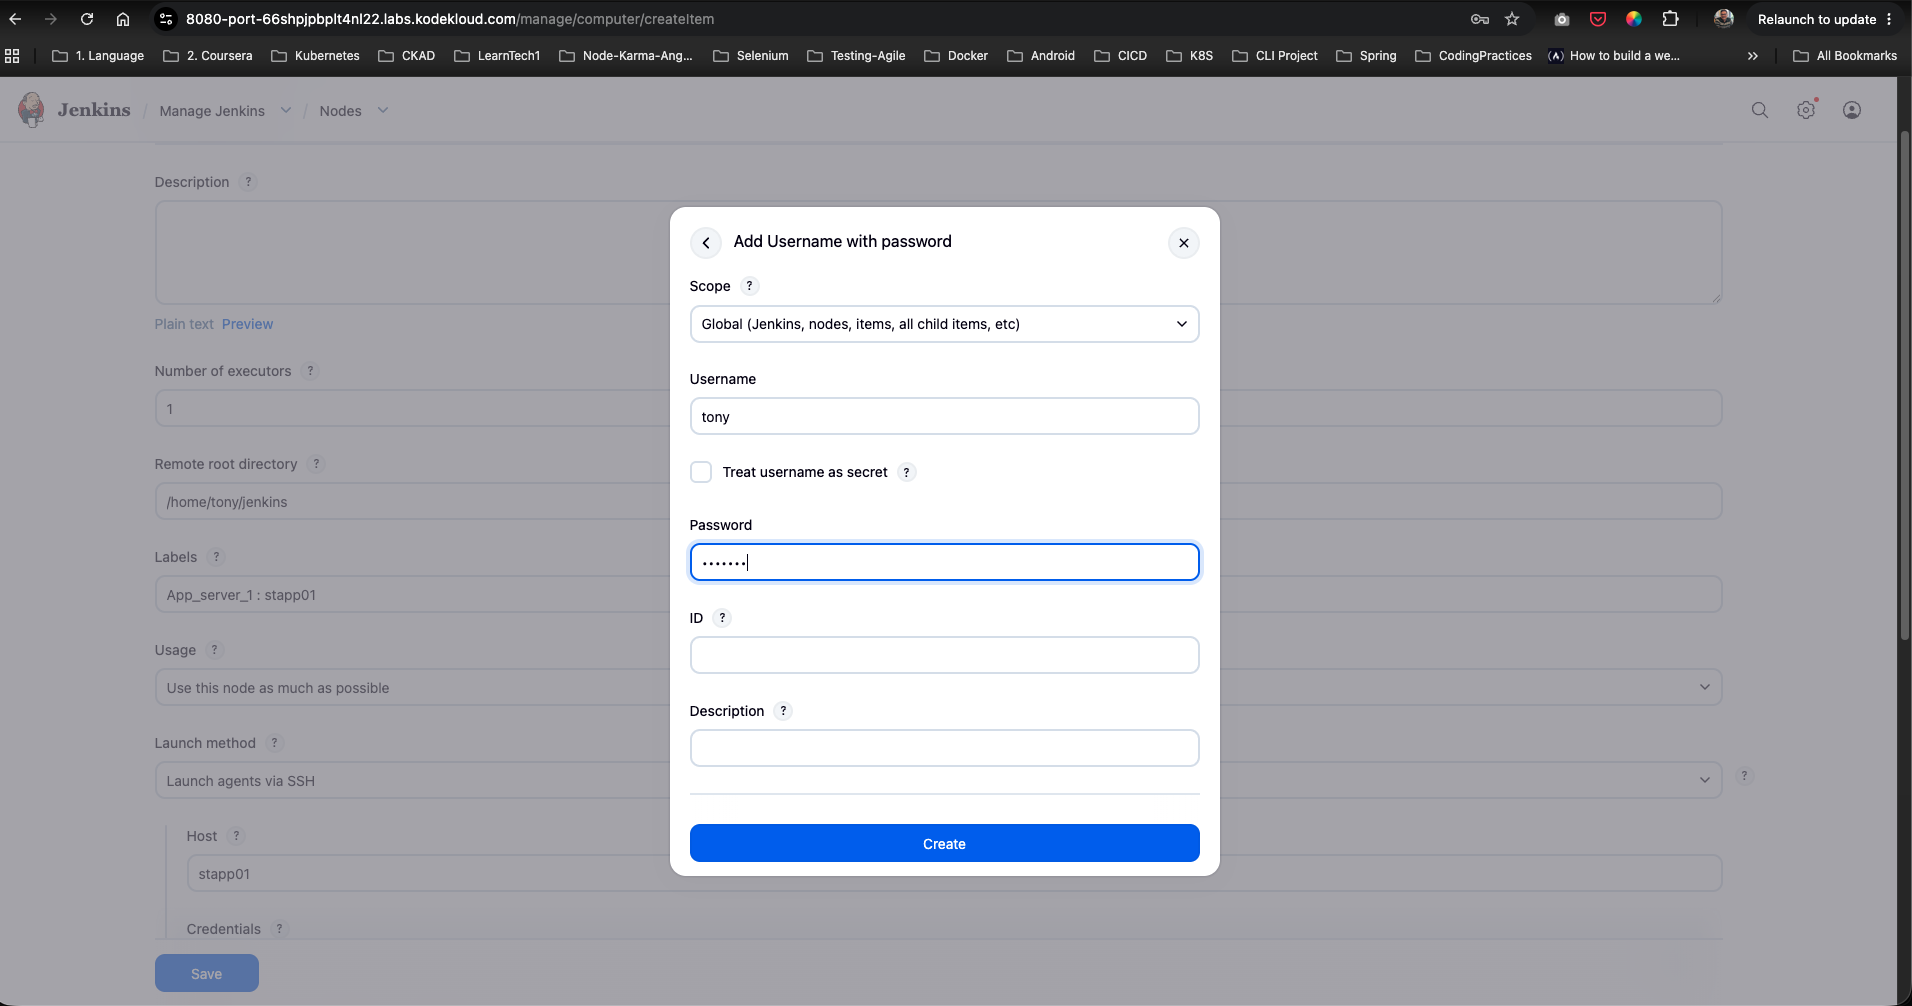
- In the Add Credentials modal, choose Username with password.
- Enter credential parameters:
- Username:
tony - Password:
Ir0nMan
- Username:
- Click Create.
Step 11: Set Host Key Verification Strategy and Save
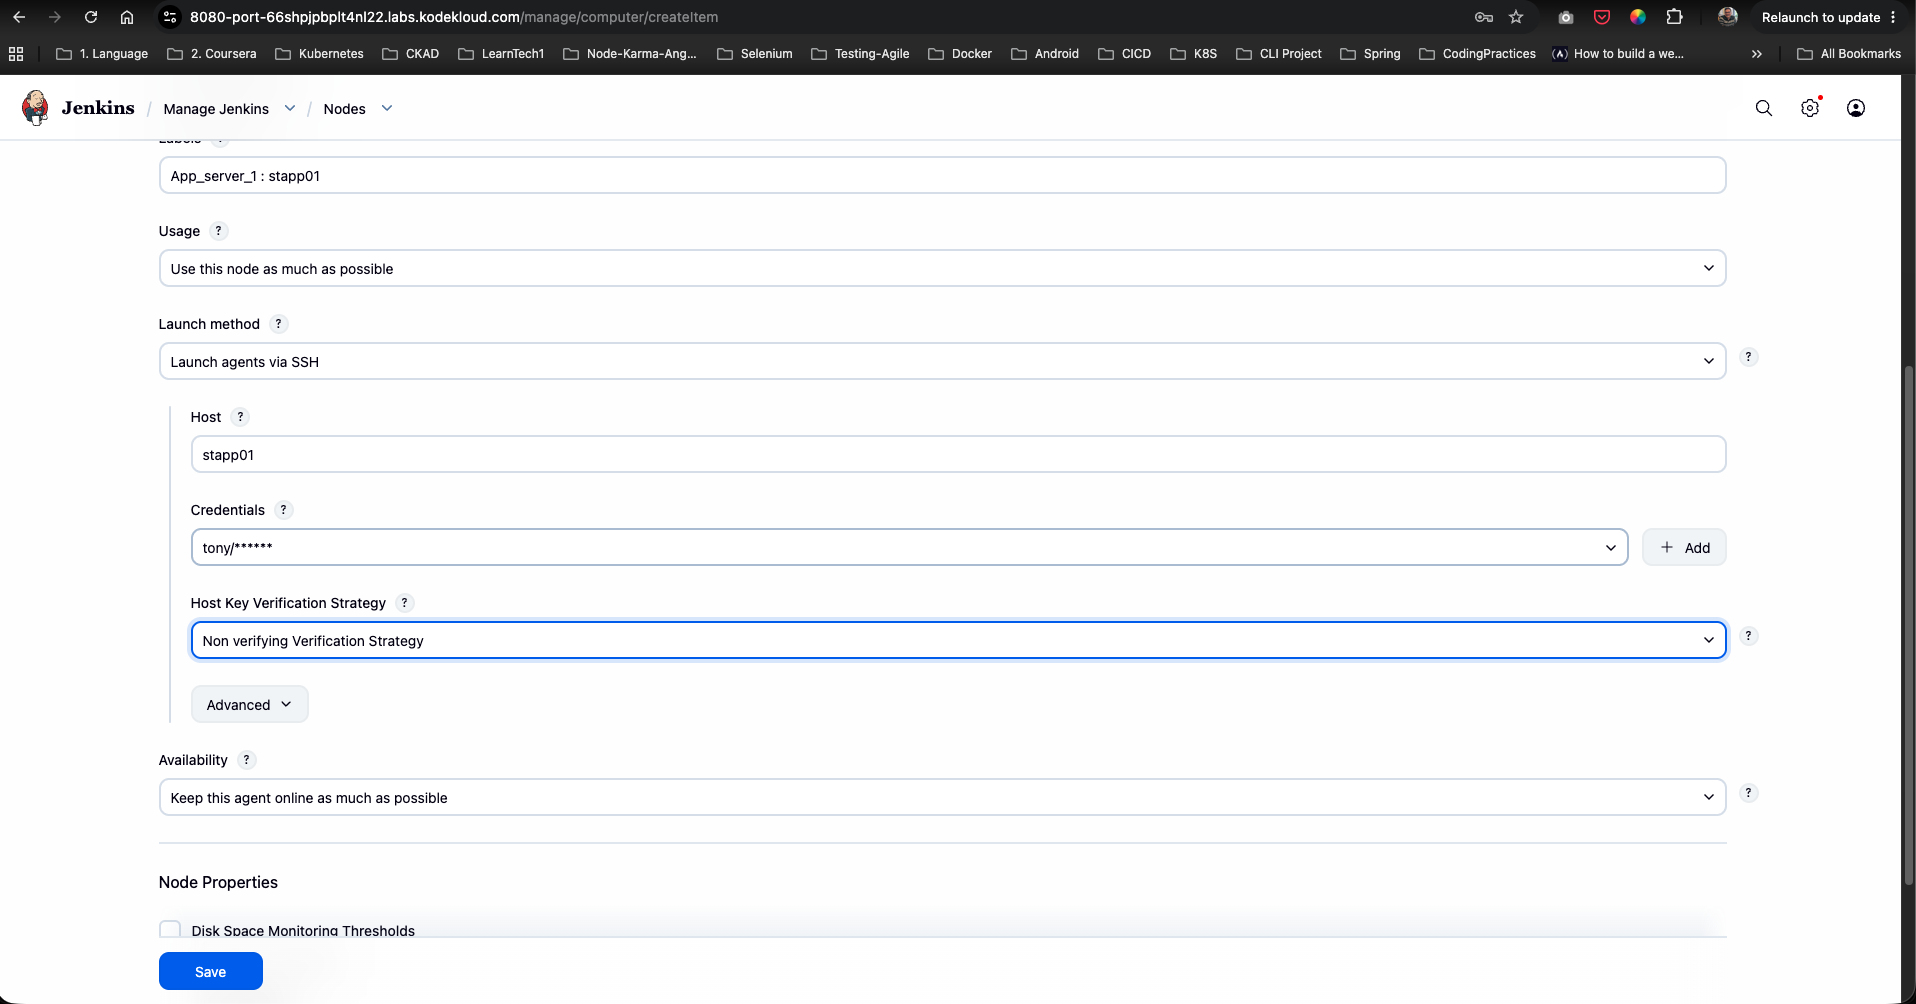
- In the Credentials dropdown, select
tony/******. - Set Host Key Verification Strategy:
Non verifying Verification Strategy. - Set Availability:
Keep this agent online as much as possible. - Click Save.
Step 12: Node Listing Updated
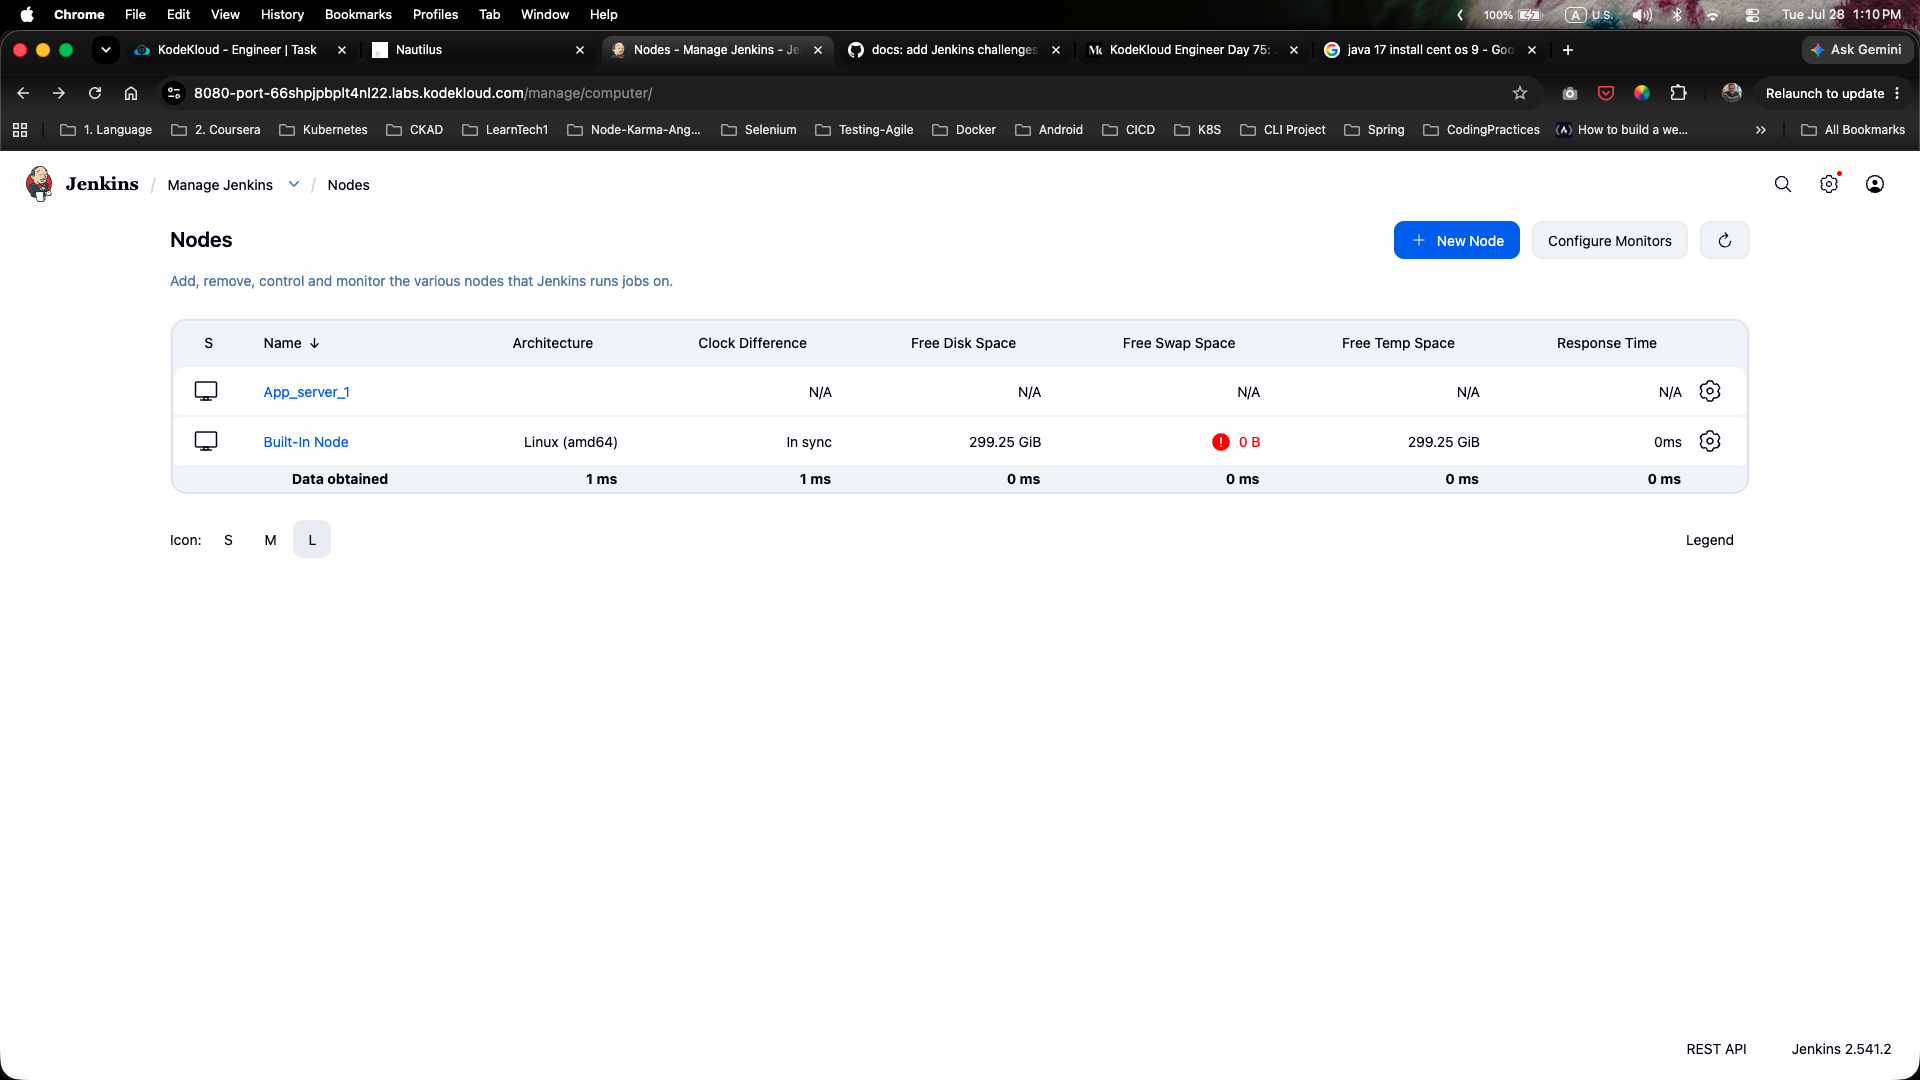
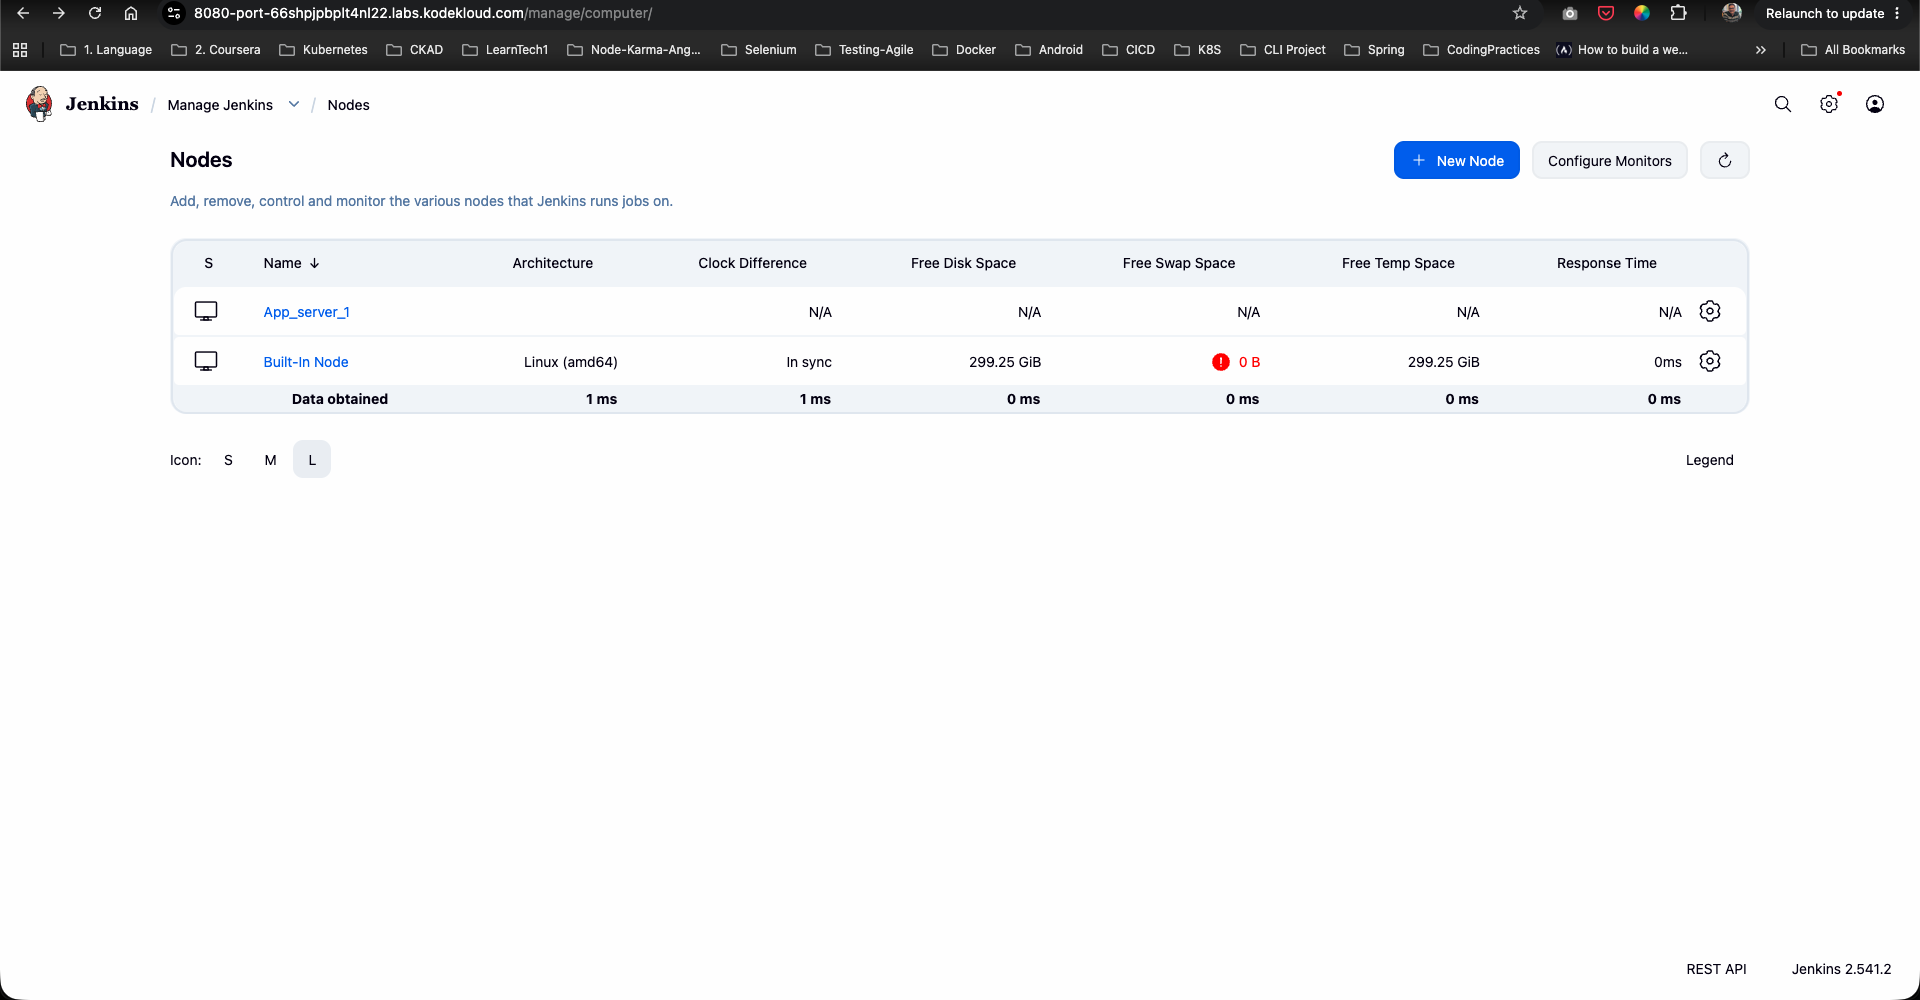
App_server_1 is added to the Nodes list and starts launching the agent connection:
Step 13: Launch Agent Connection Process
Click on App_server_1 to monitor the SSH launch sequence and JVM initialization:
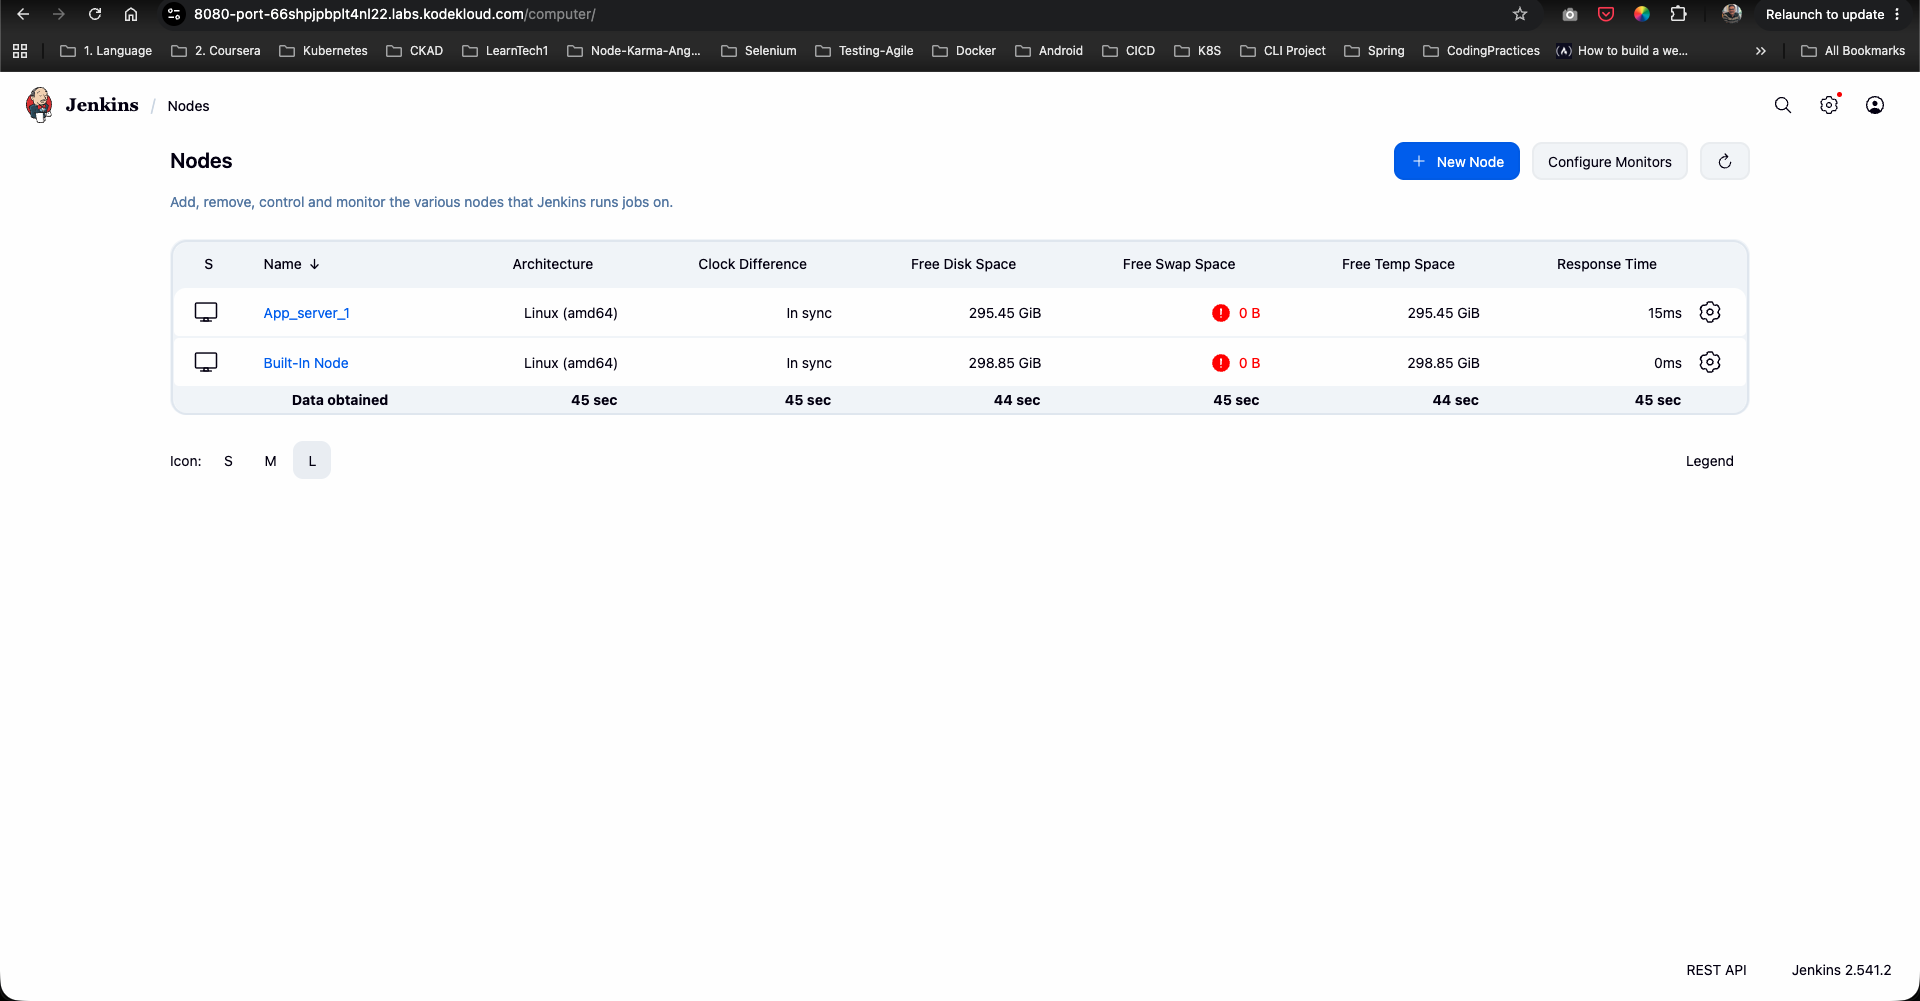
Step 14: App_server_1 Online and Synchronized
Verify that App_server_1 establishes the remoting connection and displays online status (In sync):
Step 15: Configure App_server_2 and App_server_3 & Verify All Nodes Online
Repeat Steps 8–11 for the remaining two servers:
For App_server_2:
- Node Name:
App_server_2 - Remote root directory:
/home/steve/jenkins - Labels:
stapp02 - Host:
stapp02 - Credentials: Username
steve/ PasswordAm3r!ca
For App_server_3:
- Node Name:
App_server_3 - Remote root directory:
/home/banner/jenkins - Labels:
stapp03 - Host:
stapp03 - Credentials: Username
banner/ PasswordBigBanner
Confirm that all three agent nodes (App_server_1, App_server_2, App_server_3) are connected, synchronized, and online:
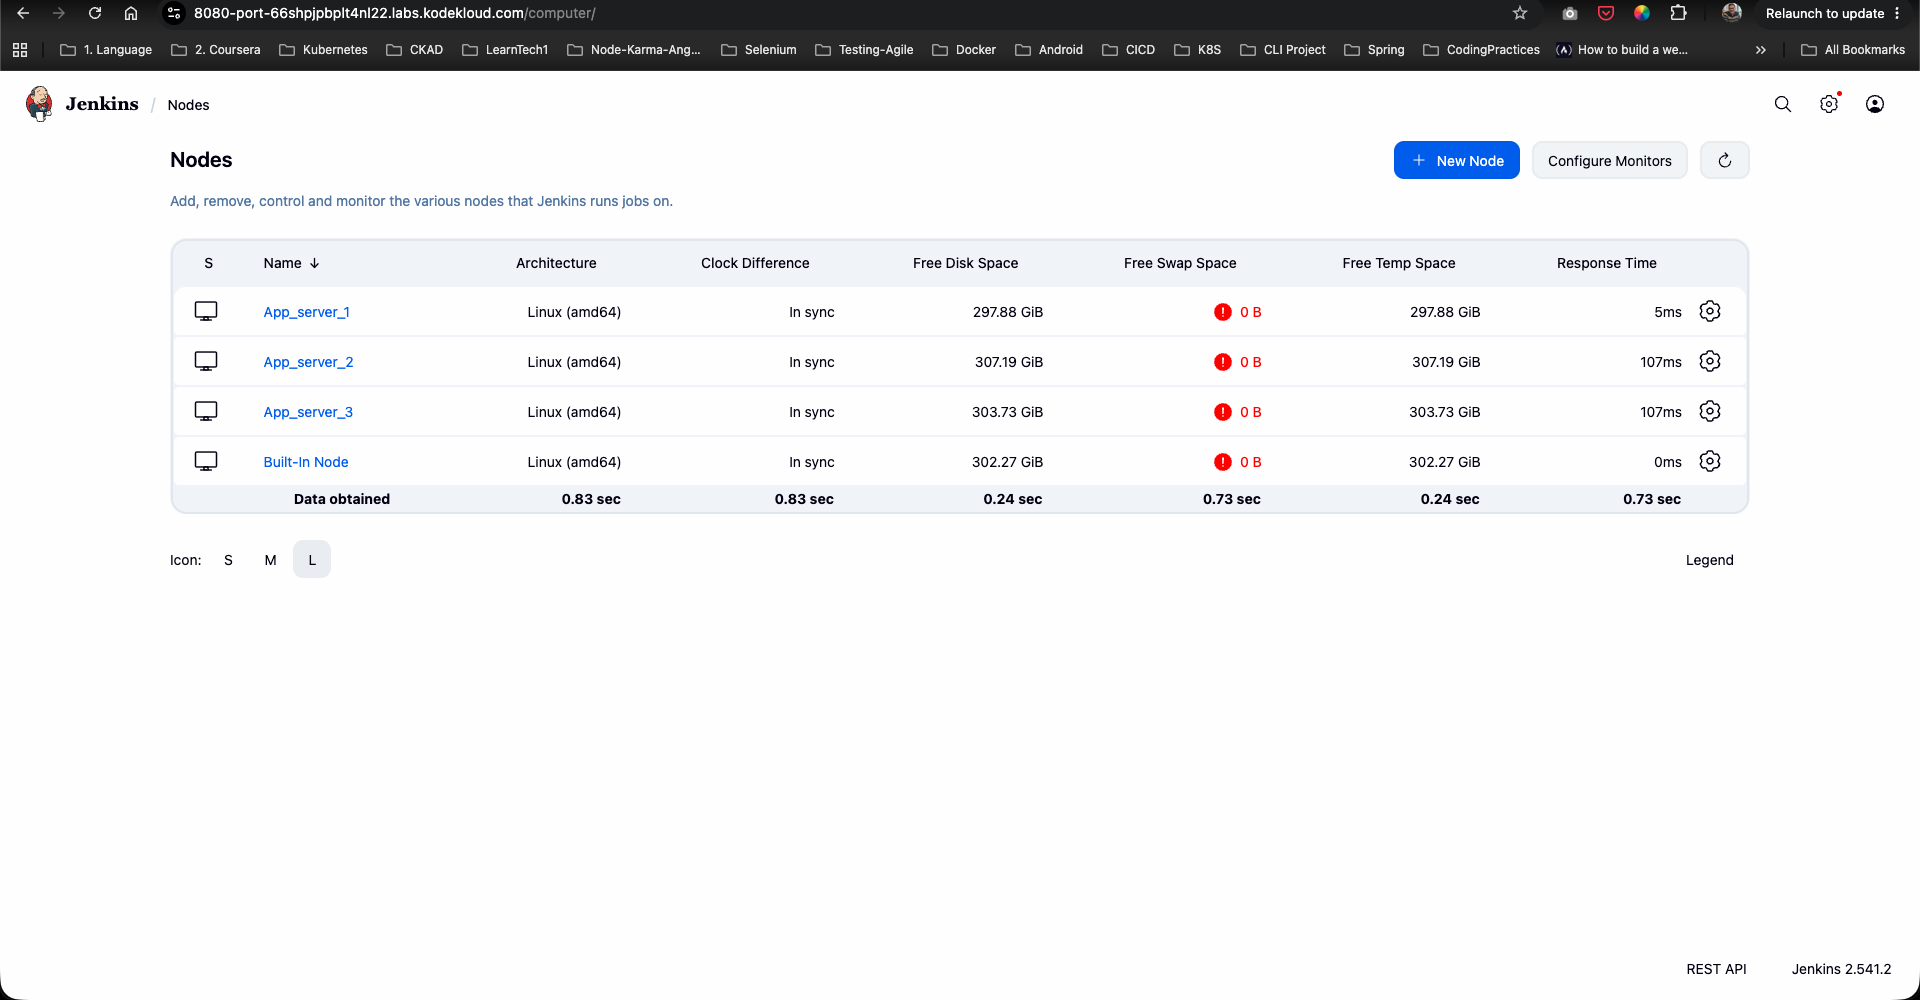
All three App Server SSH agent nodes are now successfully added, verified online, and ready for distributed job execution!